3D Scanning and getting the last parts to the puzzle
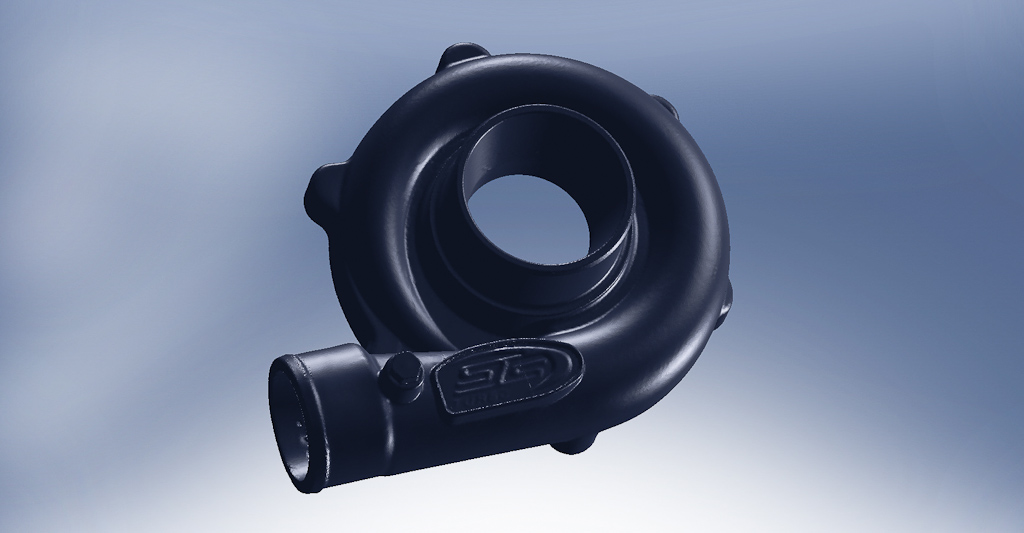
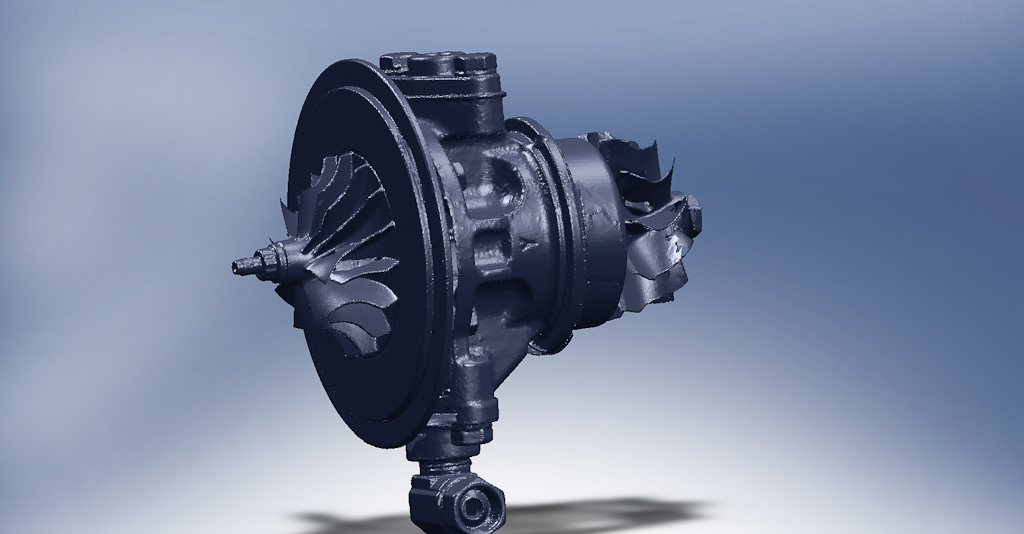
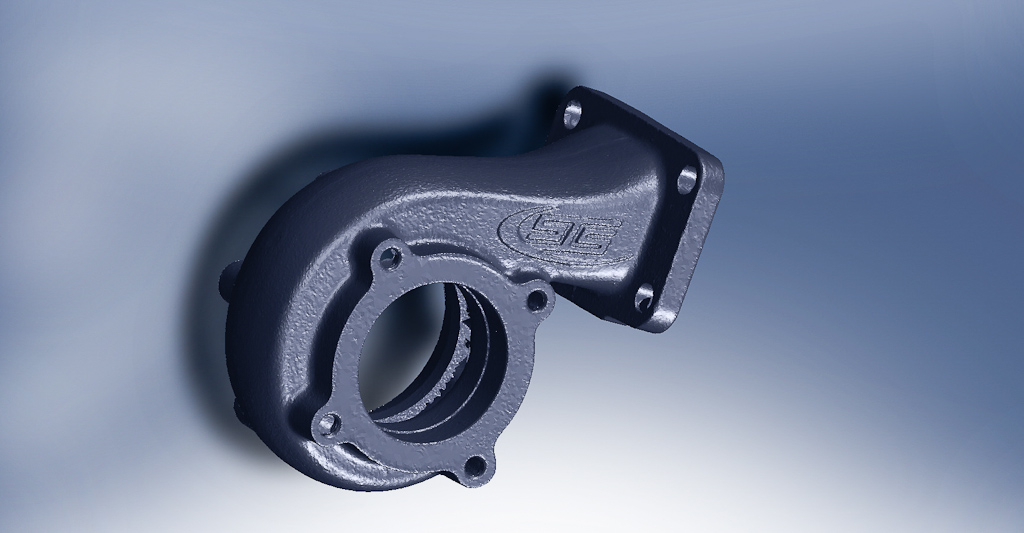
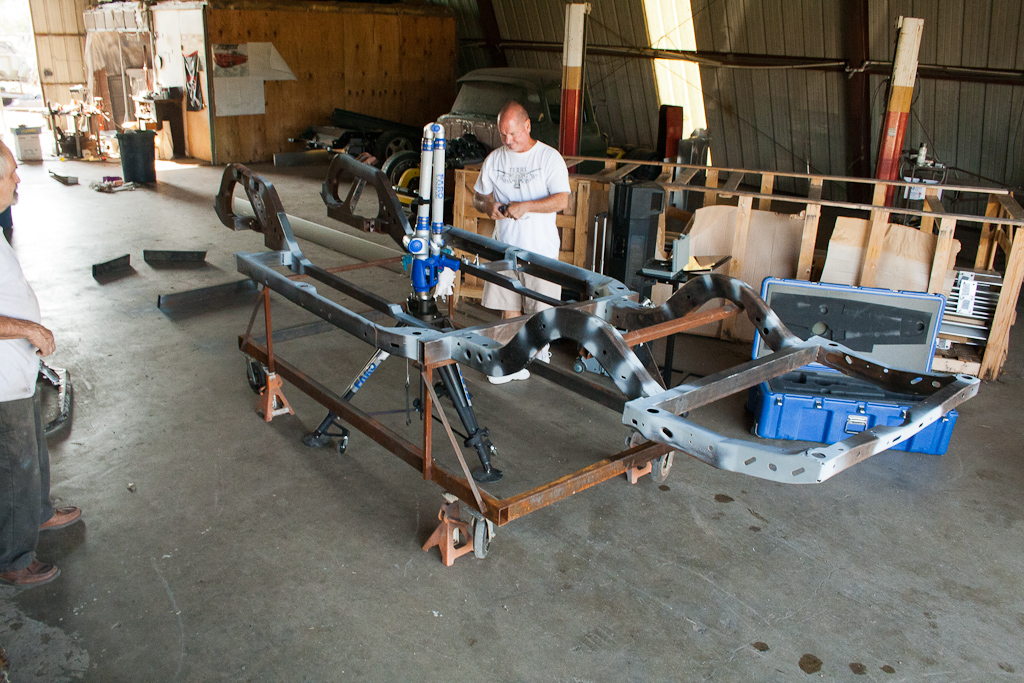
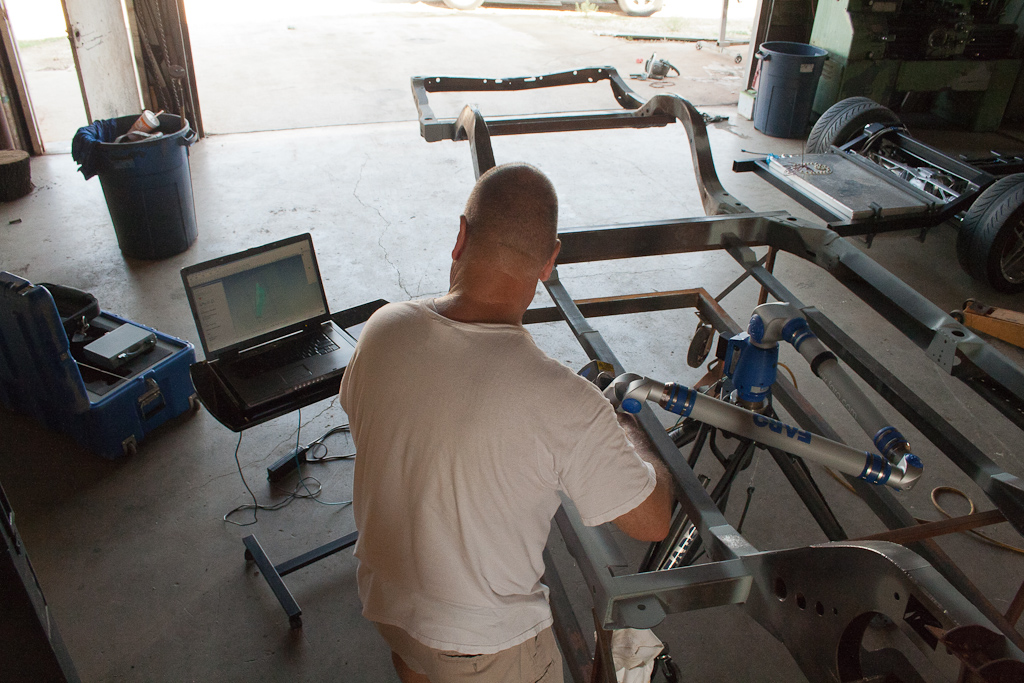
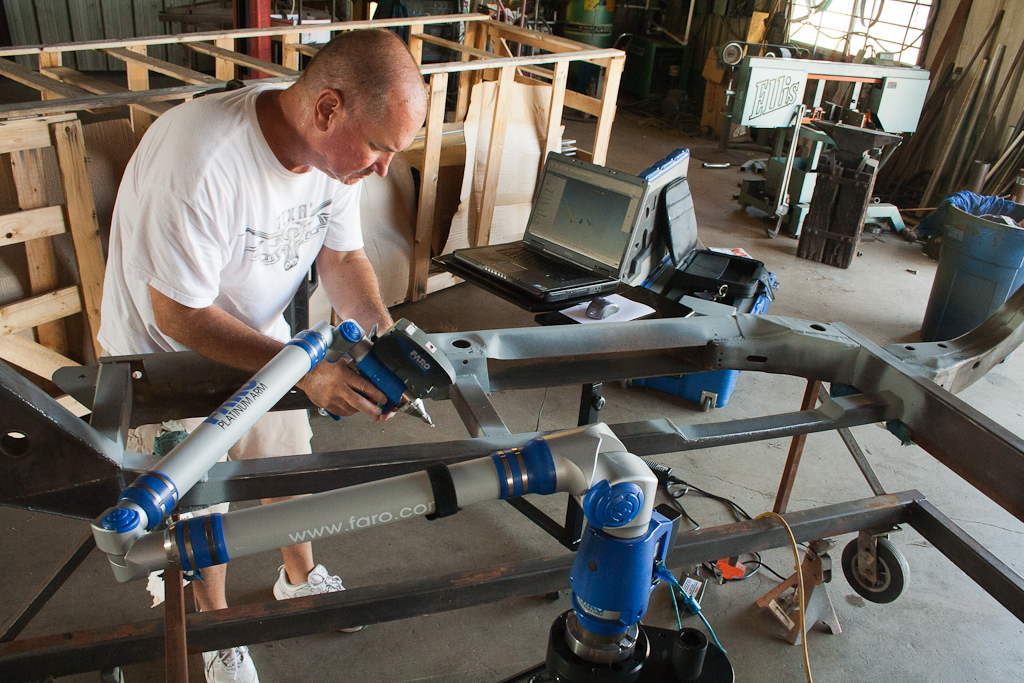
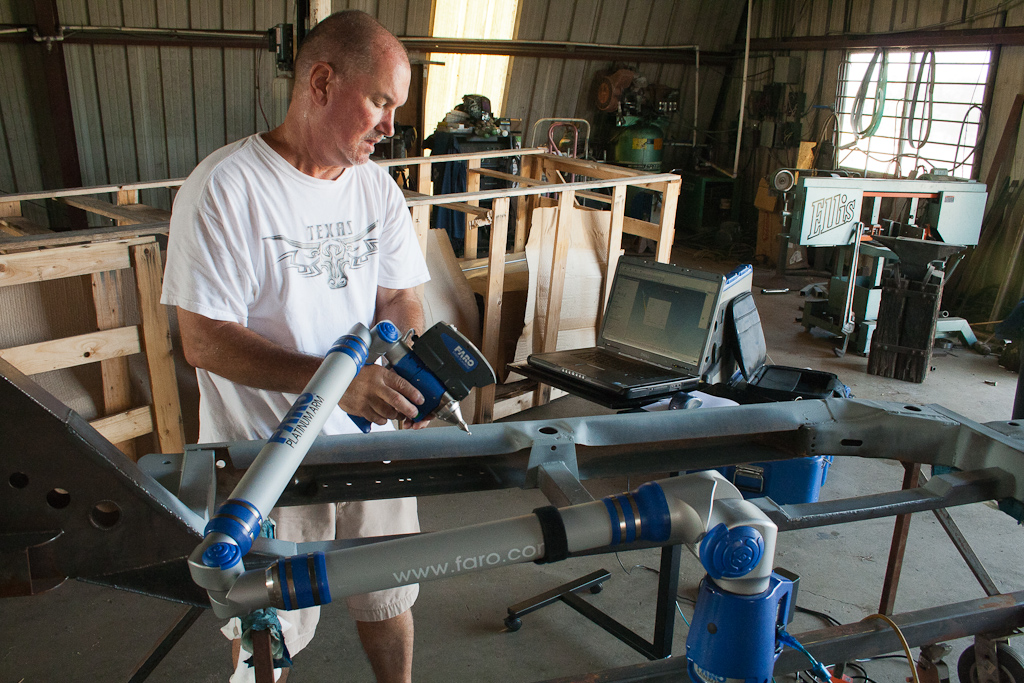
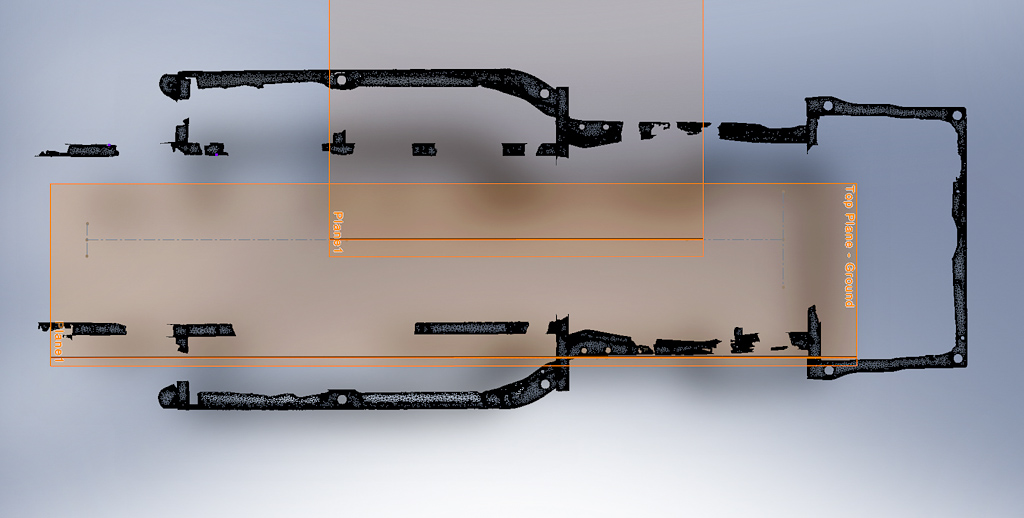
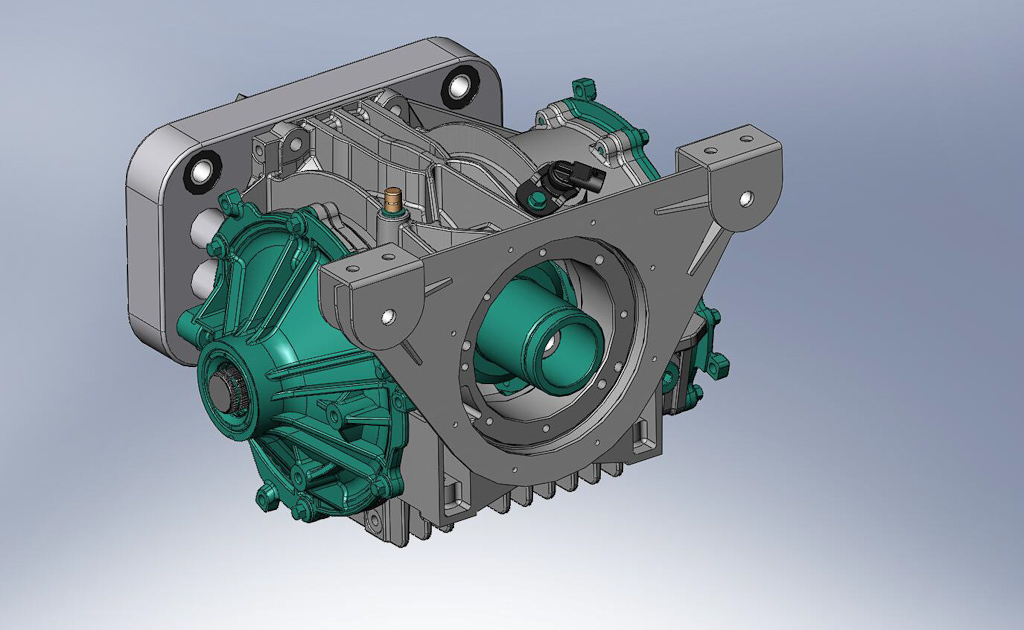
So after talking through several emails with Mike owner of Absolute Geometry (http://www.absolutegeometries.com) I figured out all I could without seeing and working with the parts myself. I spent several weeks of trying to get some free time and getting my schedule to align so I could head up to his place and talk in person with the equipment for demonstration. I also decided it would be a good idea to get some small parts I wanted scanned so I’d have something to play with in the computer to better understand the final product. The STS Turbos I want to really suck into the chassis and make them fit so I took one of the turbos and took it in 3 parts, the compressor housing, the turbin housing and the center section. This would give me 3 separate parts so I can clock the turbo in the computer for future chassis project and really fit the turbo in to the chassis, here are the results.
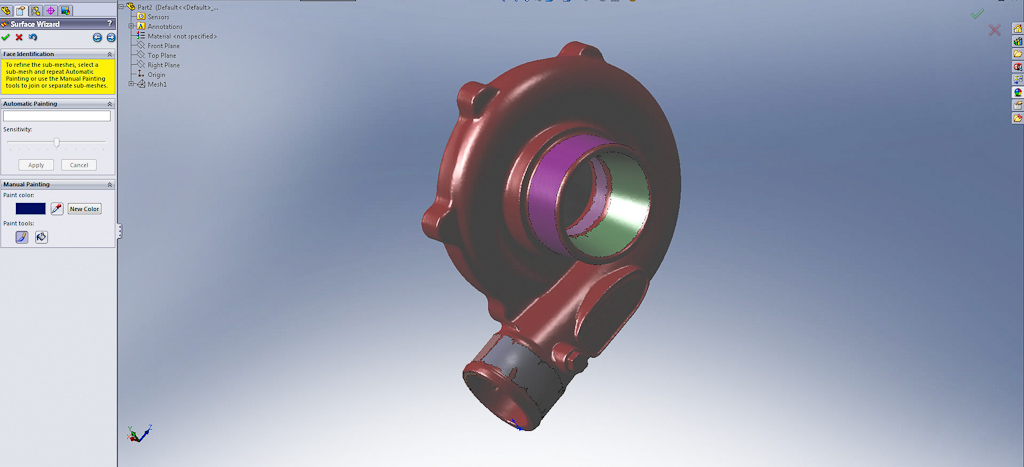
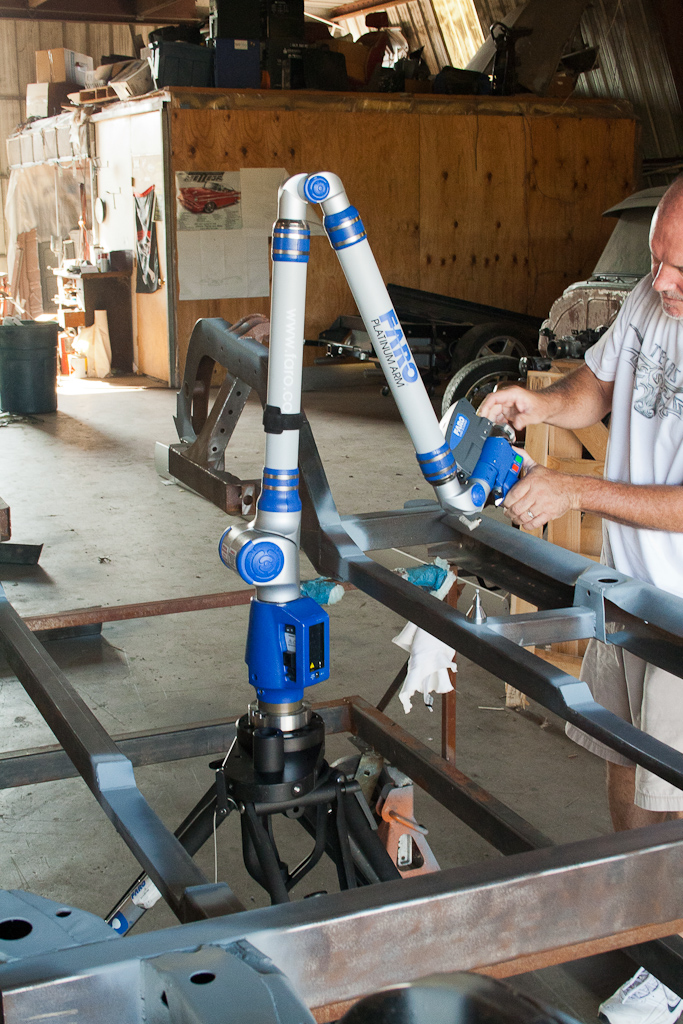
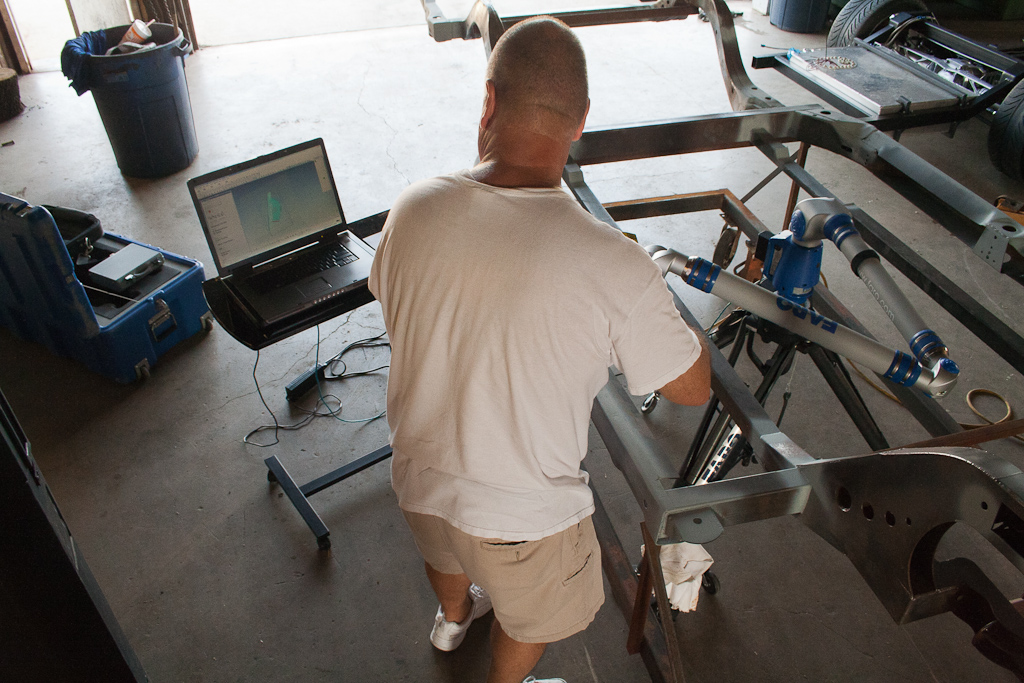
The I’m having a little trouble making 3D surface files out of them but that’s just because my version of Solidworks doesn’t have the 3D scanning software and I’m forced to go to a friend’s place to use his premium copy so I haven’t had a lot of time to play with it. I also found out he can do the laser scan of the surface and then go in and get hard points with the FARO pointer. The points come in as a IGS file that will lay over the scan. The advantage to this is I don’t have to do any work to the scan to change it from a STL file into anything else. I have the hard points to measure from and I can see where something might interfere with the outside and change that.
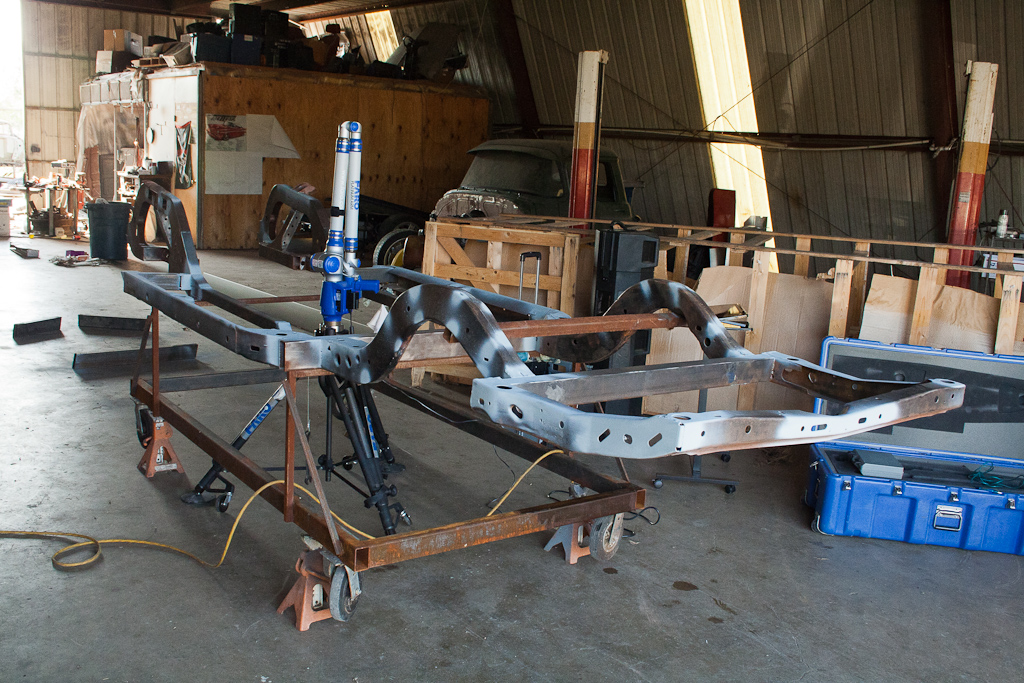
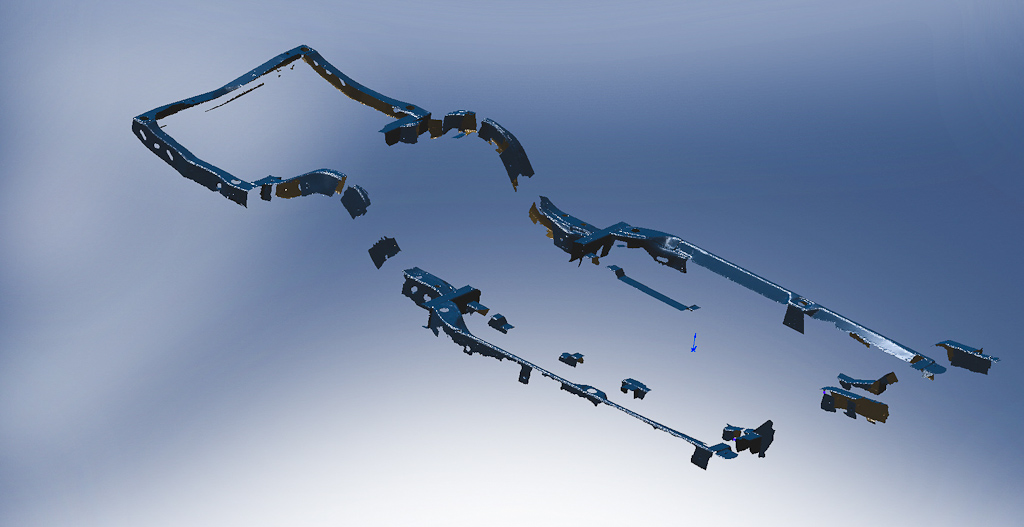
So I showed this to a friend and so he asked me to supervise the scanning of his A-Body frame. After the scan it he called and decided he wants the back to Lay frame. So he asked if I could make a quick modification and make up some rear arches that will move the loop up 4 inches. It took 15 minutes with the scan data and everything’s to scale, take a look.
So my plan is twofold. One is to have the bottom of some of my other projects scanned so in the future I have all the body bracing, inner and outer fender, firewalls and core supports all in the computer before I start so I can build my frame and look to see if it will clear without having to spend a week moving the body, building a prototype moving everything around just to find out one section is .500 to far to the left and hitting a body brace or you can’t get the wheels off, the list goes on. The second part of the plan is to check against deviation from the design. When we’re done with the frame we’ll scan the first few out of the Jig to make sure they are all within speck and not warped all to hell. The best design is useless if you can reproduce it accurately.
May. 21, 2011
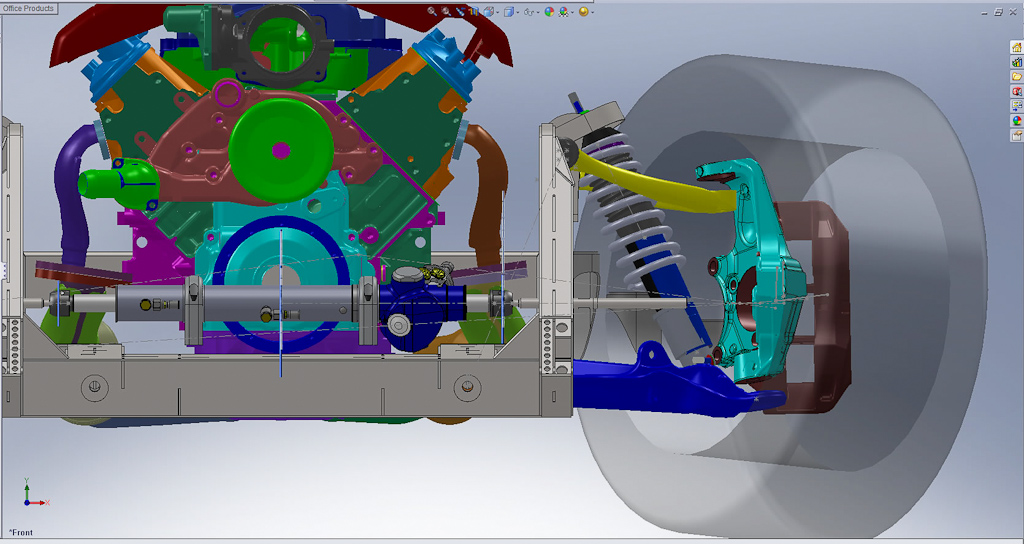
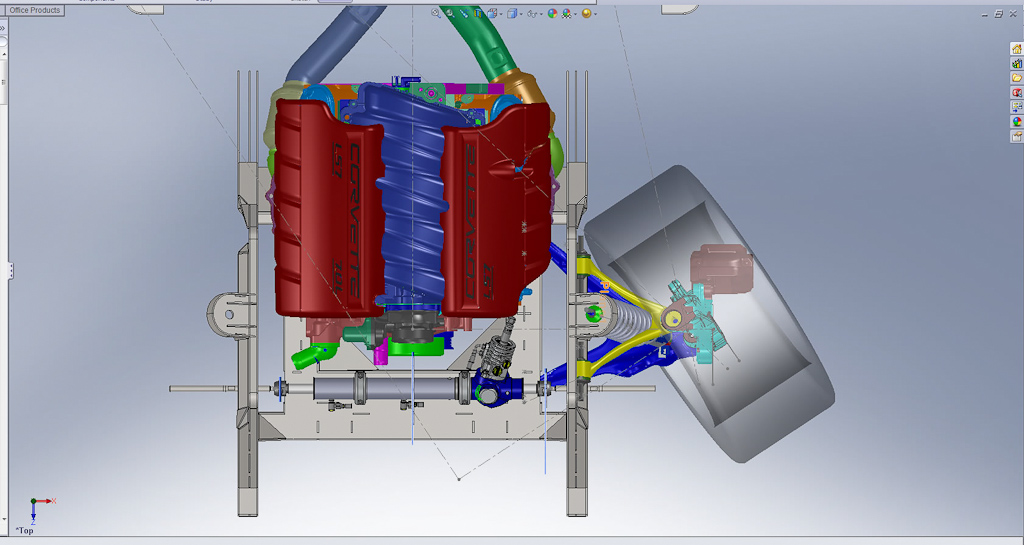
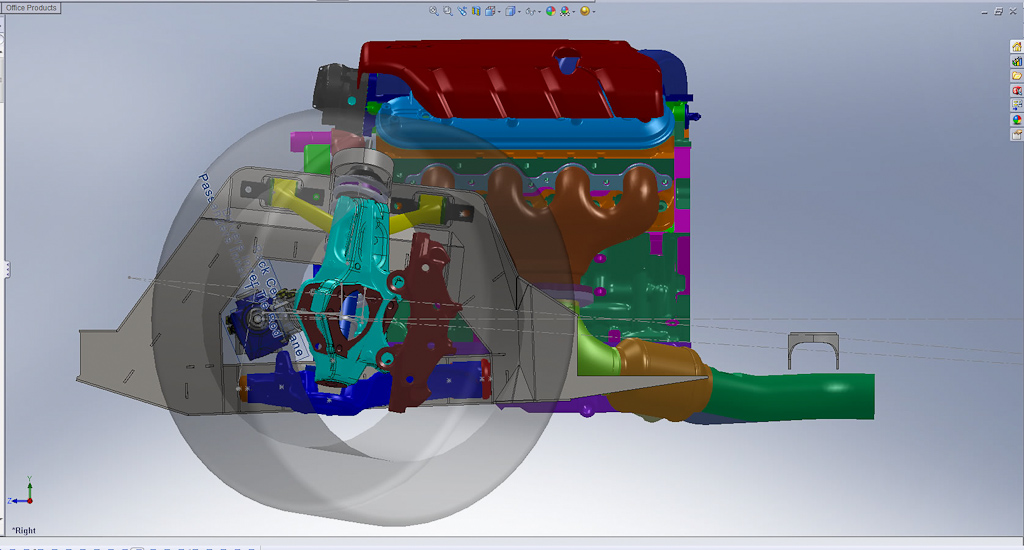
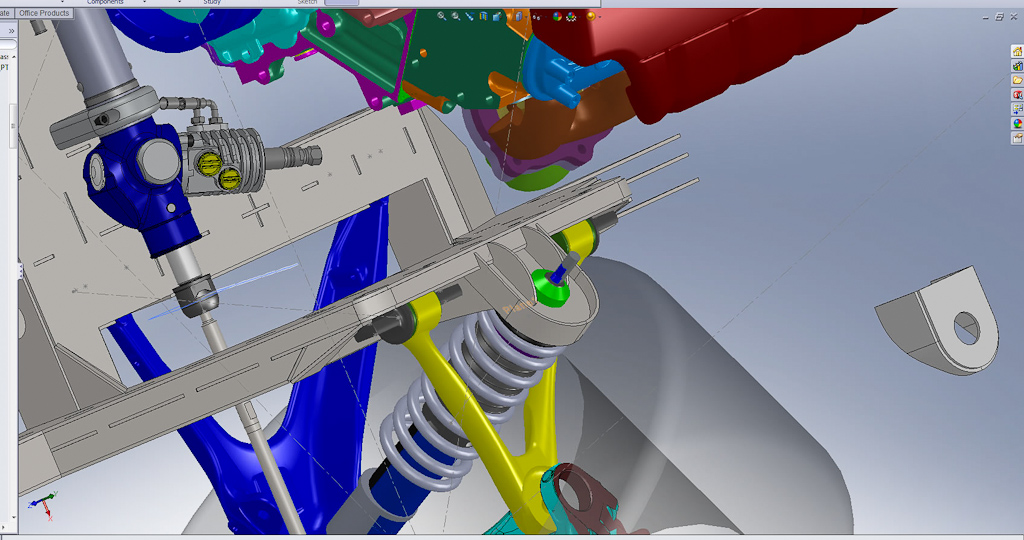
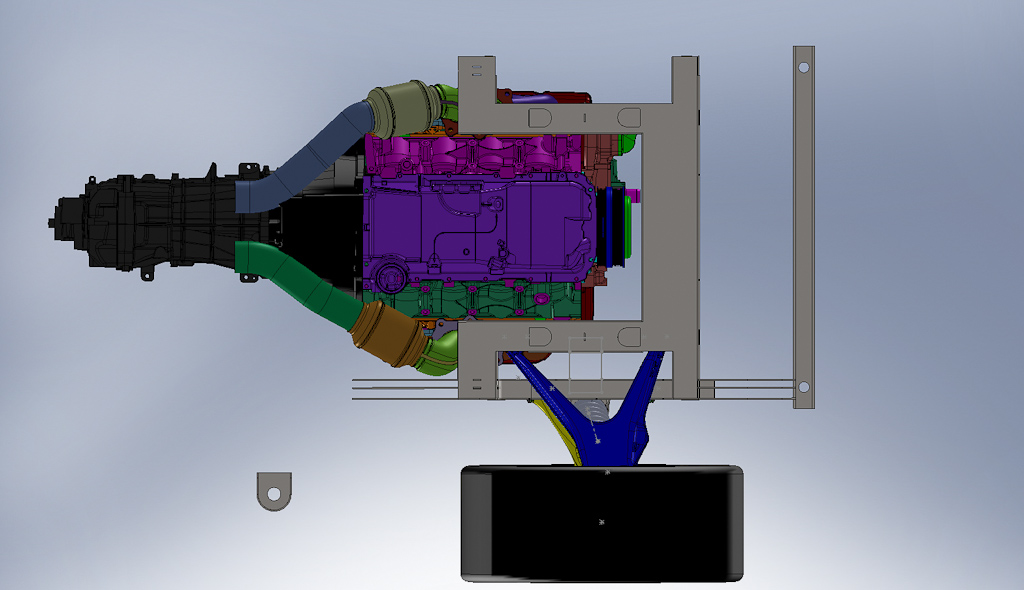
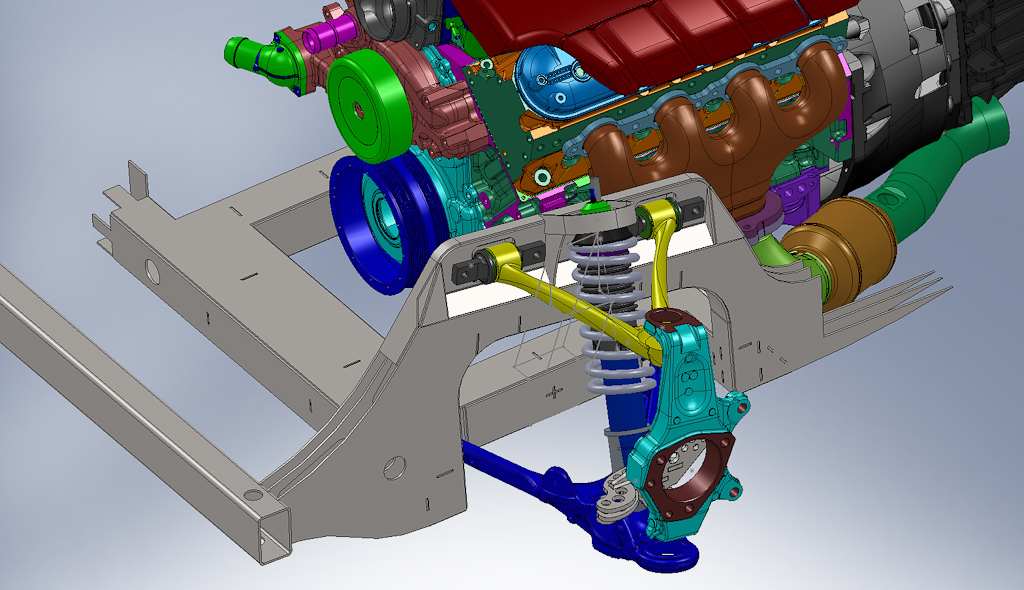
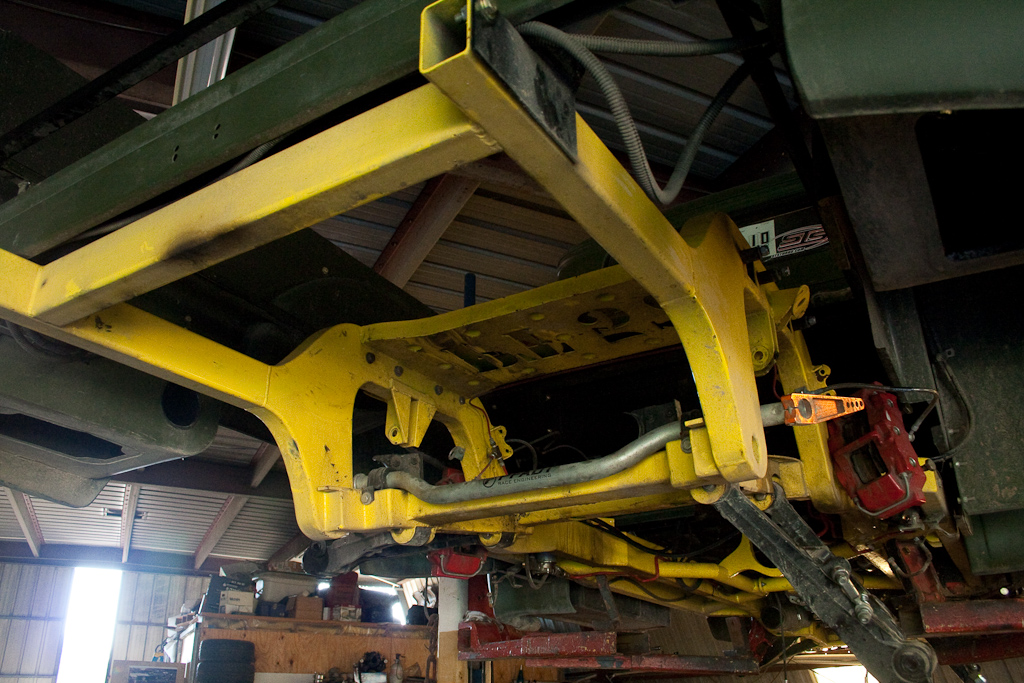
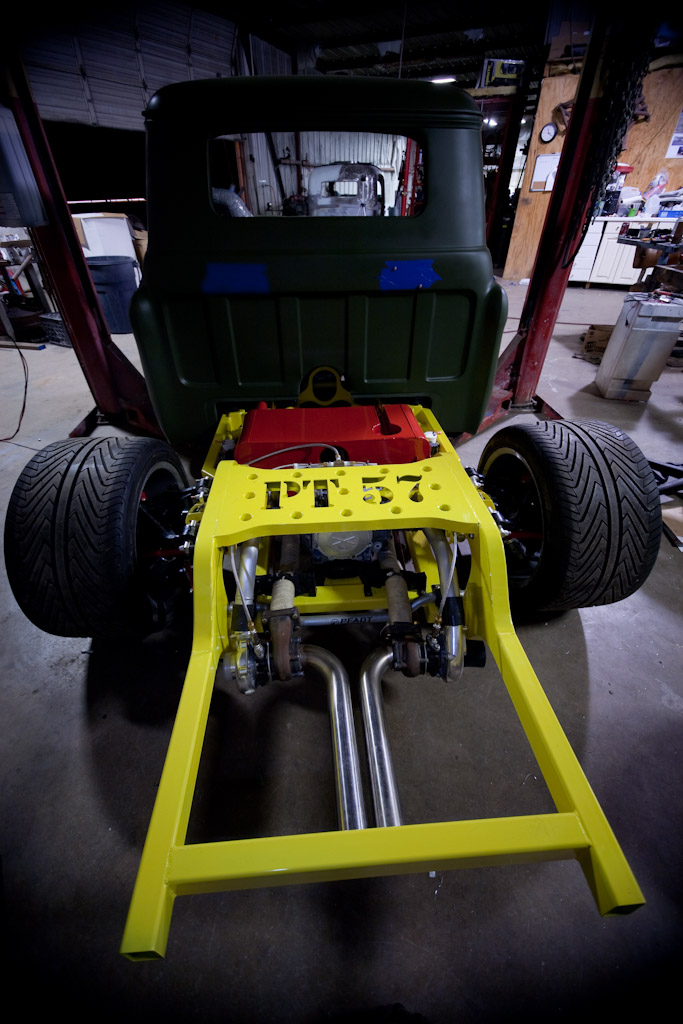
So I’m almost done with the new frame front section. Right now it looks to be right at 101.26 lbs. I’m looking for more room I can lighten the front up without losing structural integrity. I still need to add the rear shock brace and the sway bar hole so I look to pick up another 3-4 lbs there and I’m figuring on 2-3lbs of welds. The old one was just over 75lbs in the computer but I didn’t have all the parts drawn so probably closer to 85lbs with those parts and welding wire.
We now have a full 34 degrees of turning radius with 275/xx/Rxx Hoosiers. FYI Hoosiers have a serious edge on them making them almost .300” wider than a normal 275, So I can probably run 295 Front tire on this configuration and still turn around in 2 lanes without punching on it.
Flaming River Rack and Pinion, BIG thanks to those guys for sharing a part file for my design I drew one off the rack I had but there are too many compound angles and I screwed up a little here and there. We now have a much beefier rack up front to take the load and its only 2 lbs heavier than the C4 corvette rack I was using.
PFADT’s superior upper shock mount with their Coilover shocks. I love the OE Pfadt shocks I have already, the map is great and I plan on keeping them. But with some serious luck I’ll be able to get a set of these for my truck, www.pfadtracing.com/ FeatherLight Generation, this will shave some weight from the suspension and most importantly the un sprung weight and I’ll be able to dial in my compression and rebound independently which will be important when I get back on the track.
So you might ask whats been going on with the PT-57 and why has Russell stopped posting information. Well, were still in business after this last year. Its been interesting and thats taken up too much of my time just in the day to day operations. Weve gotten more models of the C6 parts and Ive spent a large amount of time turning them into manageable files groups were I can adjust the suspension geometry in the computer depending on what car were working on. Lots of time consuming BS for a 2 man shop but its all necessary and were still in business. I think that saying a lot these days.
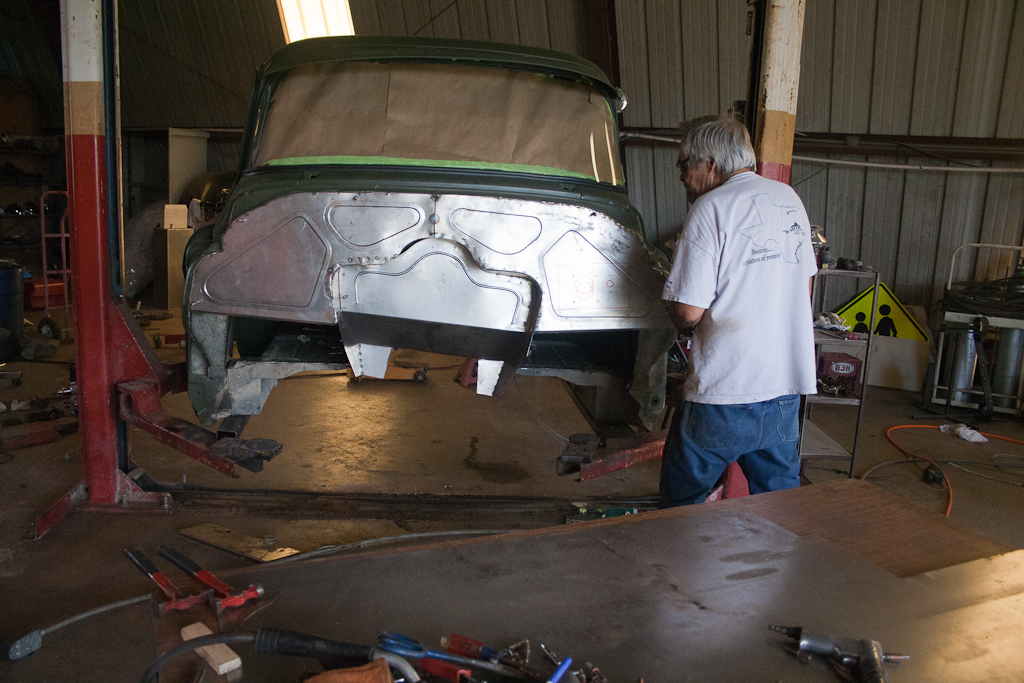
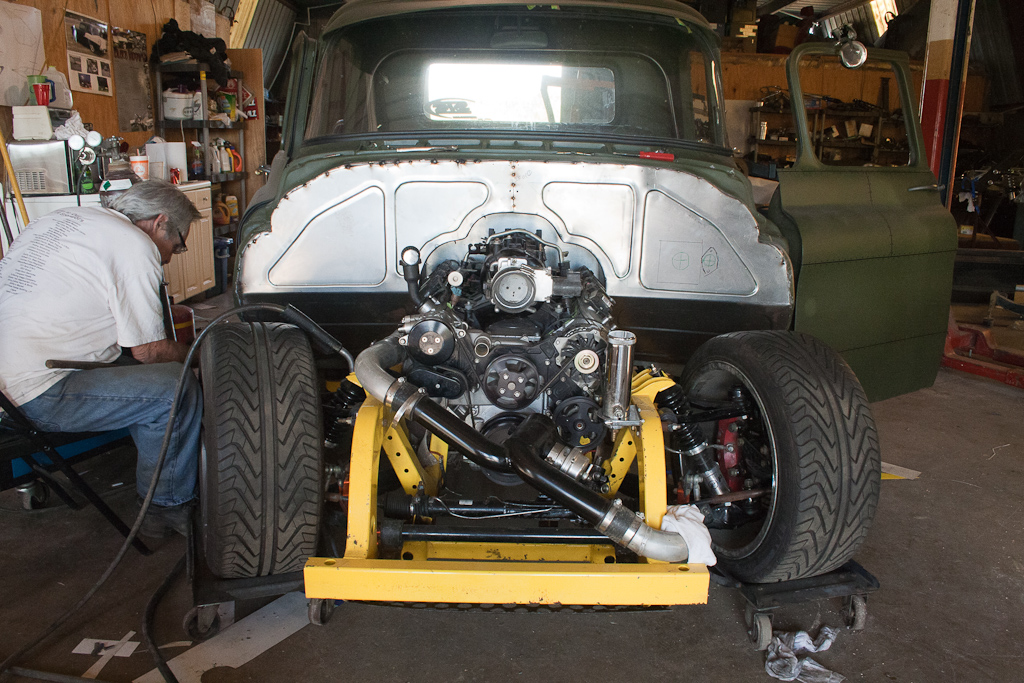
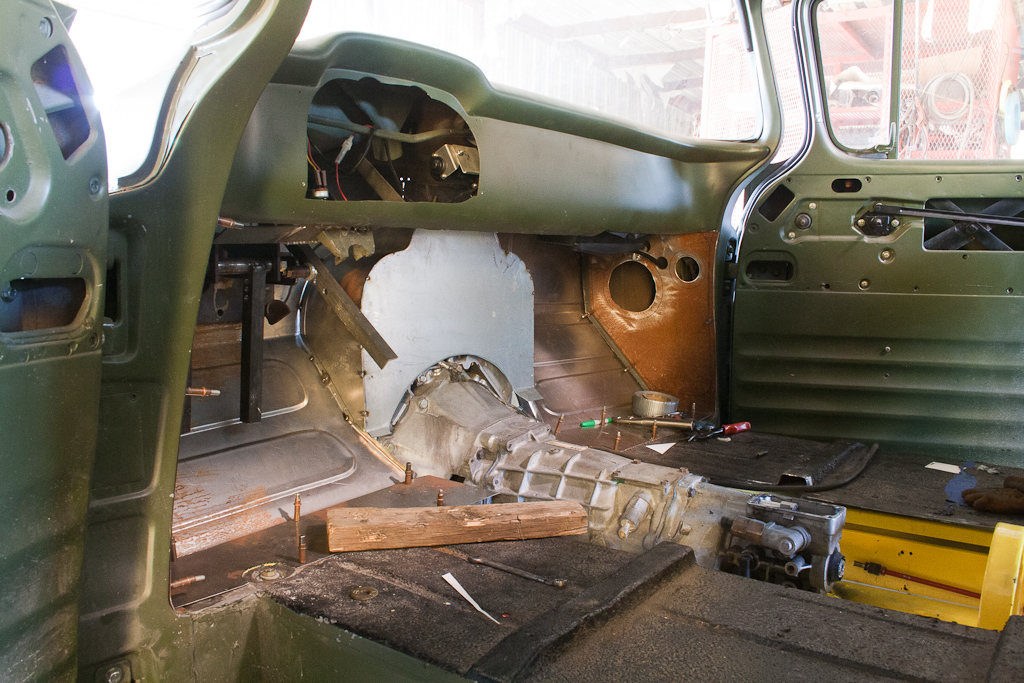
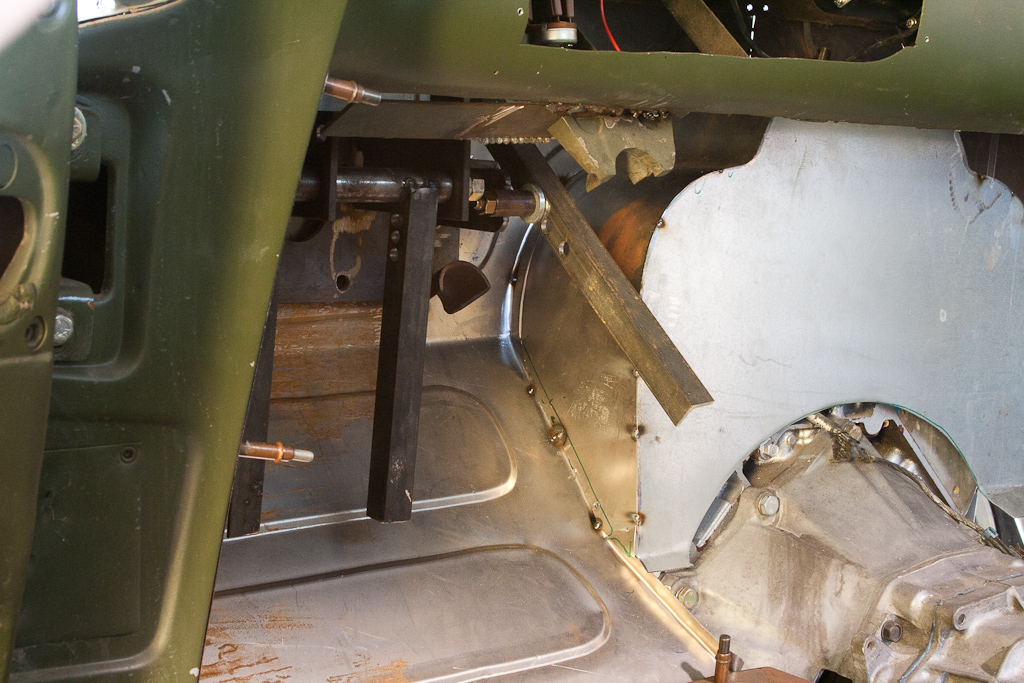
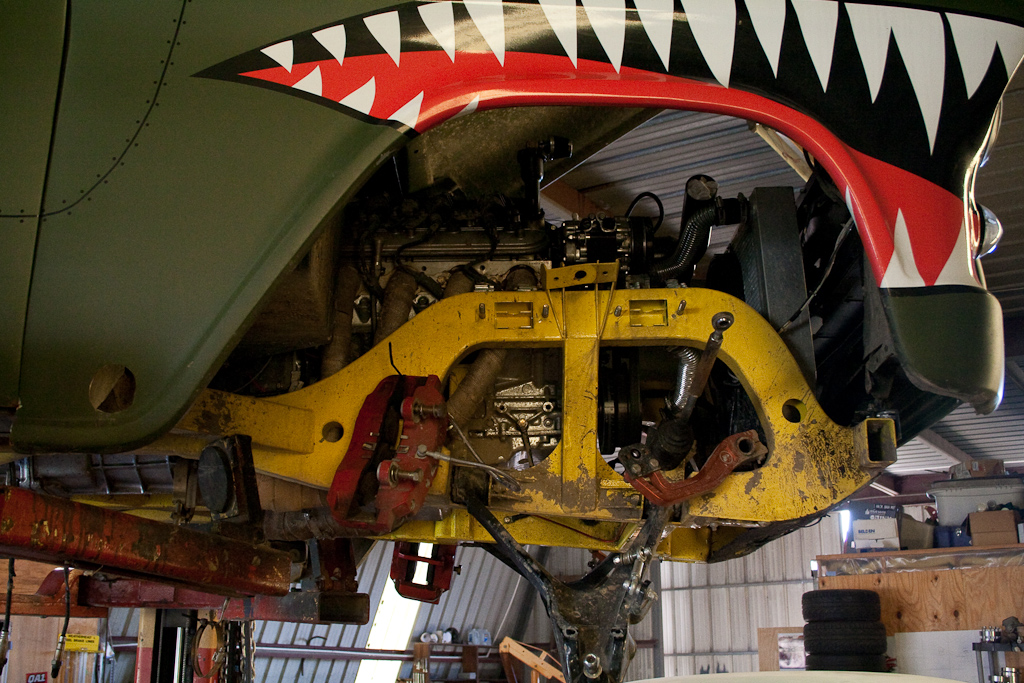
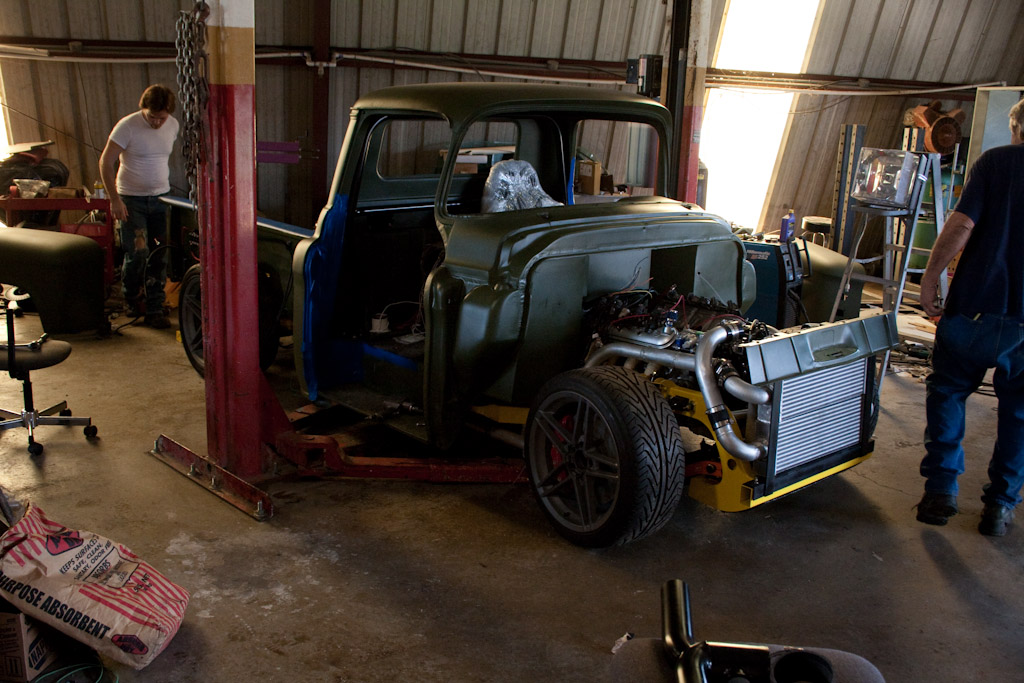
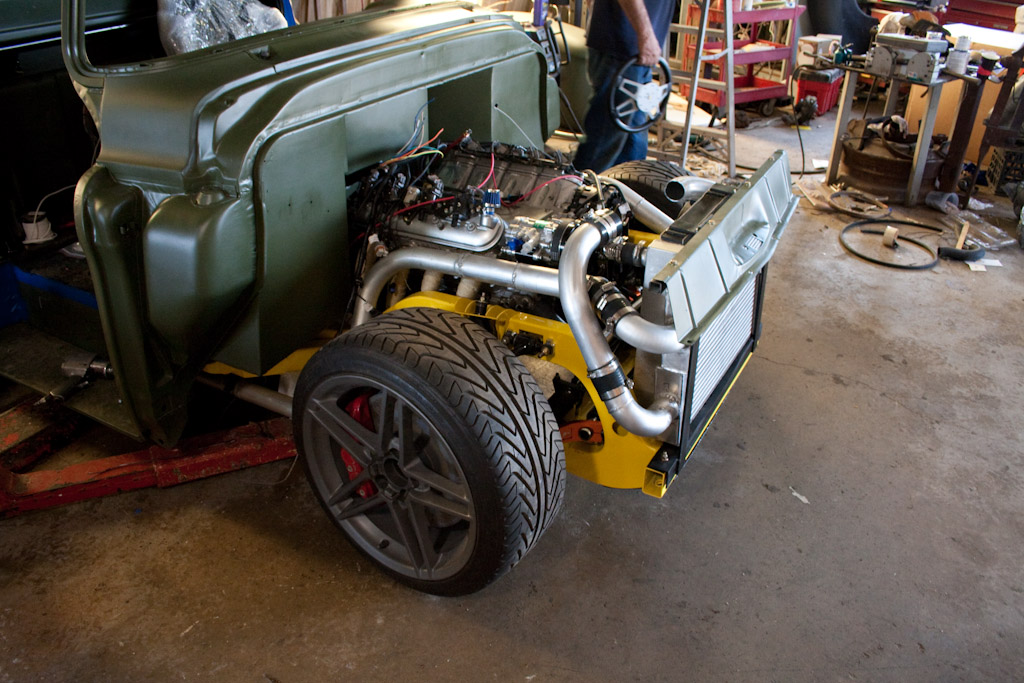
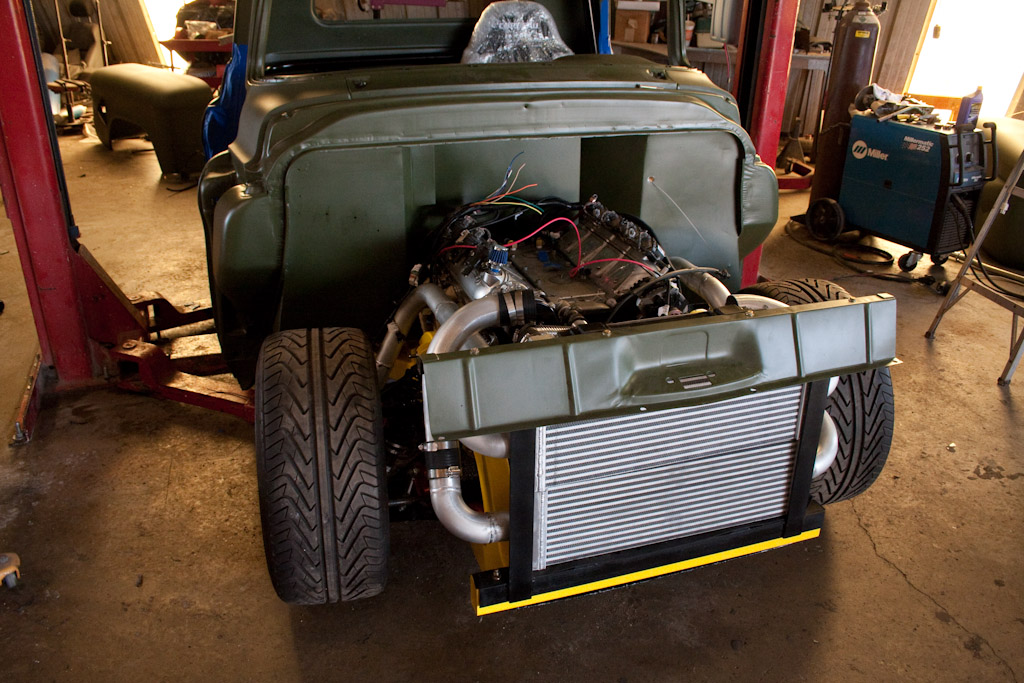
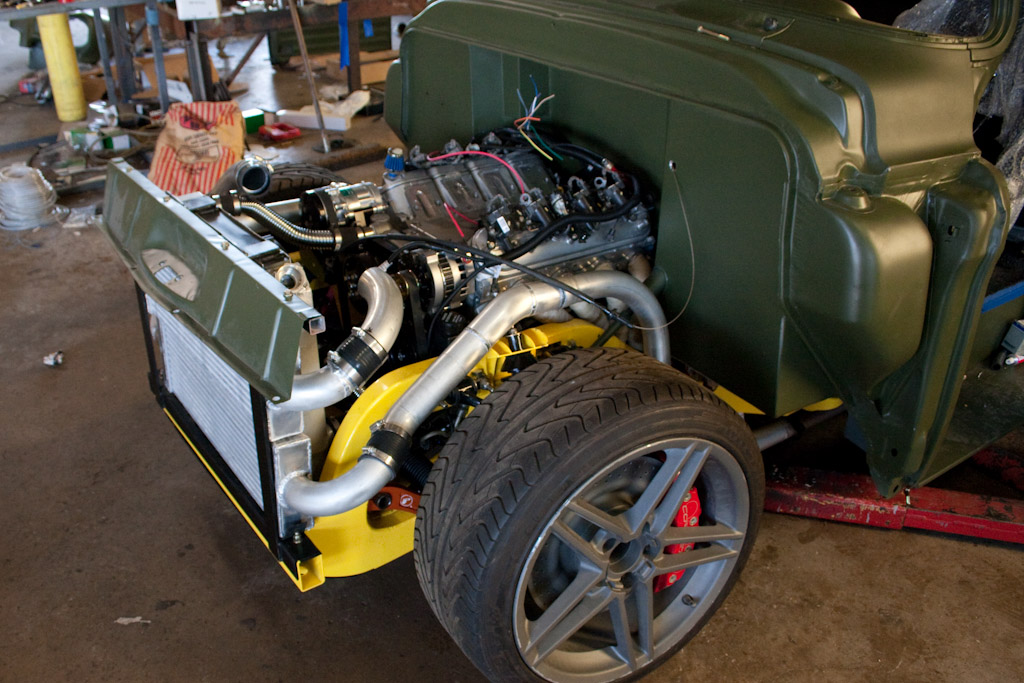
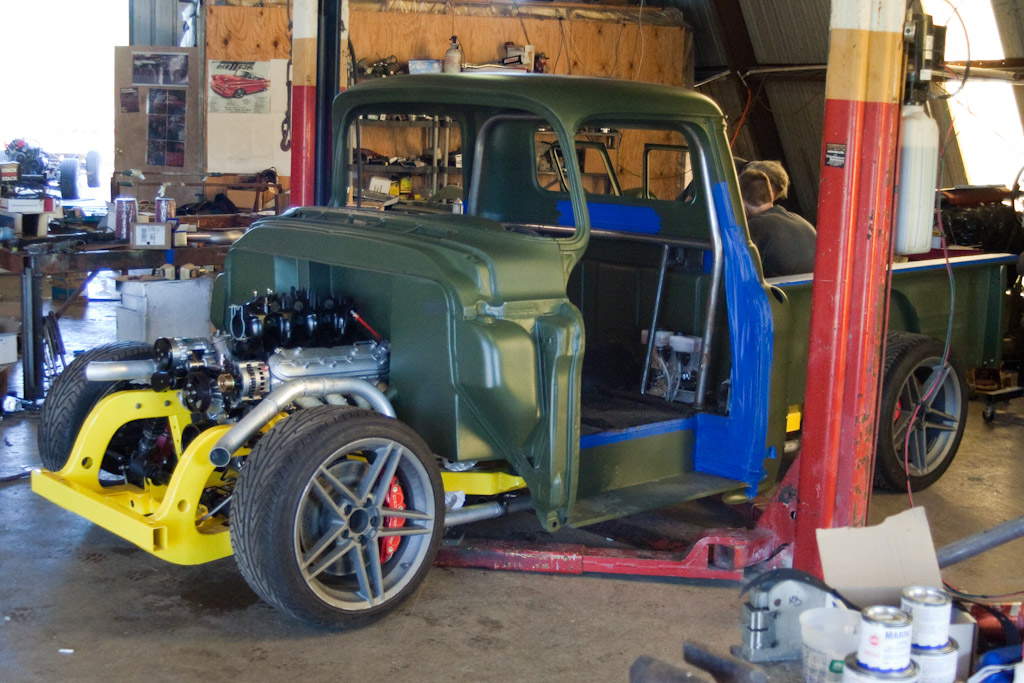
On to the truck, we were going to go to the Dallas Goodguys back in October but we had some issues and couldn’t make it in the end, that cost us a serious chuck of time. Part of that was in some new sheetmetal we wanted on the car. A local shop offered up a good price to bang out some sheetmetal work on the Fire wall of the PT-57 to help with her weight loss program. Let’s just say it didn’t work out to well, pictures are worth a thousand words so they say.
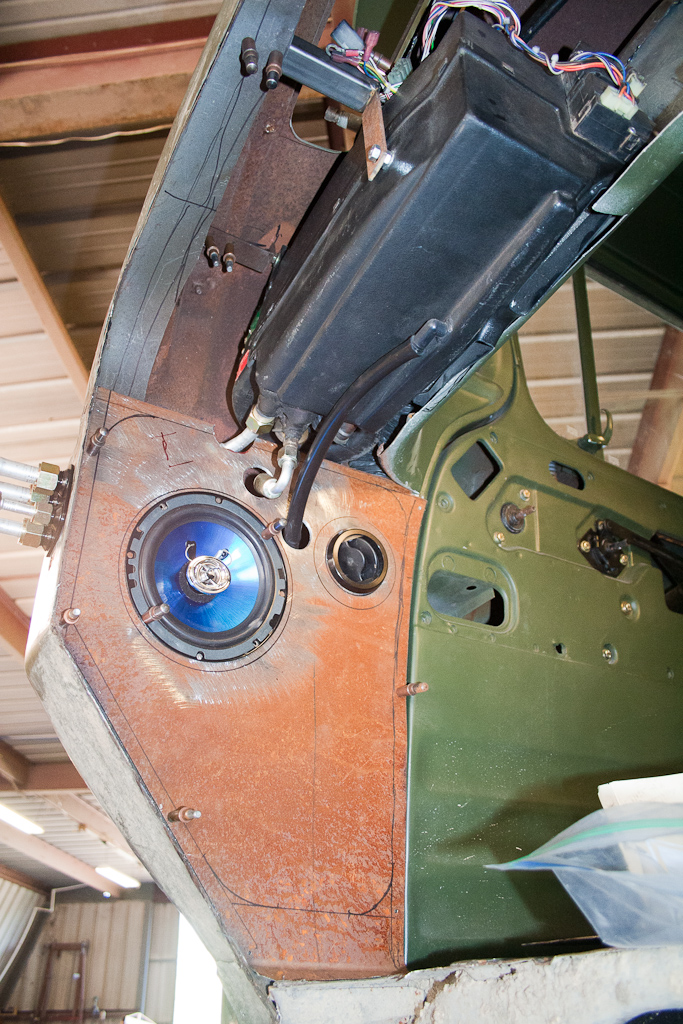
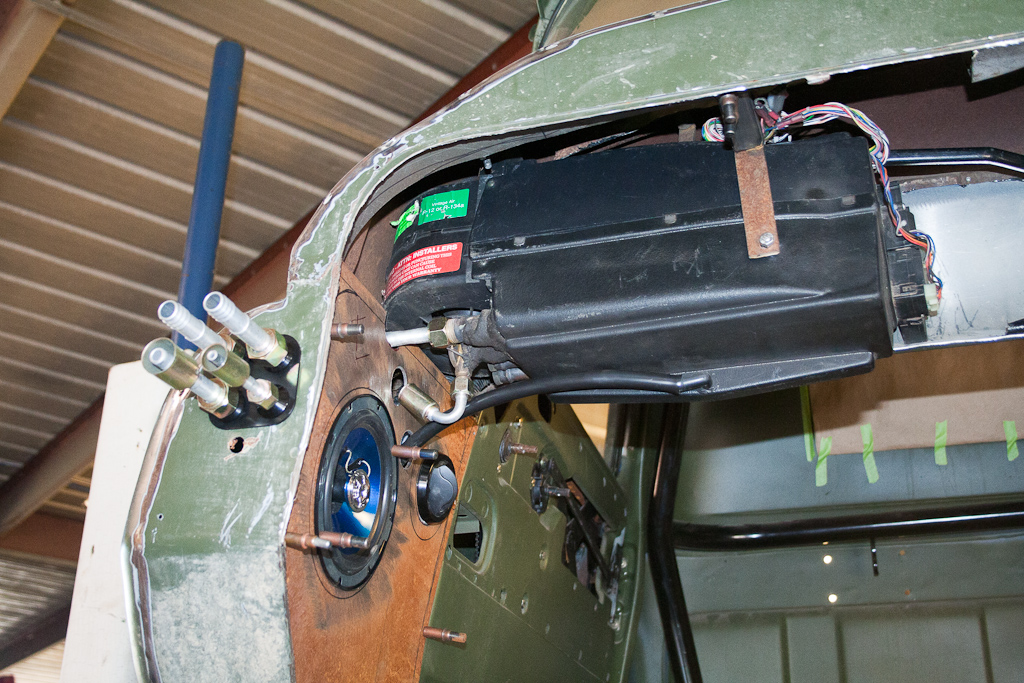
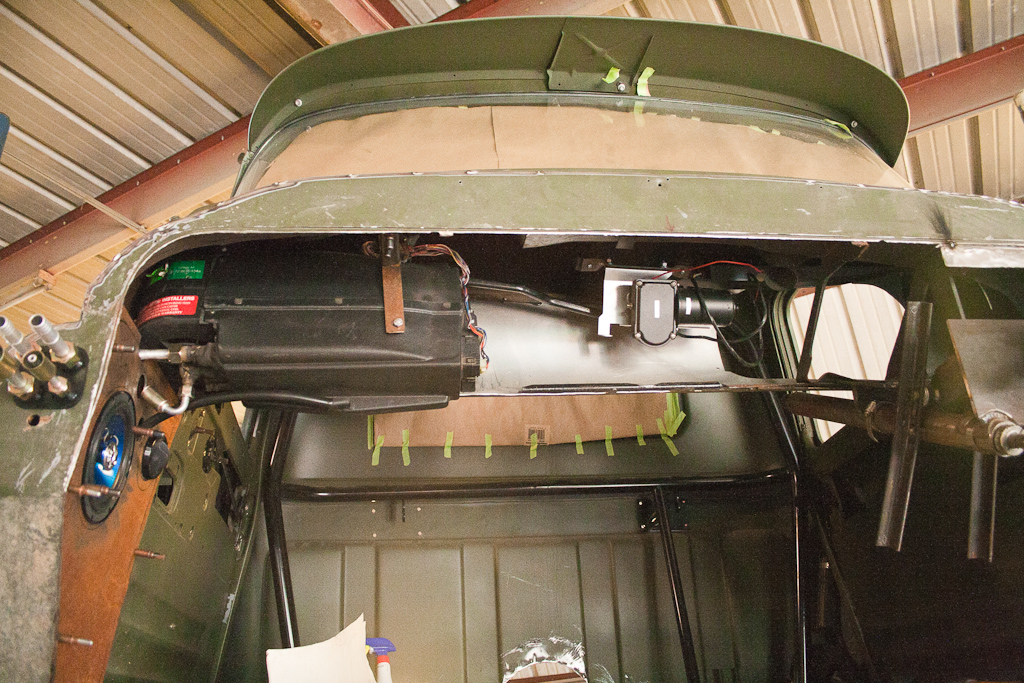
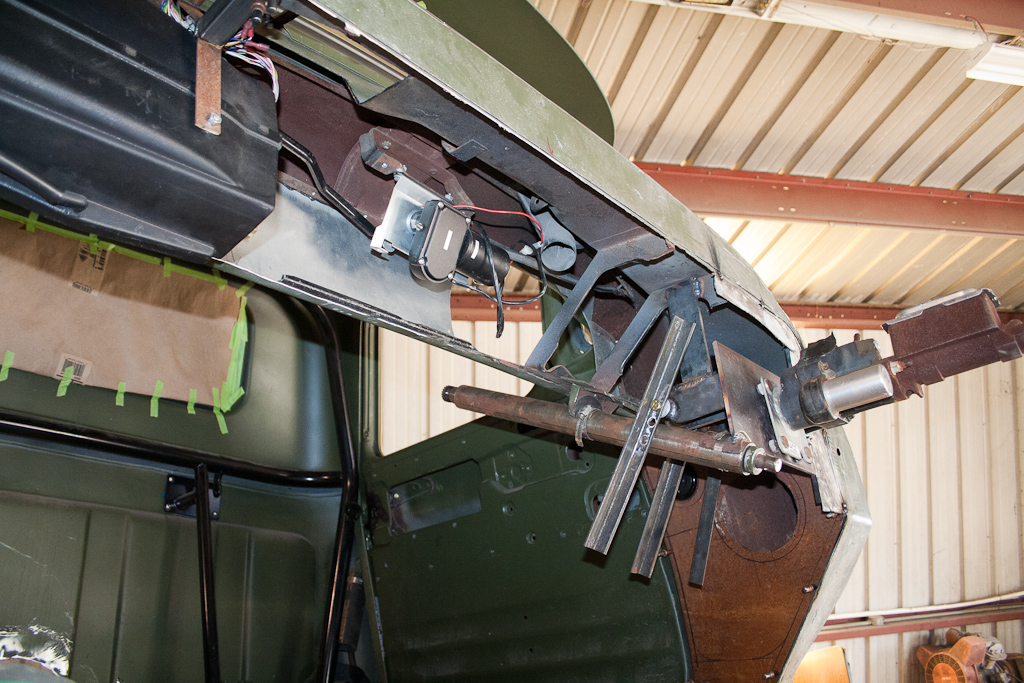
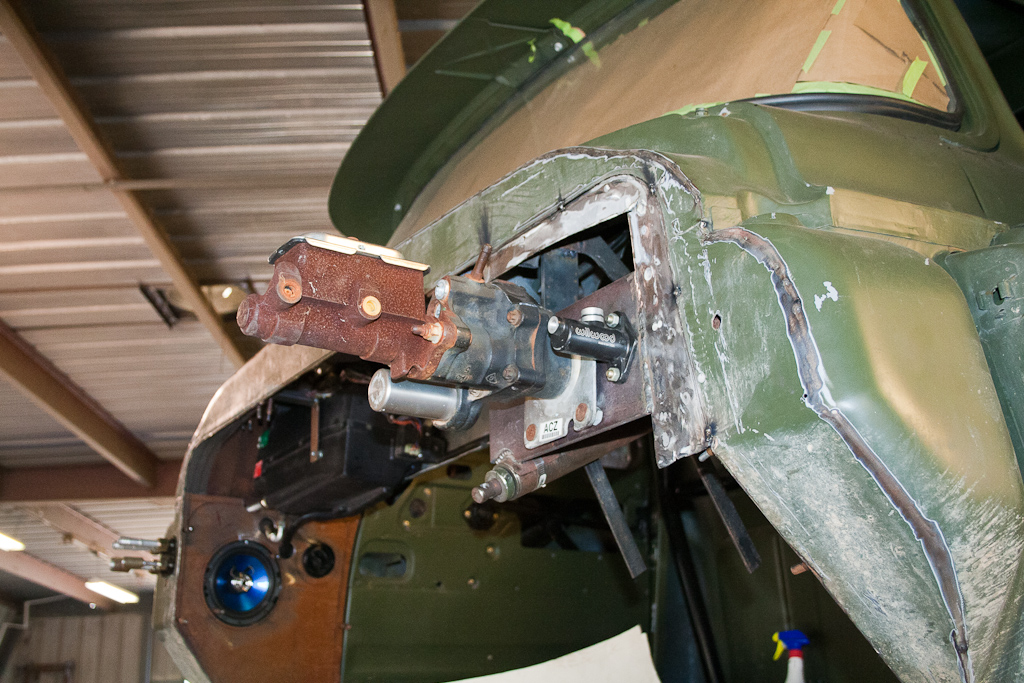
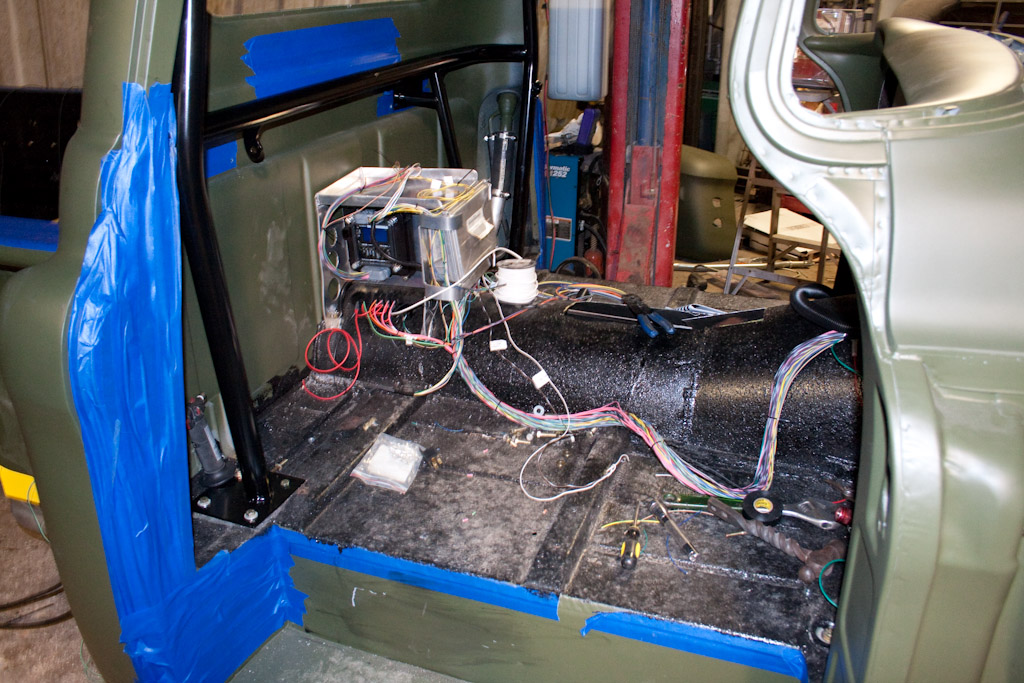
So my father (the retired metal art professor from Texas State) decided he wanted a whack at it finally. We cut out the old crap and removed lots of .250 steel flat stock that was welded in to the truck and used to form the sheetmetal around. Lets just say I think with the new fire wall and floor tunnel, the truck is probably 20-30 Lbs lighter, and thats being realistic. We mounted up the Vintage Air Gen 2 AC, tossed in some speakers, and decided to go to a hydro boost master cylinder on the fire wall due to packaging restrictions under the trucks floor and for the ease of daily driving.
Design ideas
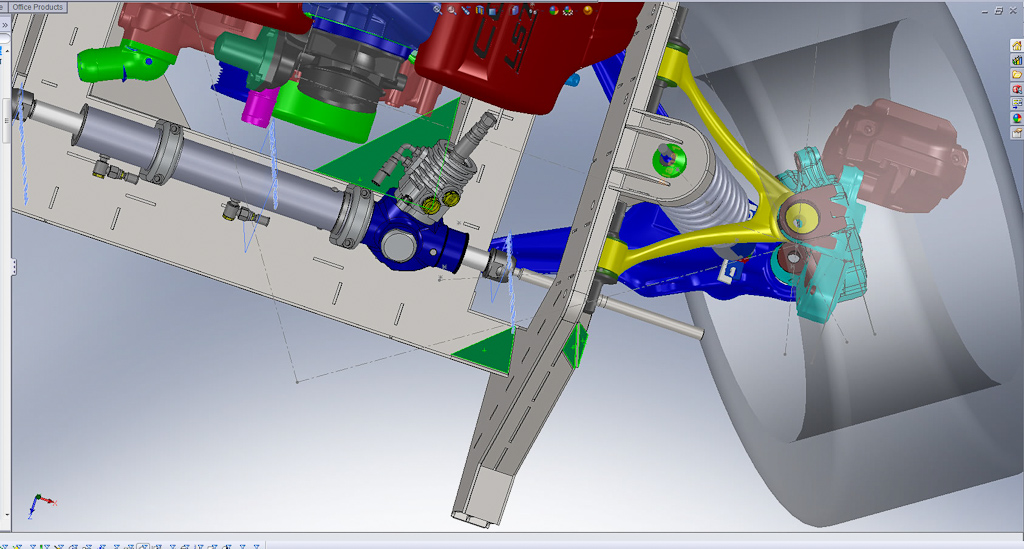
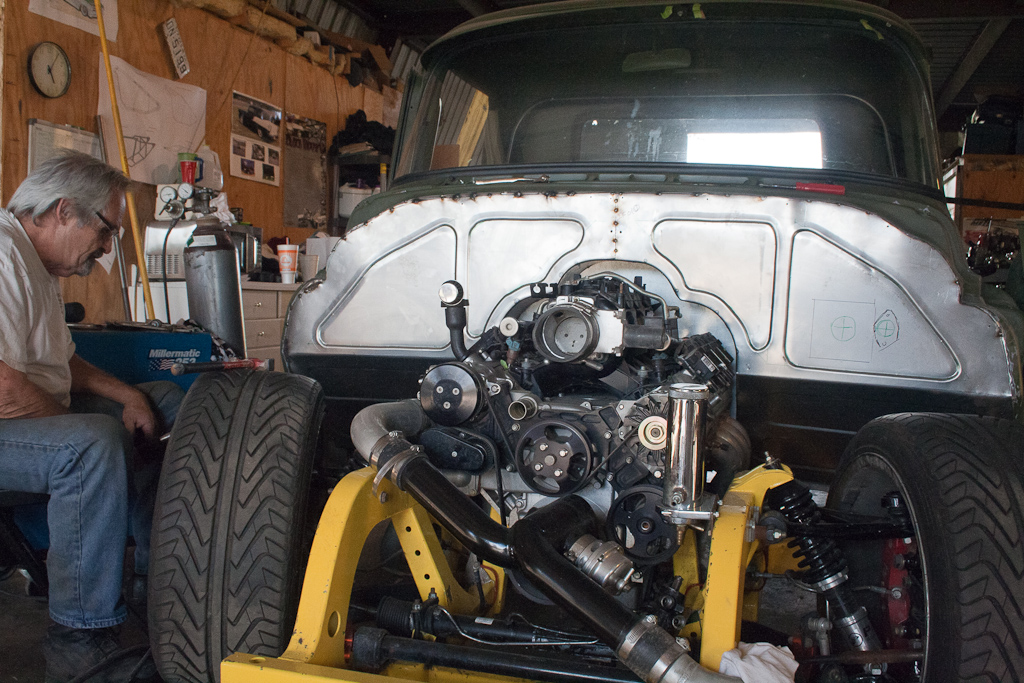
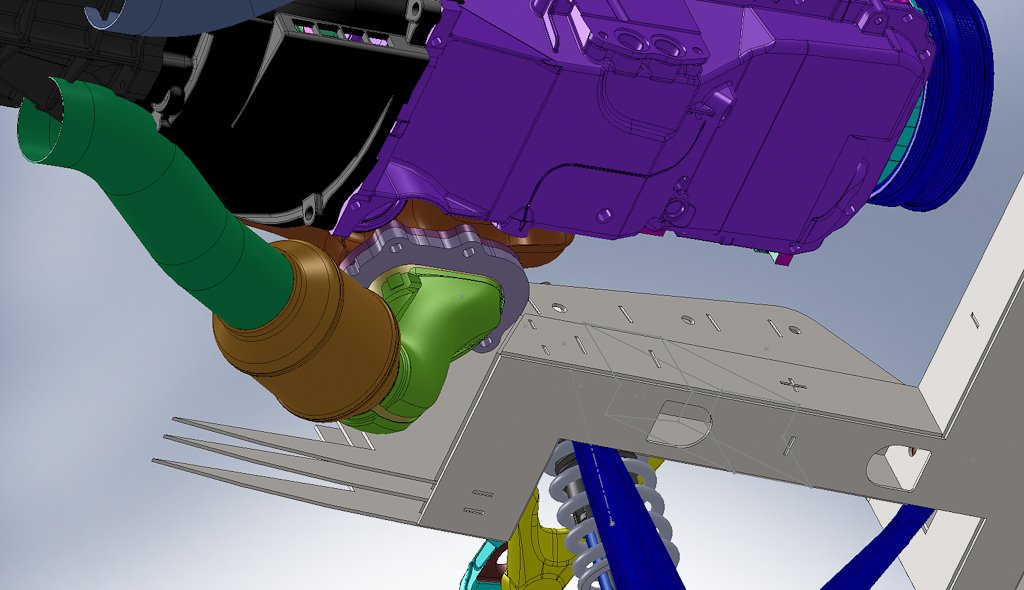
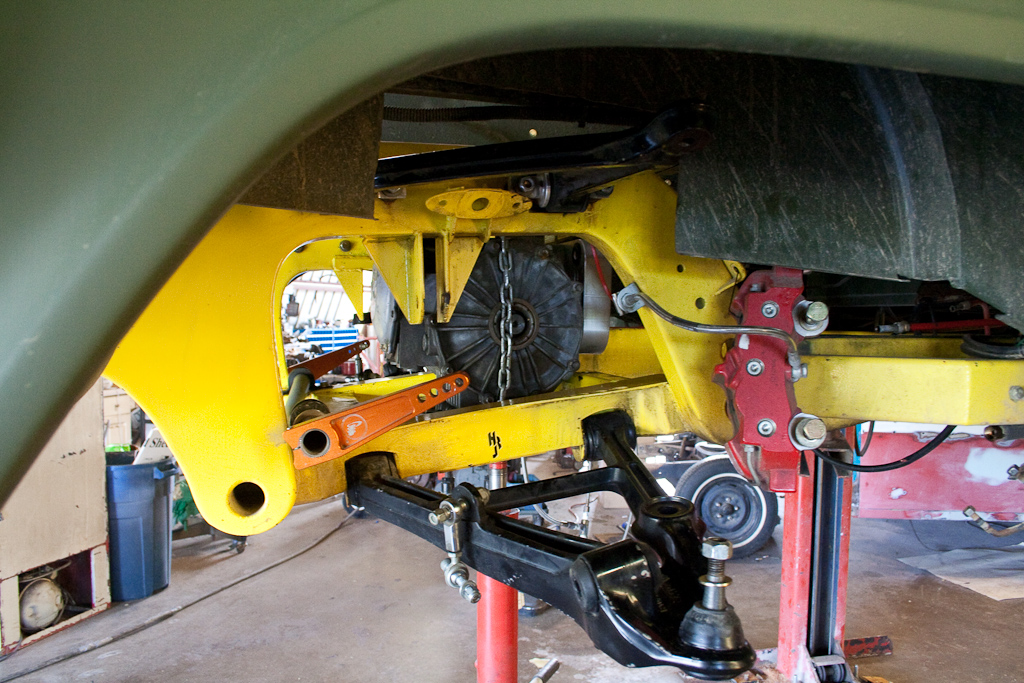
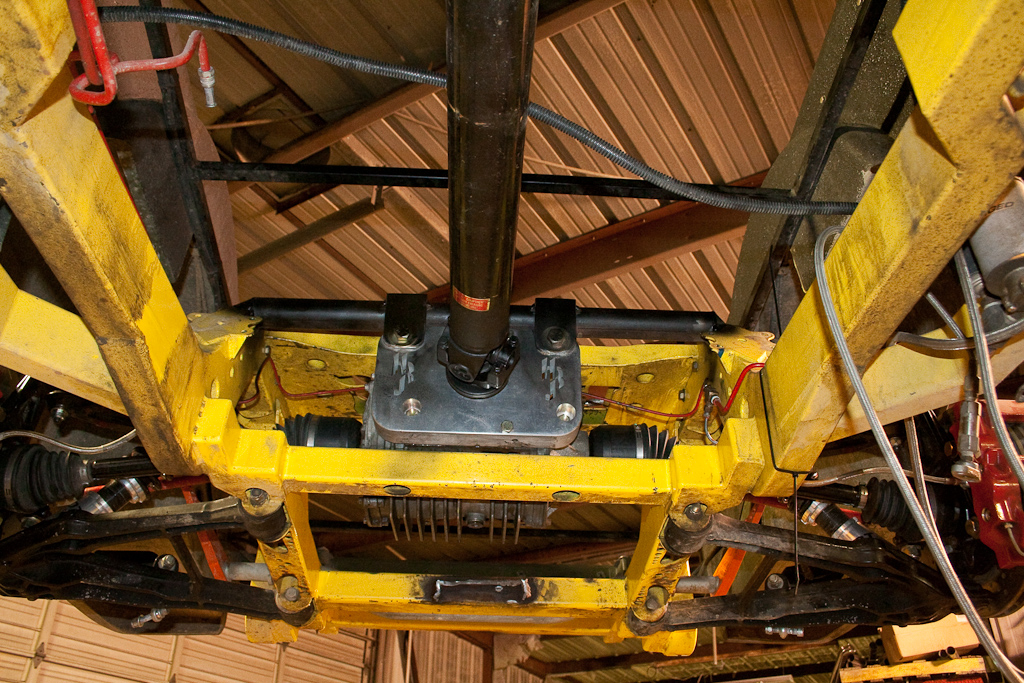
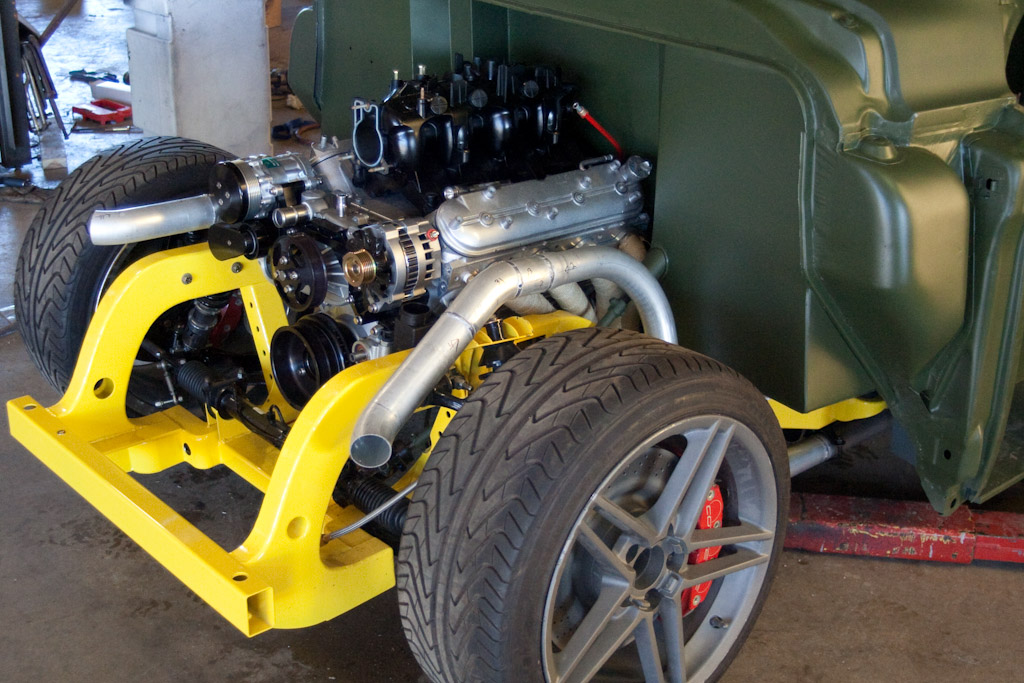
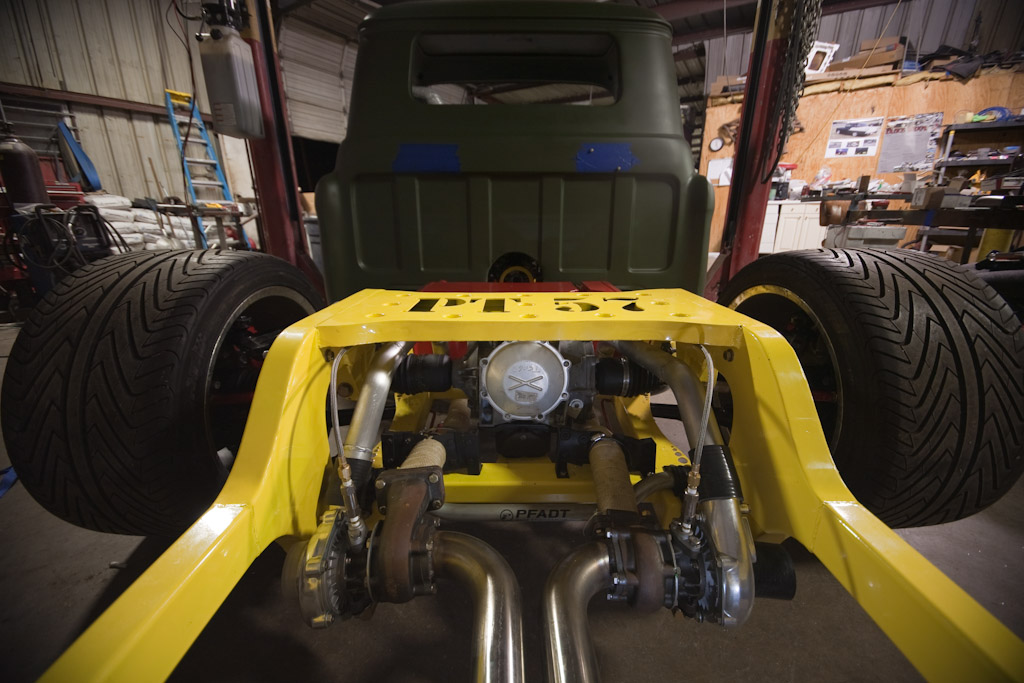
So we had some big problems with the PT-57s front frame design and its interference with the surrounding systems. The headers and steering were the biggest problems. The headers were so close to the oil filter that in the 2000 miles I put on the truck during testing I burned up 4 oil filters. The headers were so close that is caused the internals of the filter to break. To me driving I suddenly saw the oil pressure drop from 45PSI to almost 20, scared the shit out of me the first time. I feel luck that the starter didnt burn up, the headers were just as close on that side. Next because of the frame and the headers we didnt have enough room for a steering linkage I would normally approve of. So we needed more room for that as well. Rack and pinion choice also needed to be reevaluated. We went with a C4 corvette rack on the original design for the availability but with GM cutting back the racks are getting harder and harder to find. I also want 32 degrees of turn in radius for the truck so I can do some more drifting so we turn to Flaming River for that one. We will be using the Flaming River FR40001 with its 6 travel over the 5 travel corvette rack. The rack doesnt have the clearance issues with the Power Steering lines anymore and we can move the motor down a little further getting the CG down a little more.
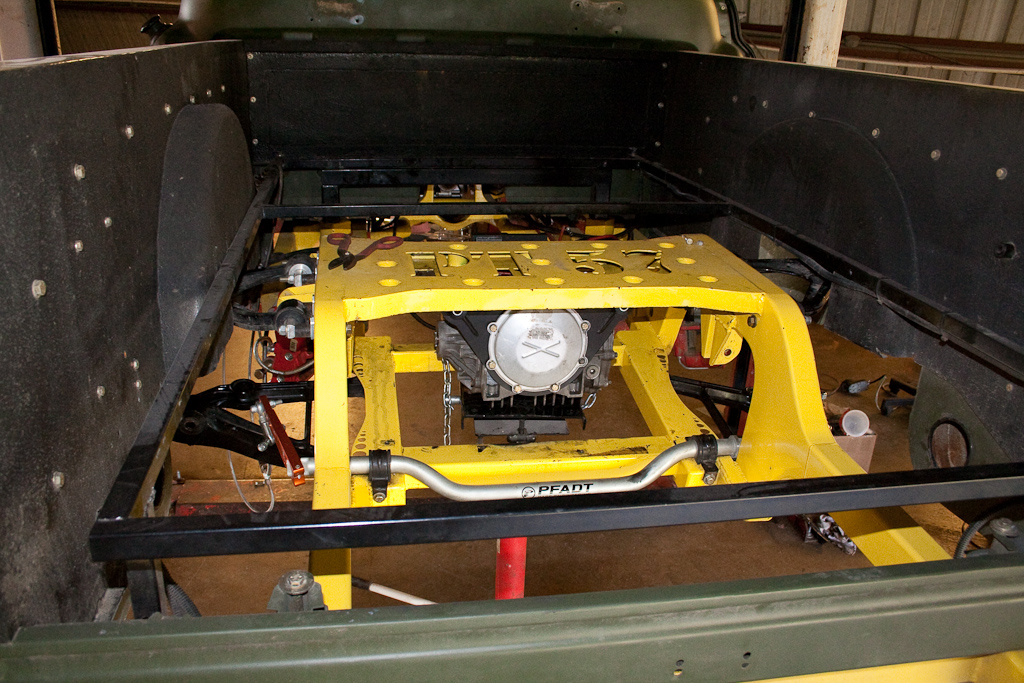
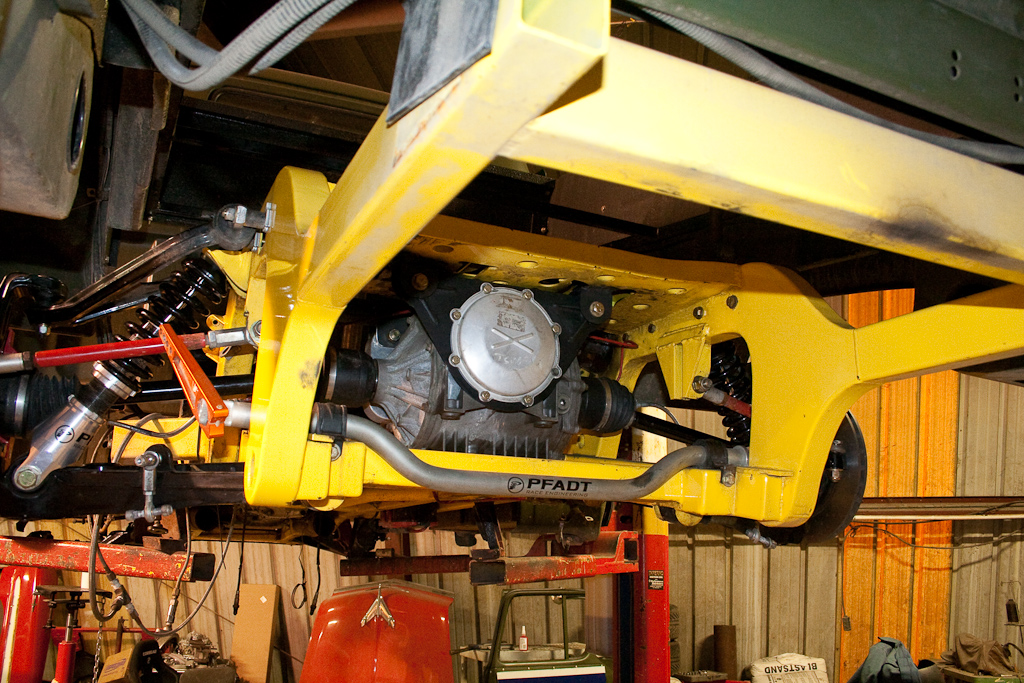
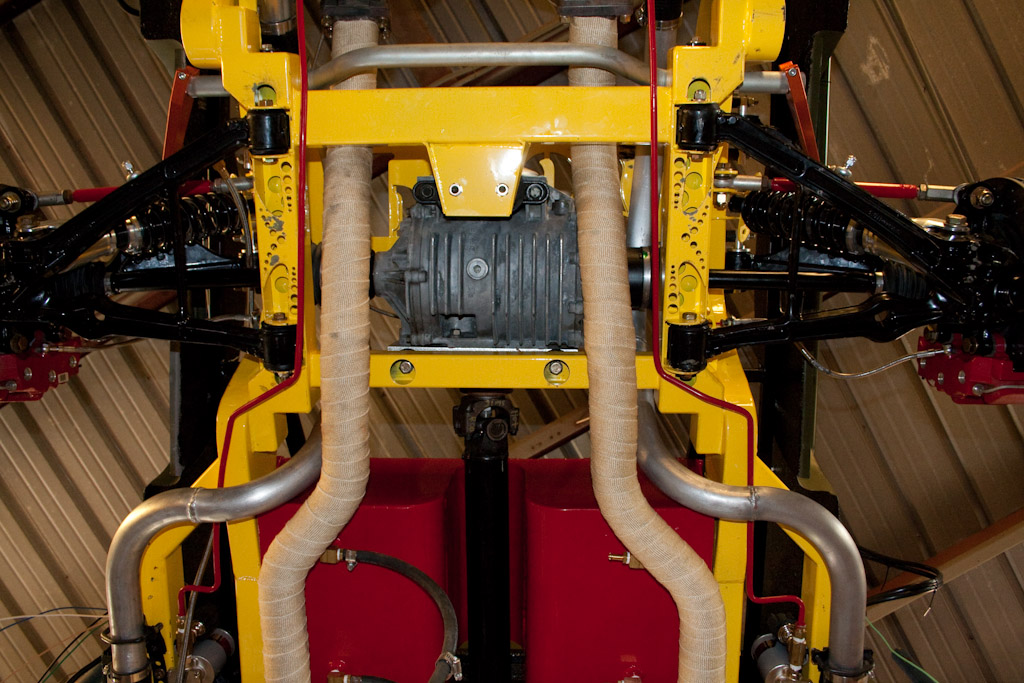
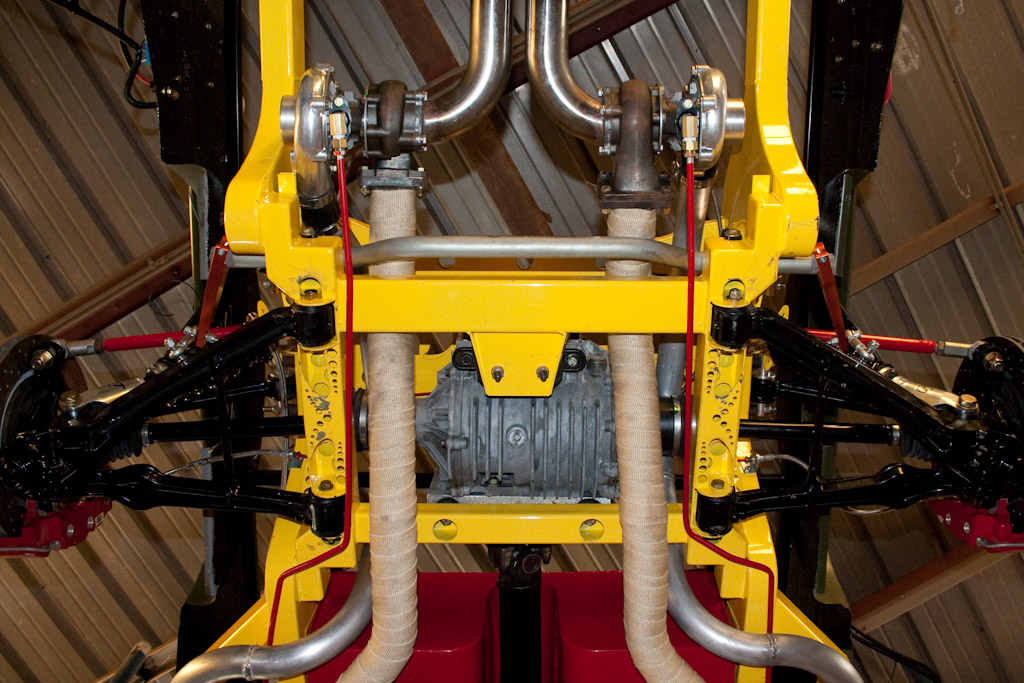
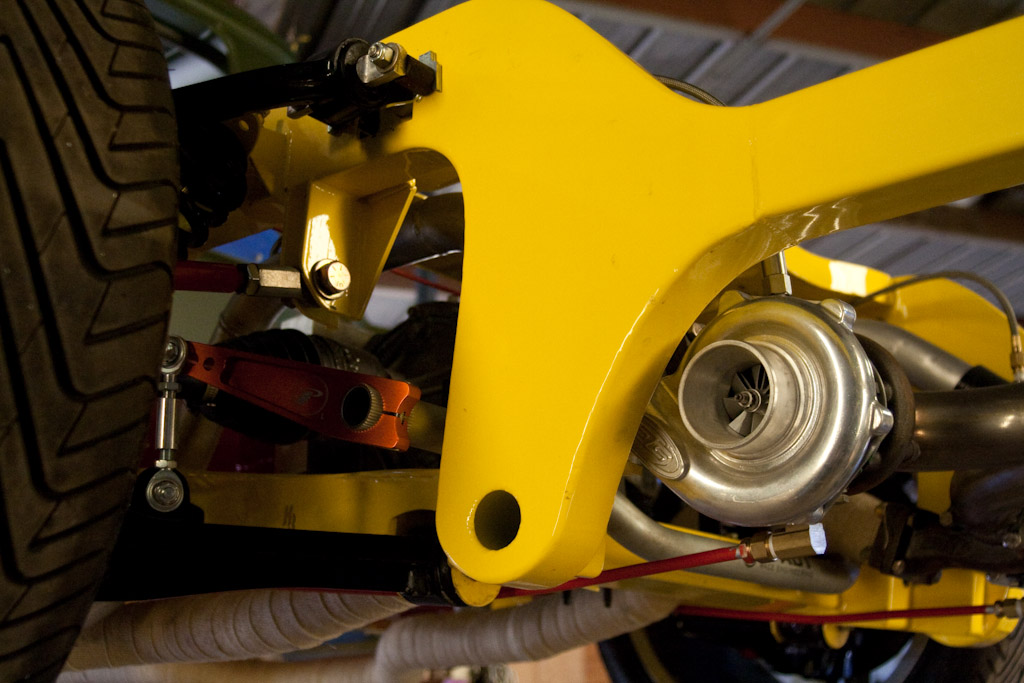
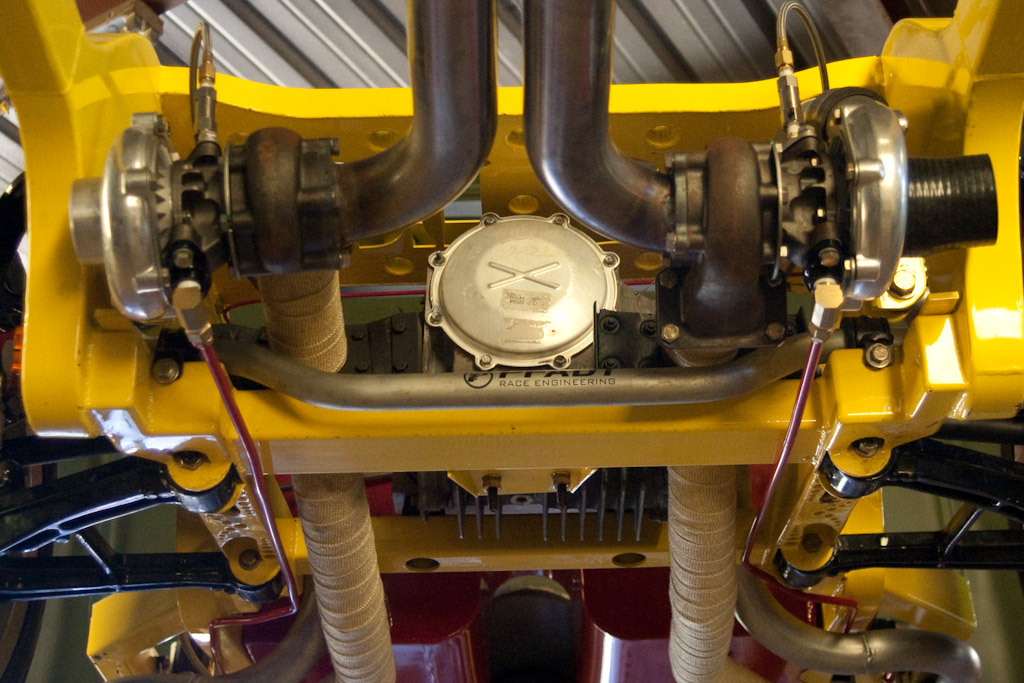
The rear of the PT-57s frame also needs some re working for the new differential adapter and better turbo integration. The new differential adapter mounts from the top and the current frame didnt have enough bracing to hold the differential with its short lever-less structure so more tubing needed to be woven in to make the functional support. I love the rear turbos but I need to take the complexity of the boost tubing down a notch so Im also going to integrate some of the boost tubing into the structure of the frame so we dont have to fish it through and around the differential and CV Shafts
Finally after some problems with the powder coating (and the final straw with the yellow V4 Frame) We built our own powder coating system again so this time we can do all the little bits and make sure they wont crack off this time. We can also take out oven up to 800F so I plan to add ceramic (or titanium) coating to the headers and complete exhaust of the PT-57 for even better turbo response (I dont know it thats even possible.)
These are some of my rejected frame designs from the last year.
And finally after 4 rejected frames (I think) Ive finally found the right combination to make the front really work out, take a look and let me know what you think.
Well, I started fixing thing, one thing led to another and we ended up not making it. Sunday morning at 3:30 My buddy Kelly and I sat down, made a list of what we needed to do and at the very least we needed 10 more hours worth of work. Had we not been awake for 20+ hours at that point we would have keep banging on it. I didn't want a repeat of Optima where I get the car together then bring it back and have to rip into it again to fix something that was half assed of overlooked because we rushed it.
Prototype parts are one thing but I found pinched lines from the oil back on the turbo, the shaft pivot had been installed with a grade 2 bolt and had twisted, I see 10-15 pounds worth of steal on the front that made up a last minuet radiator support and gussets that can all go, and I want to get my inner fender in finally.
So onto the rear end and the mods I was working on for the truck to make it a better street car and way better for drifting.
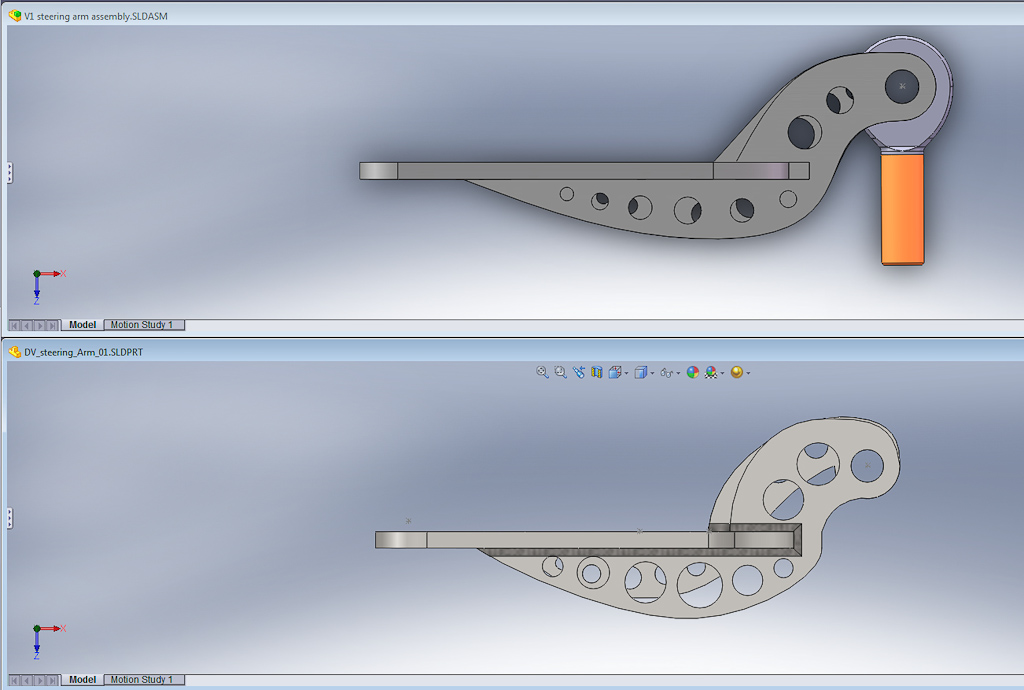
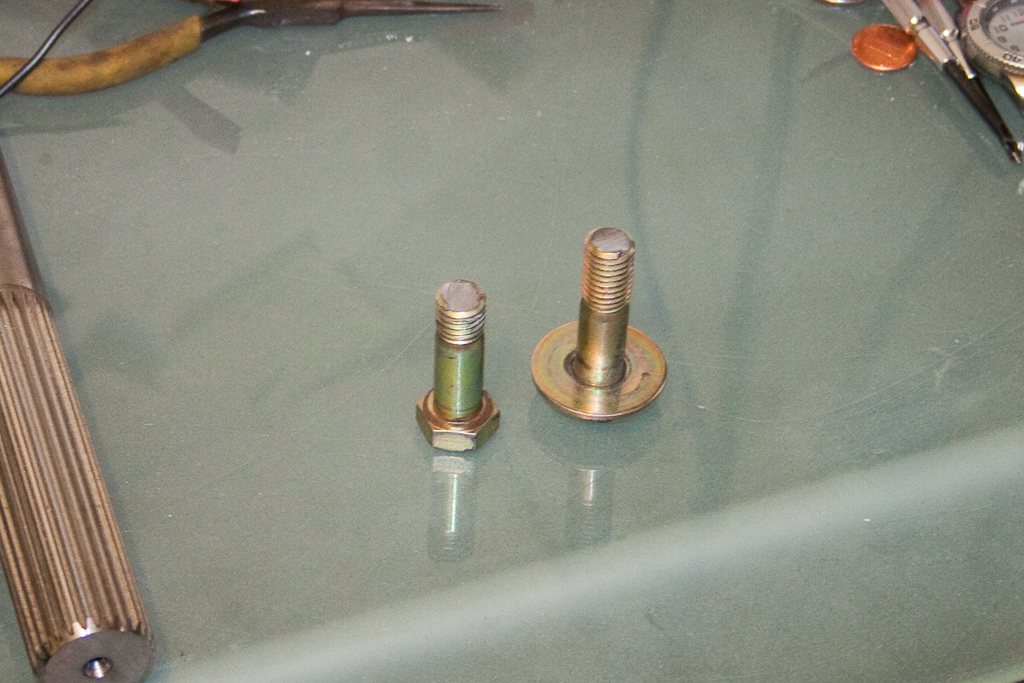
-Steering Arms
The truck only had about 46 degrees of turn in, good for smooth course racing but it was a little tough in town making tight corners. So I made up a new set of steering arms that moved the rack back .5" inches increasing the steering angle to 57 degrees. The old arm is shown here on top with the new arm on bottom, notice that the lower plate on the new are is also clearances to allow the outer tie rod room to move up into and clear the steering under real hard cornering.
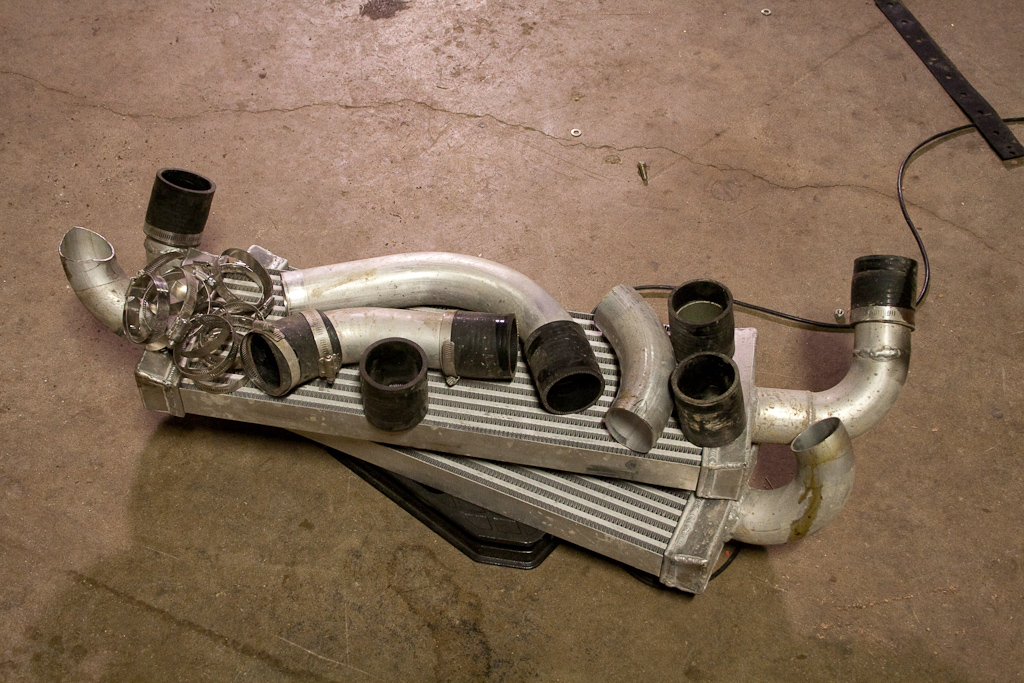
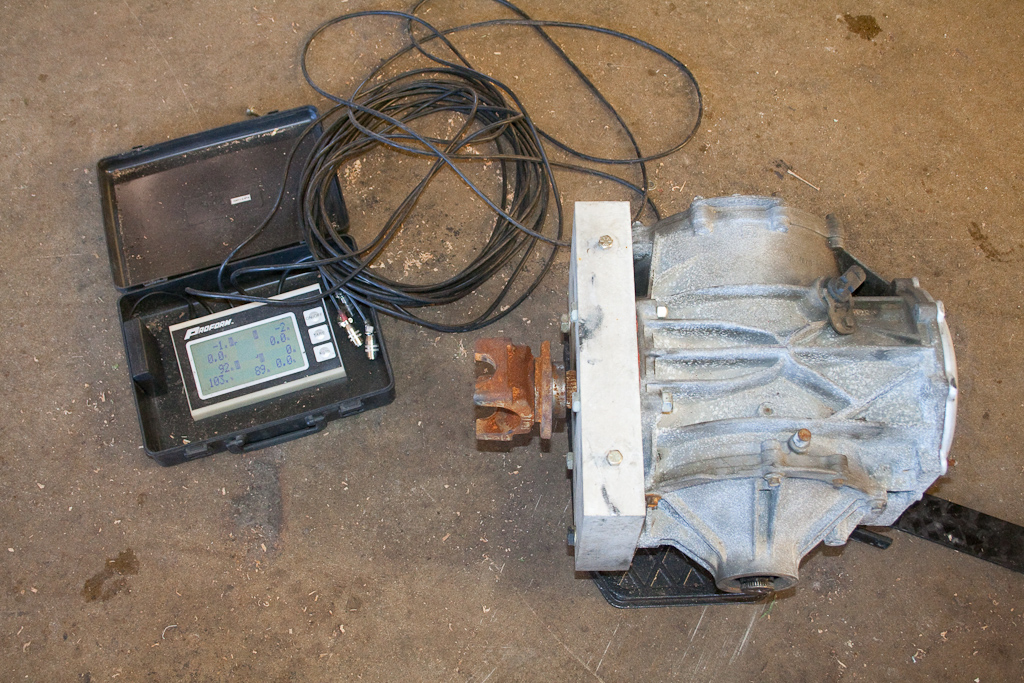
The pile of inter cooler just that came out after we proved on the dyno that they were little more than dead weight.
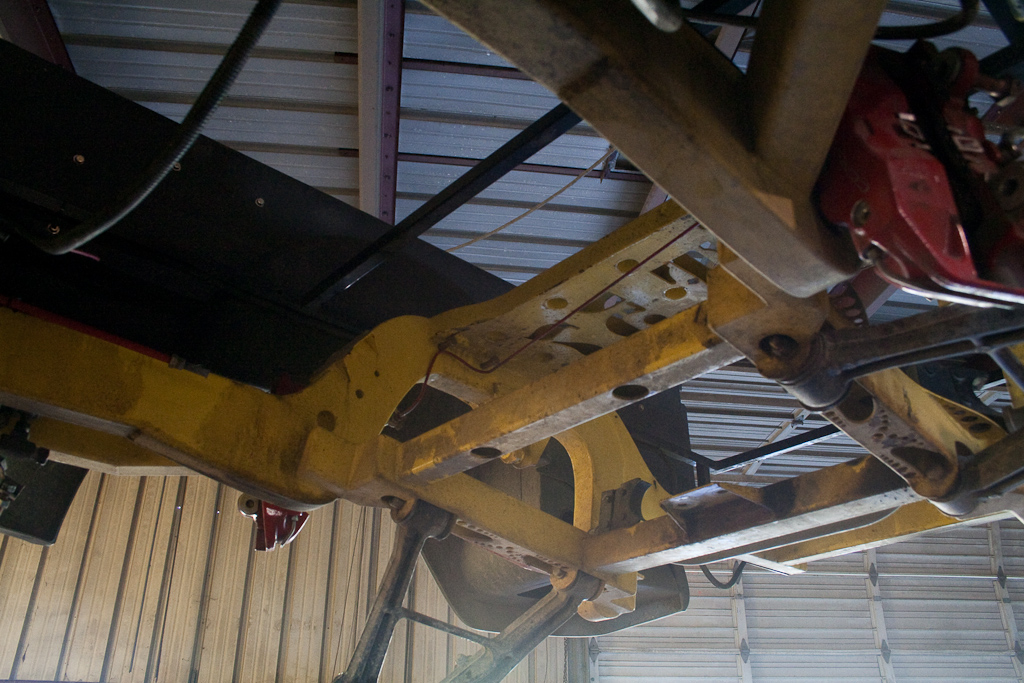
For the diff and the race I decided I really wanted to get in there and see what things were doing, so you can see almost everything that ended coming off.
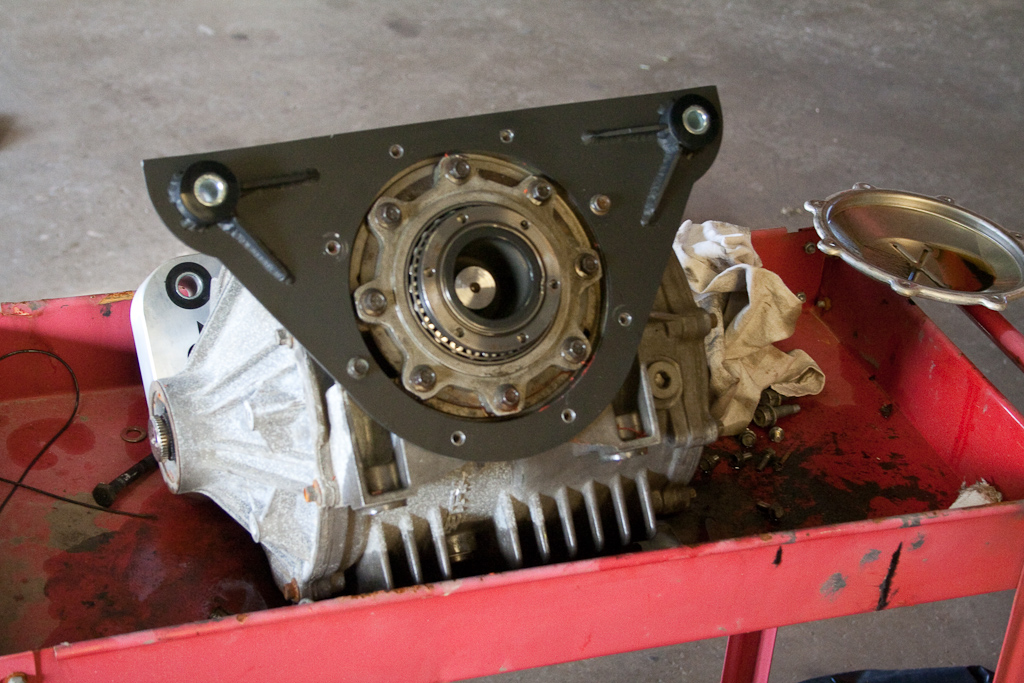
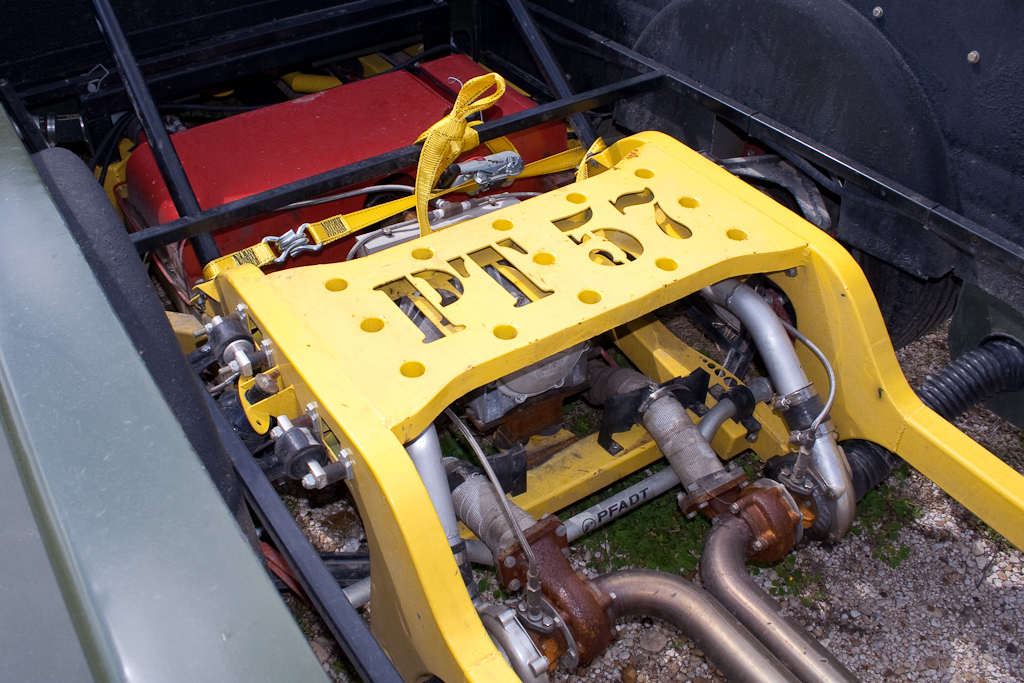
-New Diff Mount
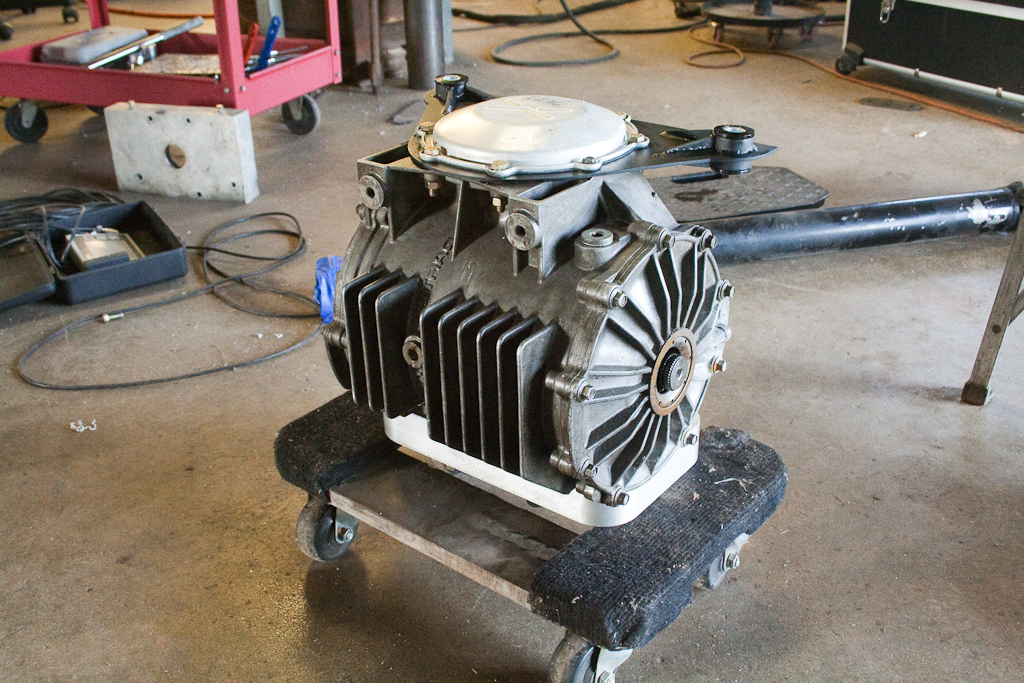
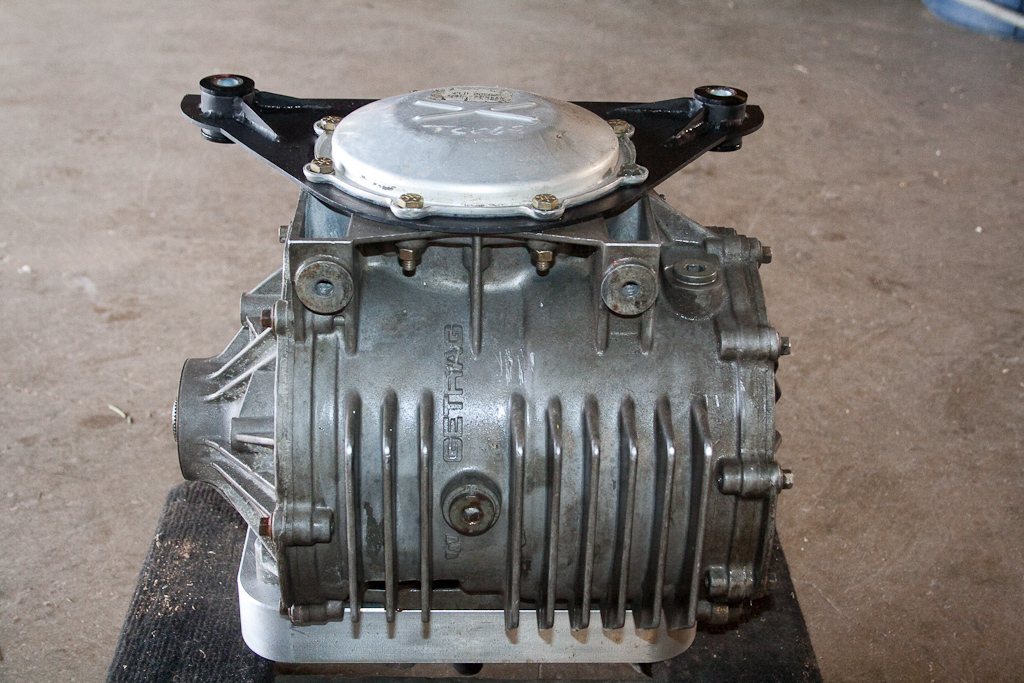
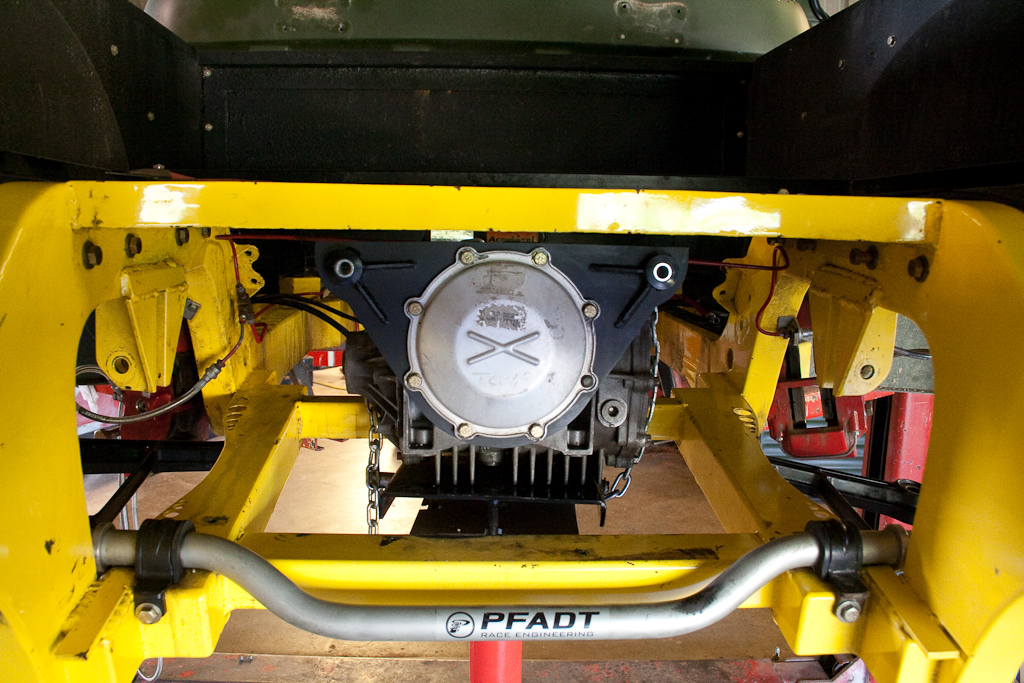
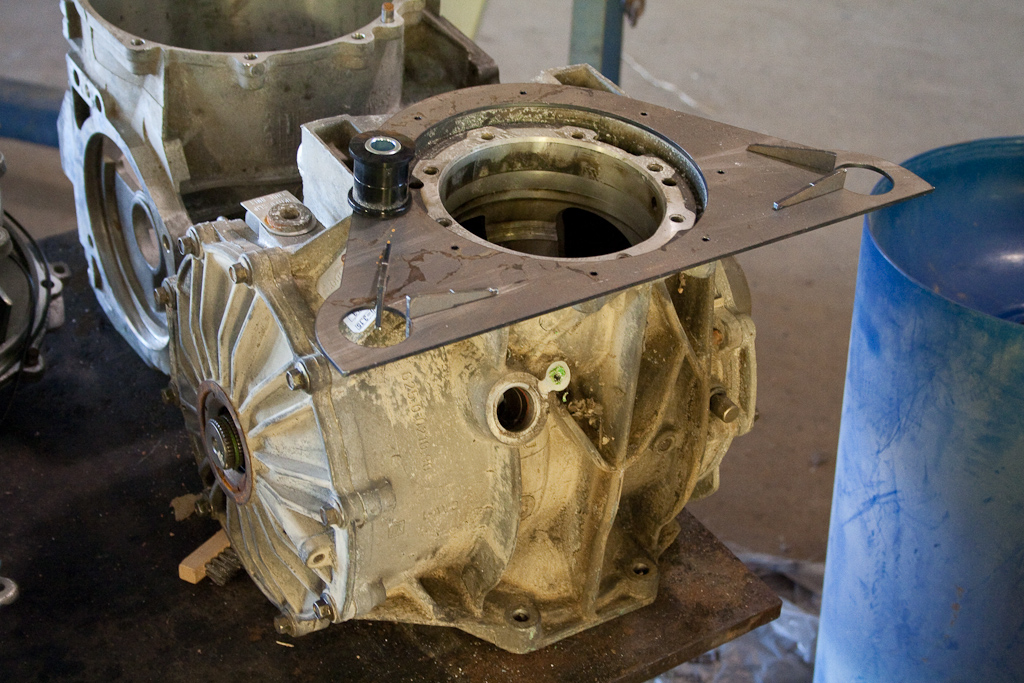
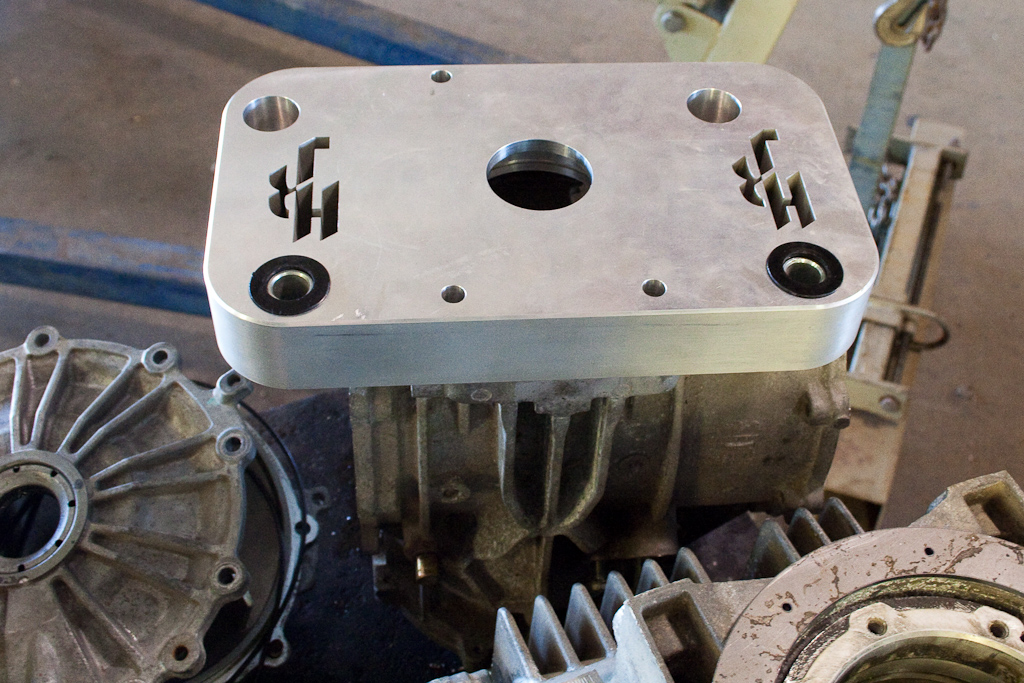
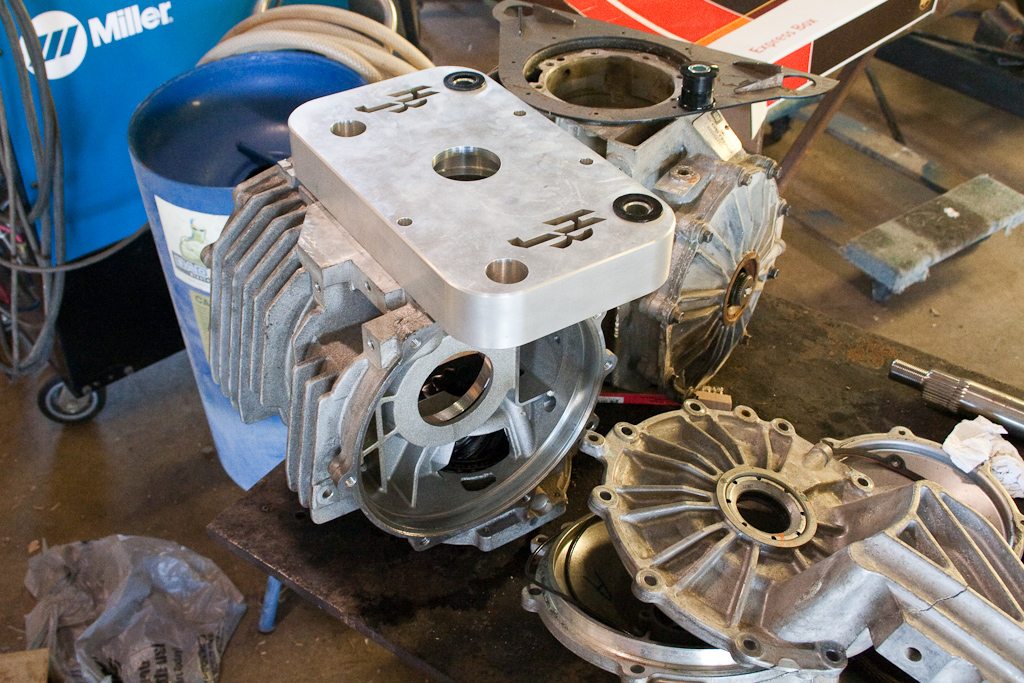
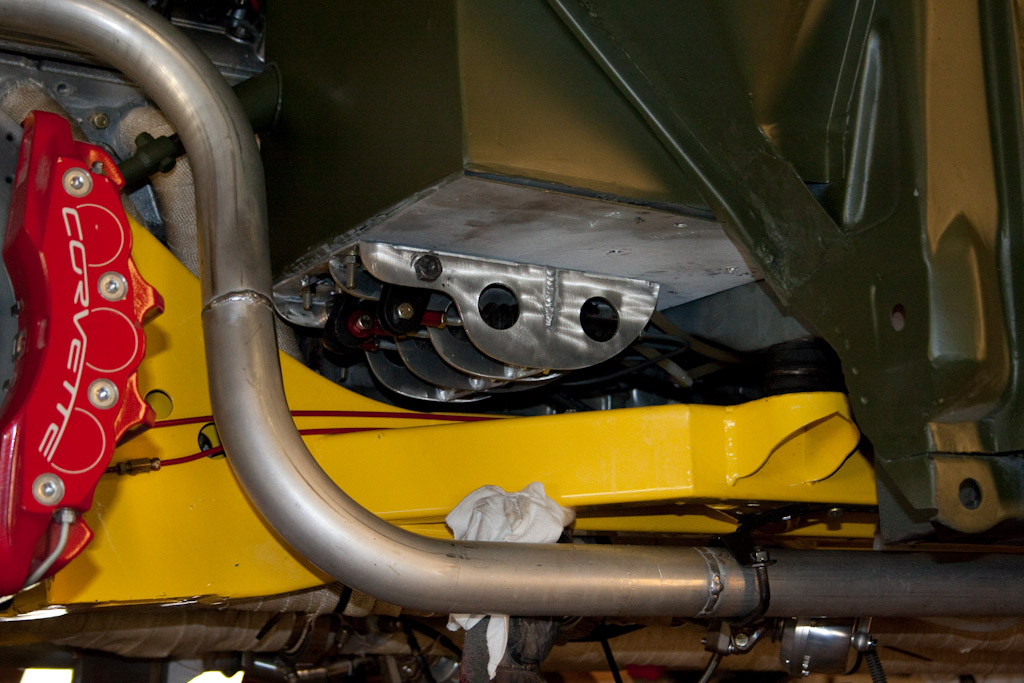
The old diff coming out weighted 92 lbs. You can see the new rear mount on the diff. The old system tried to use the OE corvette mounts and added a few, that failed honorably. So this is what I've come up with to fix it. The rear plate is the big difference but I've moved the front upper mounts too and upgraded to 5/8' hardware. The rear we drilled out the threads since all but 1 of the rear plate holes go through the aluminum and captured the bolt on the other side to ensure a much better hold to the case.
What's next
-I'm going to get the turbo's coated and mod the exhaust a little. Some of the wrap was getting ripped up on bottom with all the gravel in the area.
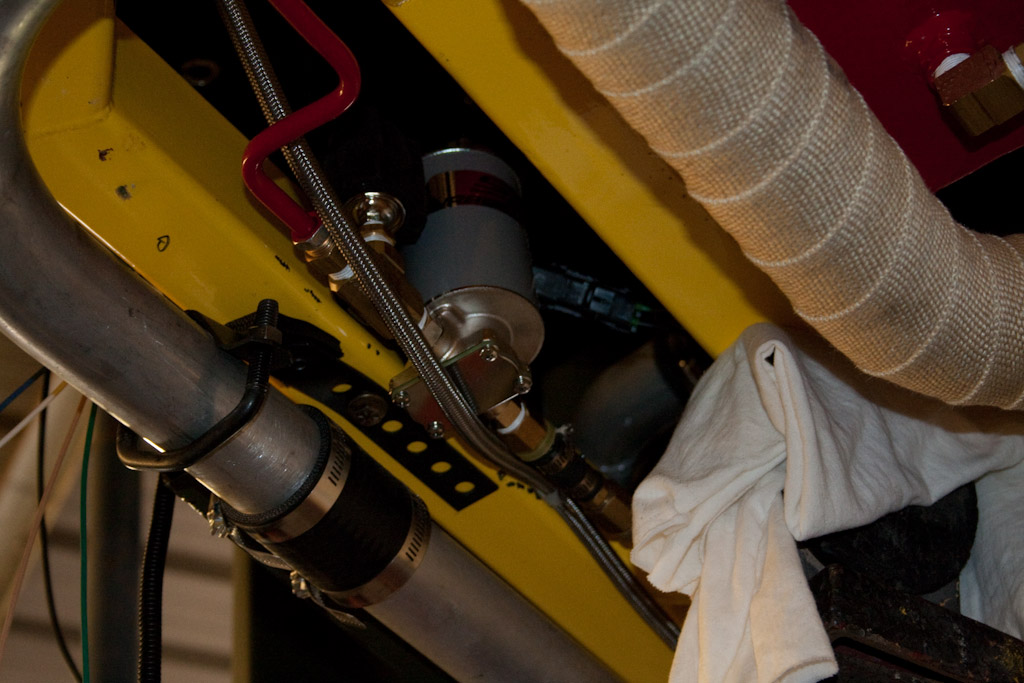
-Gas tank mod, it had a little leak, lets just say I got a little full of my self with the tabs and slots and made an awesomely complicated section that I couldn't weld all to well and now it leaks, a lot.
-Wiring, I'm re arranging some of the ISIS boxes for ease of access and changing some of the wiring to more secured locations.
-Brake cooling ducts, with the inner coolers out of the way it'll be easy now the back is getting a neat trick too.
-Finish out the roll cage
Mar. 11, 2010
BIG NEWS, ITS DRIFT TIME
What better racing type to make an attempt to break my new differential combo. We'll be in Houston on March 28th at Grand Sport Speedway sliding around with the best of them and of course I'll have as much video as I can get. You can read more about it here. http://fabricatedmotorsports.com/forum/index.php?topic=1413.0
Feb. 22, 2010
I BROKE IT AGAIN!!!!
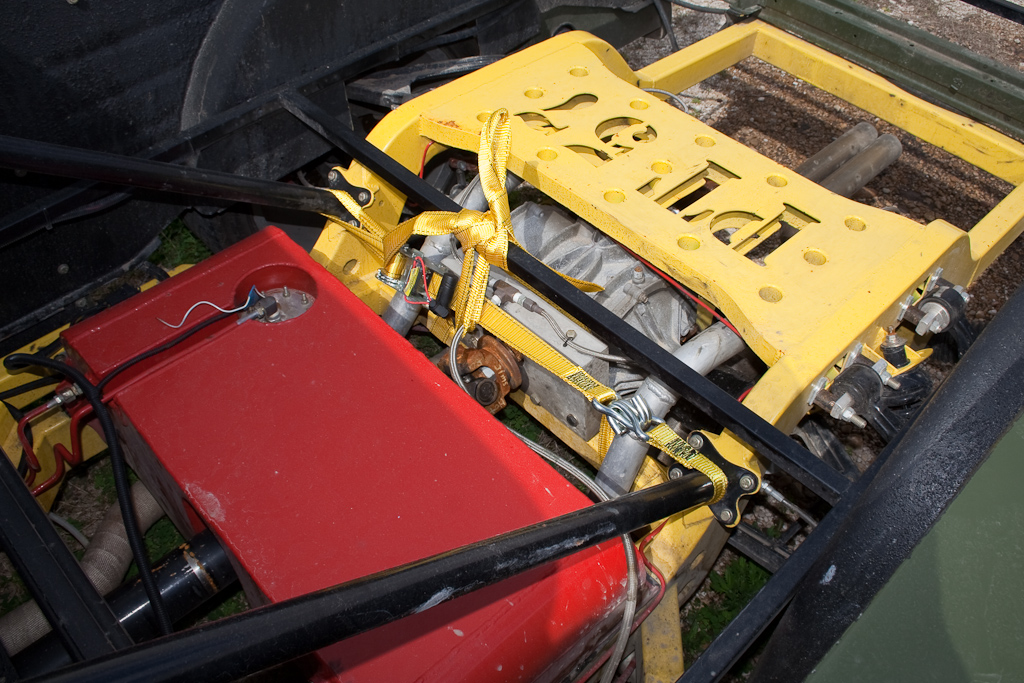
This time I killed the two bolts holding the dif plate into the car. They were grade 8 1/2" and they both snapped after 2-3 days of long hard burn outs on the Pilots playing with various rear shock settings. Then the next day, I'm leaving a parking lot and bam. The rear end is jumping up and down. With the front two bolts snapped the rear rigid mount I built as a replacement quickly with scrap from around the shop (during breakage #3 when I snapped the OE Corvette mount) this was the only thing holding the diff in the car and the CV's kept it centered so I could get stopped.
Now I'm sure everyone is wondering why there's a strap on the diff, that's how I got home, with a ratchet strap holding the diff down to the frame and X' d to keep it centered. I was about 20 miles from the shop and it was one of those days where everyone at the shop was gone along with my haul truck and trailer. So I had to drive it home, very, very slowly.
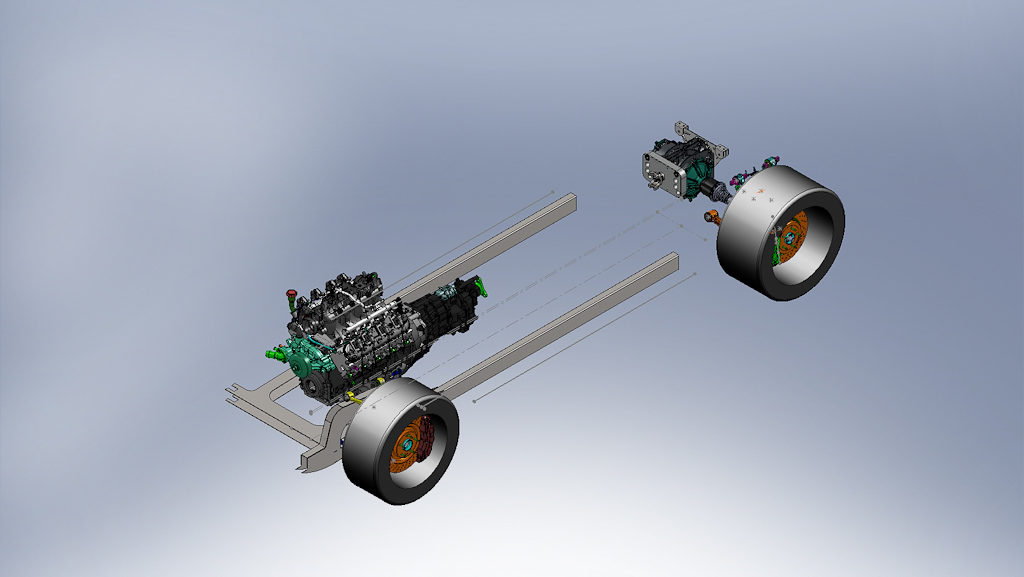
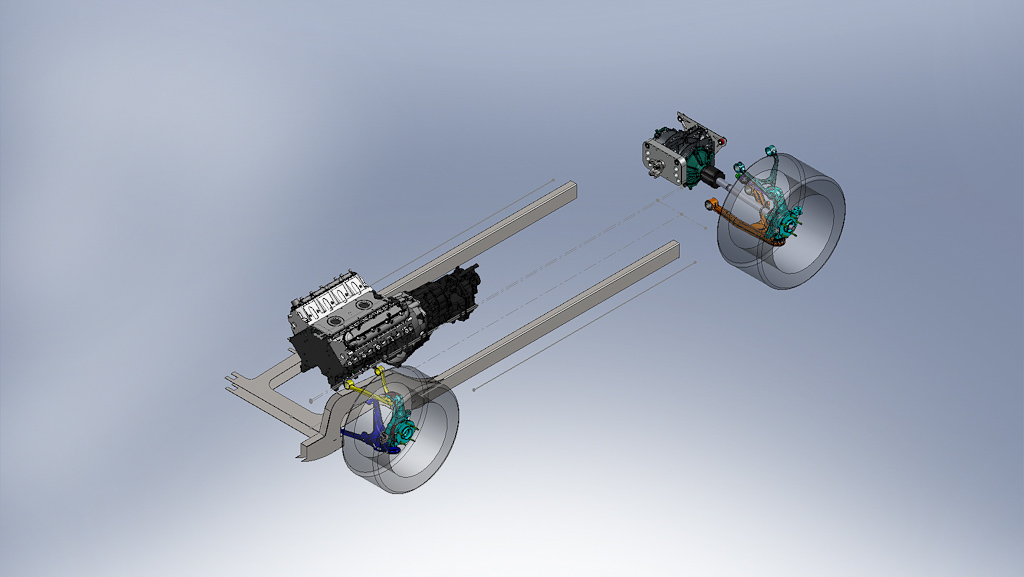
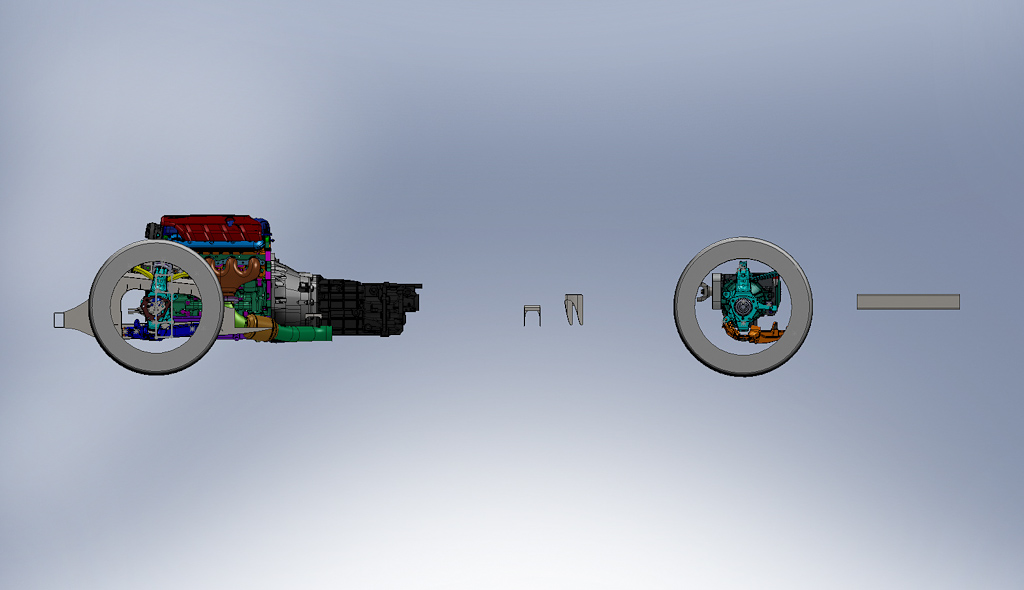
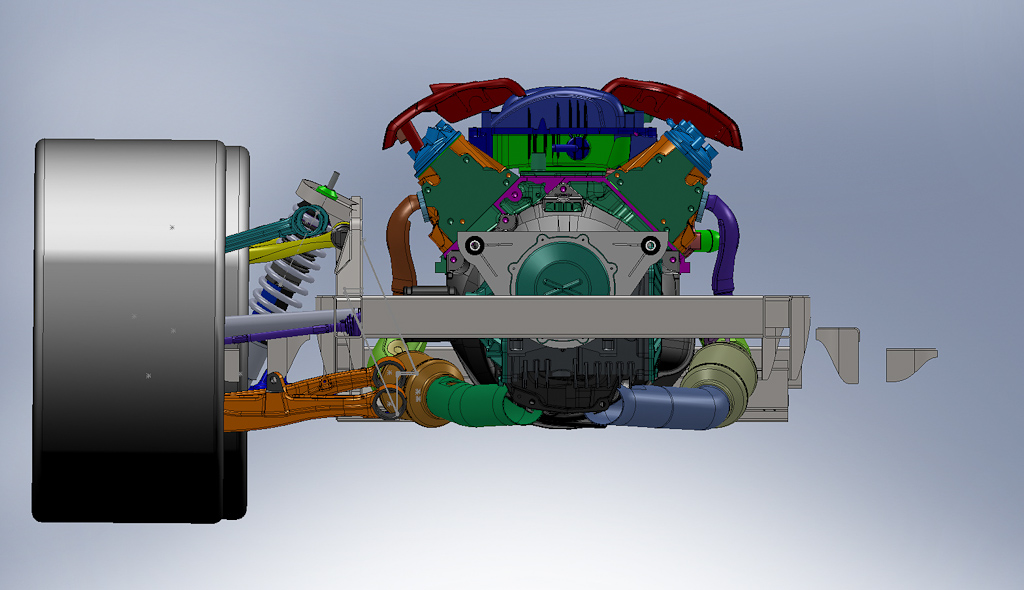
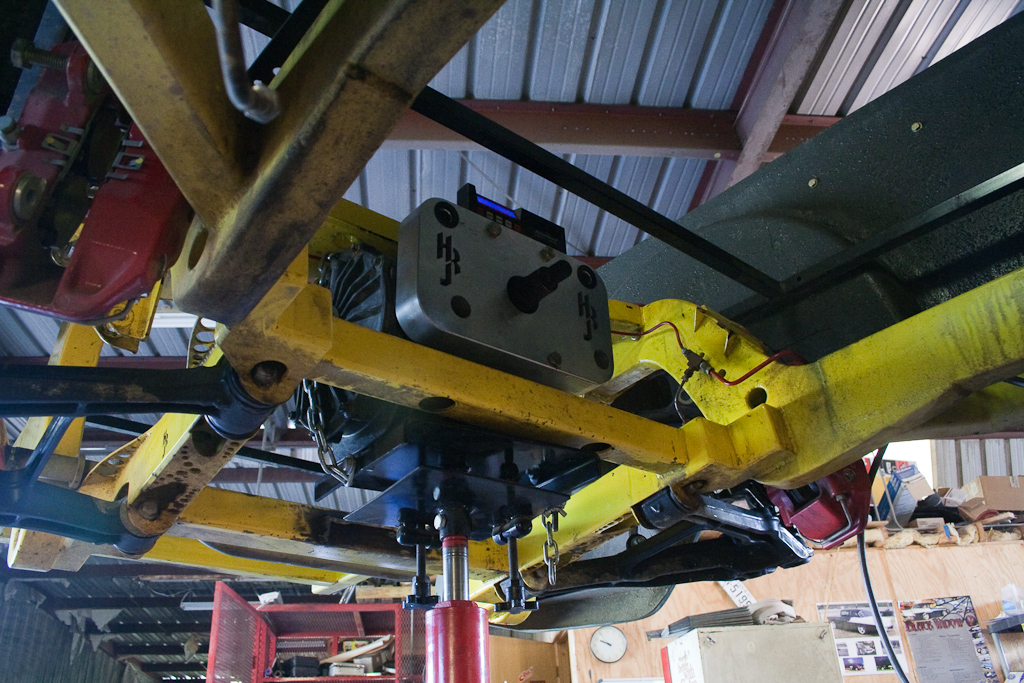
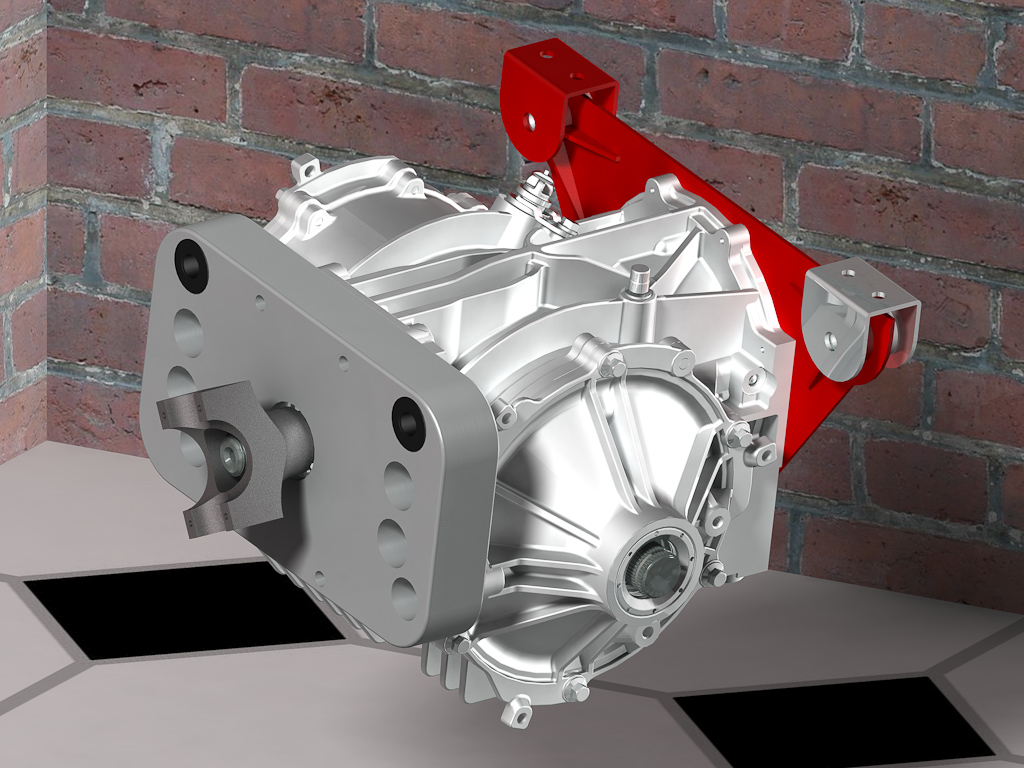
So on to the real fix now and what will hopefully be the production mount. I kept patching the old system and prototype adapter to just see what, and in what order, things would break when we take away the torque tube and transmission from the system. Obviously the first thing that needs to be addressed is the lack of support that would keep the differential from rotating around the rear axle center line. Just like the diff on a live axle car the IRS diff is forced up from the pinion yoke rotating backwards around the rear axle center line during positive acceleration. So instead of a rear lower mount (like a stock C5) I'm going to give the diff a mount up top so it will be pulling down against this new mount instead of trying to crush it. Then on the front I'm going to keep the two bolts and bushing into the adapter plate from the bottom for support during negative acceleration while the clutch is engaging the motor and the transmission is in gear. The diff at that point is hammered into the frame or in this case into a pair of rubber bushings. But I'm going to add two lateral bolts on top of the diff plate to give these two bolts more mechanical advantage over the differential case and keep the nose down under positive and negative acceleration. We will now have a grand total of 6 bolts (4x 1/2" and 5x 5/8's) holding the diff in place and set up in a way that different bolts will all be loaded a little differently and spread the force out. Take a look at the pretty picture soldworks made for me, lol you can also see the new lighter plate with a little Hot Rod Jim bling,
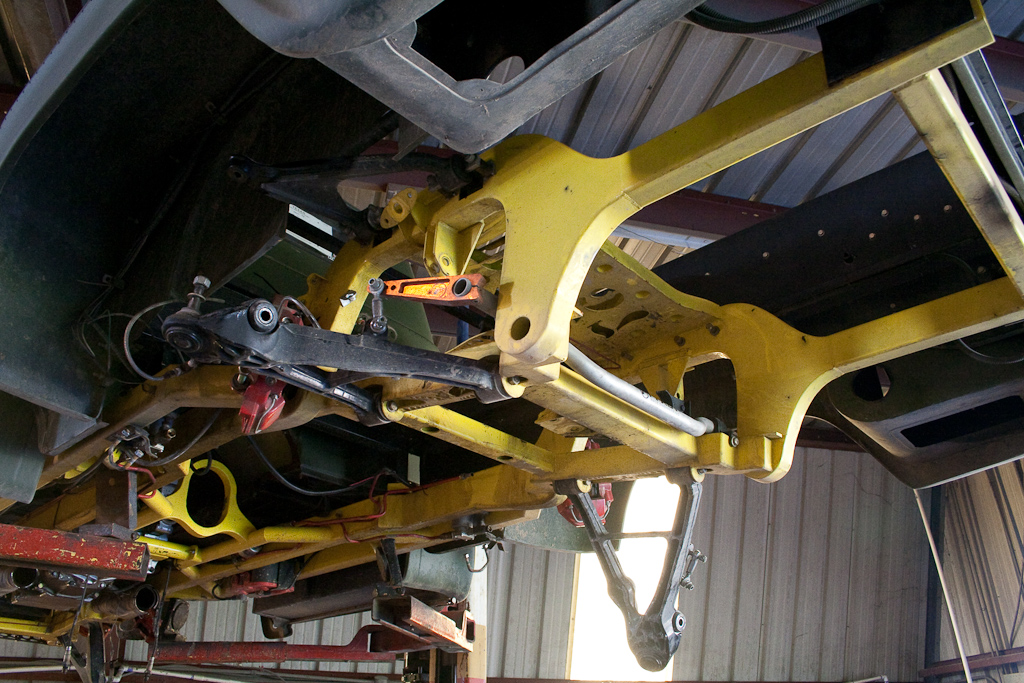
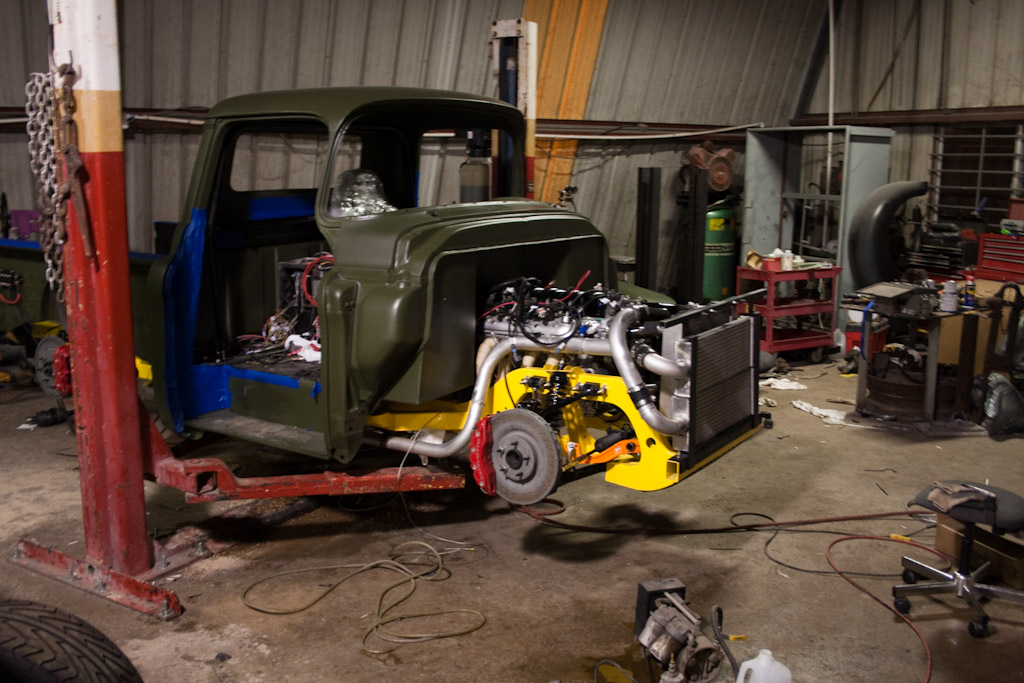
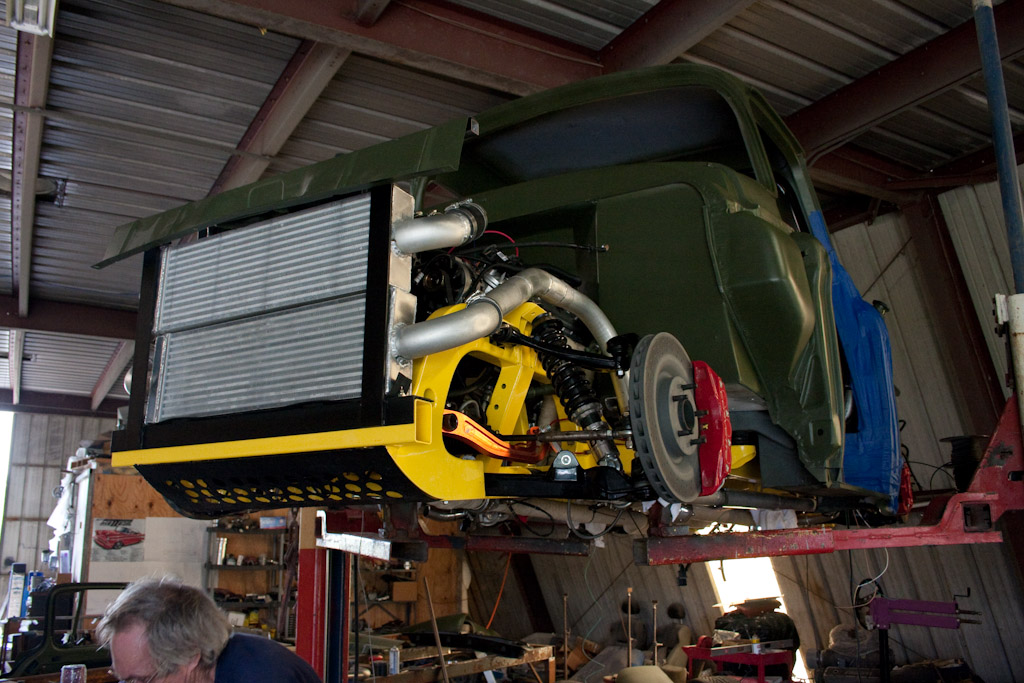
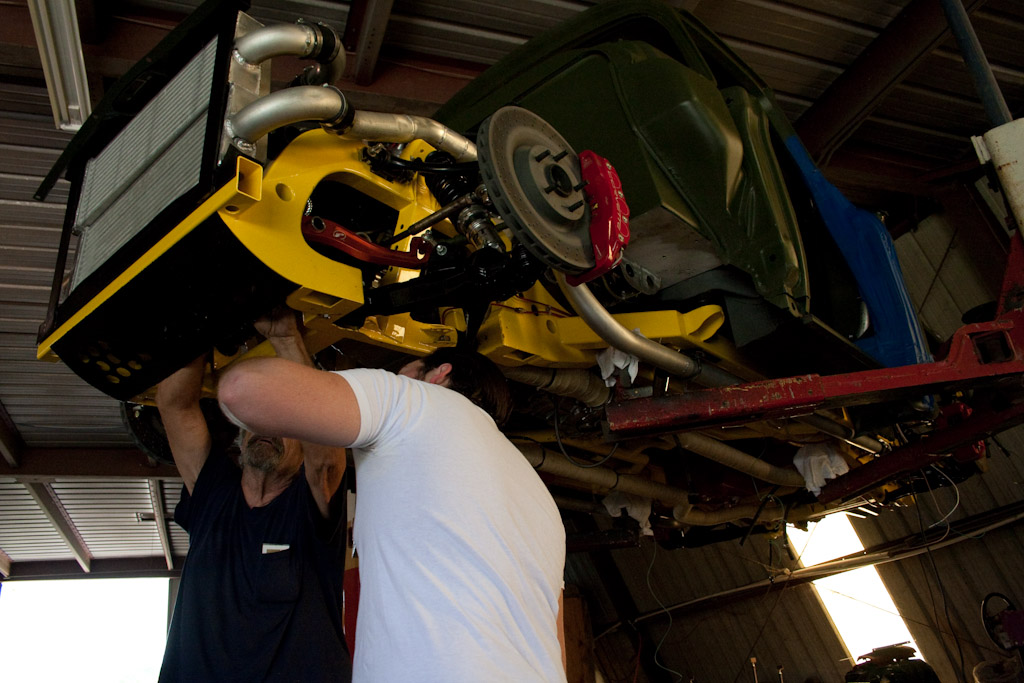
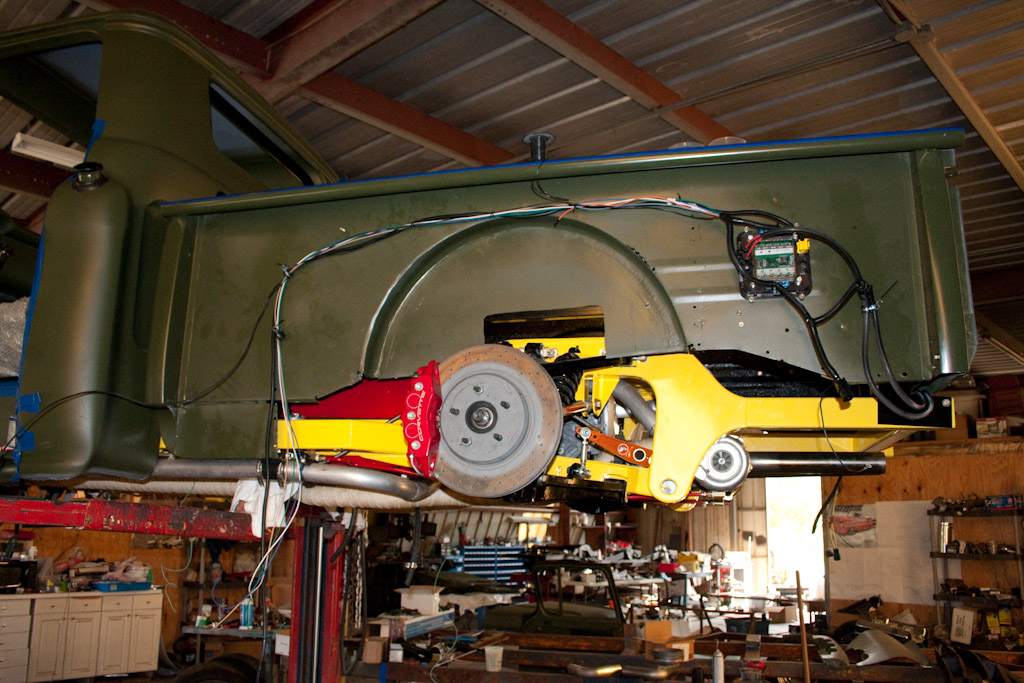
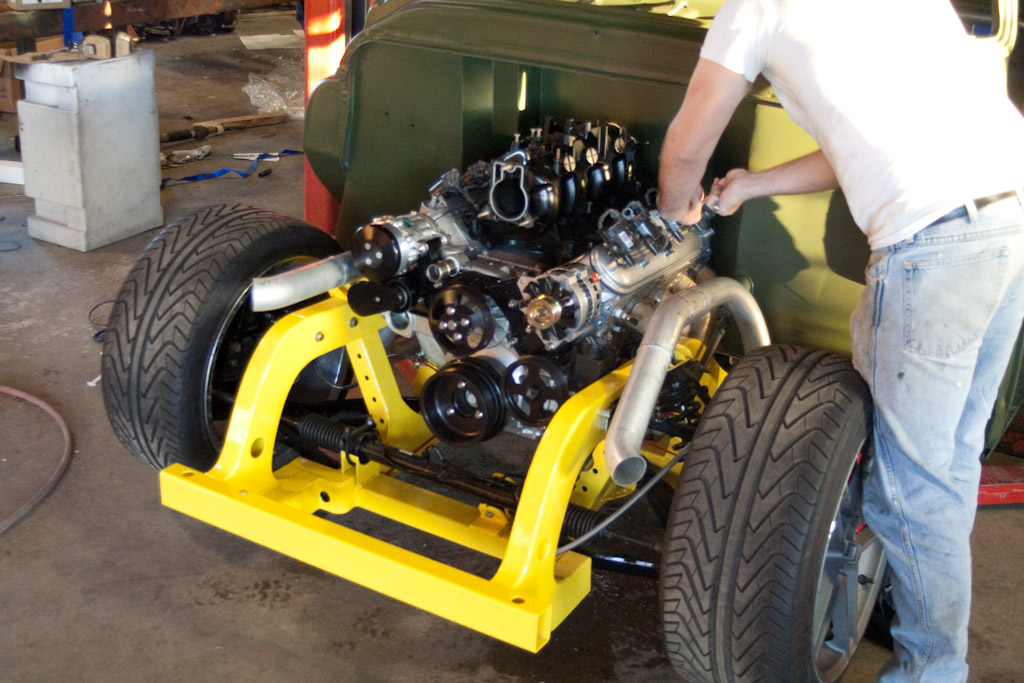
What’s this mean about the truck, she goes on the lift. The bed comes off, most of the rear suspension, gas tank, turbo’s, exhaust, several lines and more. And we get to play setup on the new diff mounts. I'm also going to fix up several other things that have been peeving me and add in some quick disconnects on the wiring so when I get the new frame banged out the body swap will be quick and painless. So let the fun begin.
Jan. 29, 2010
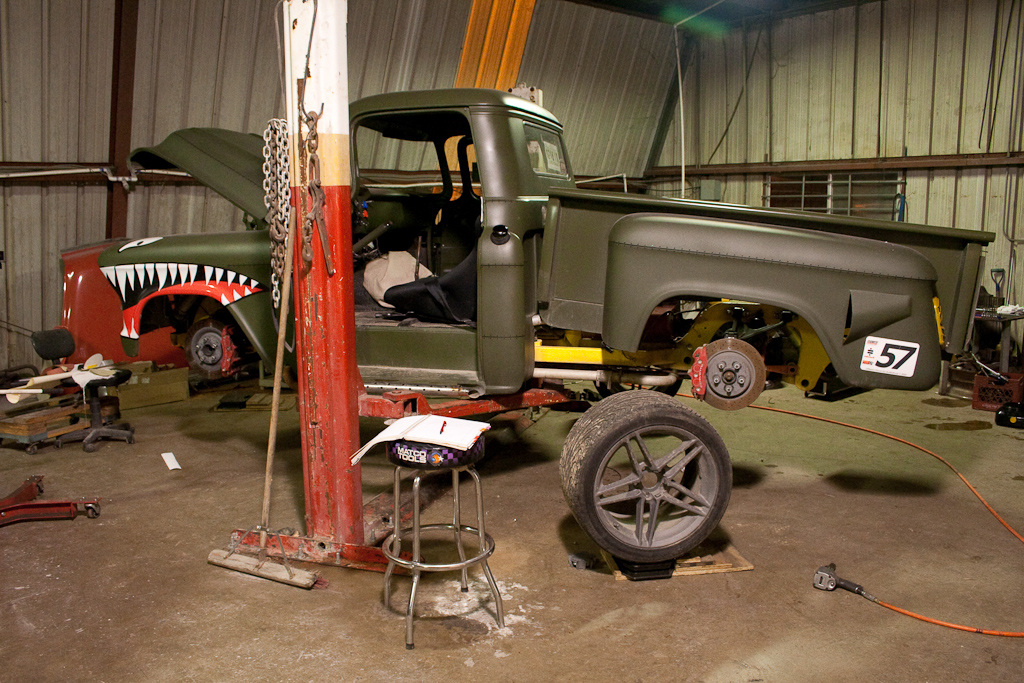
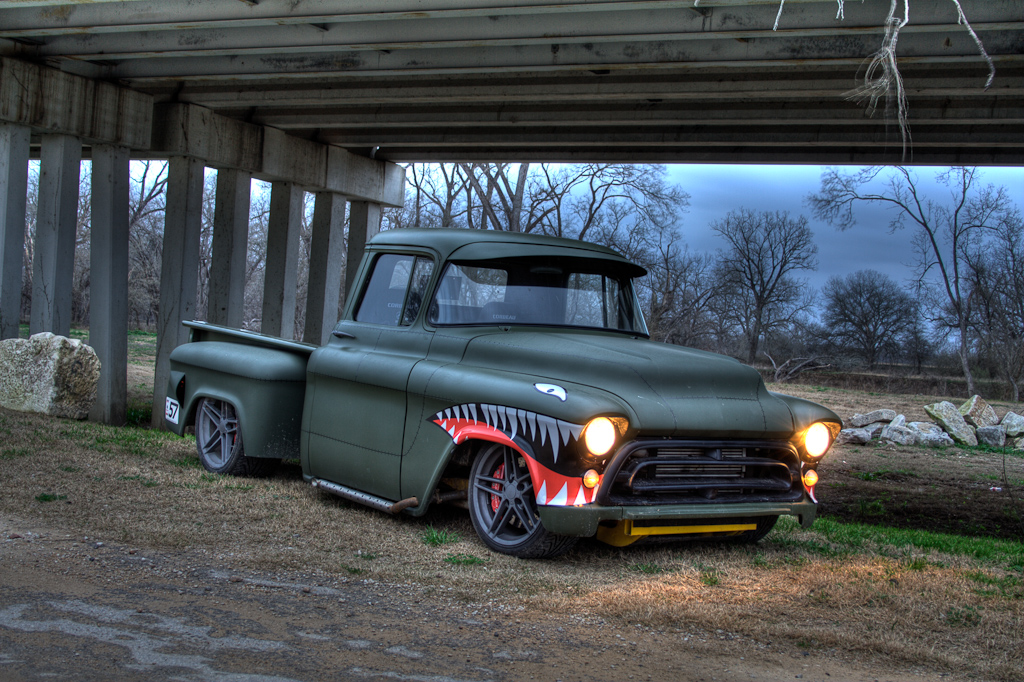
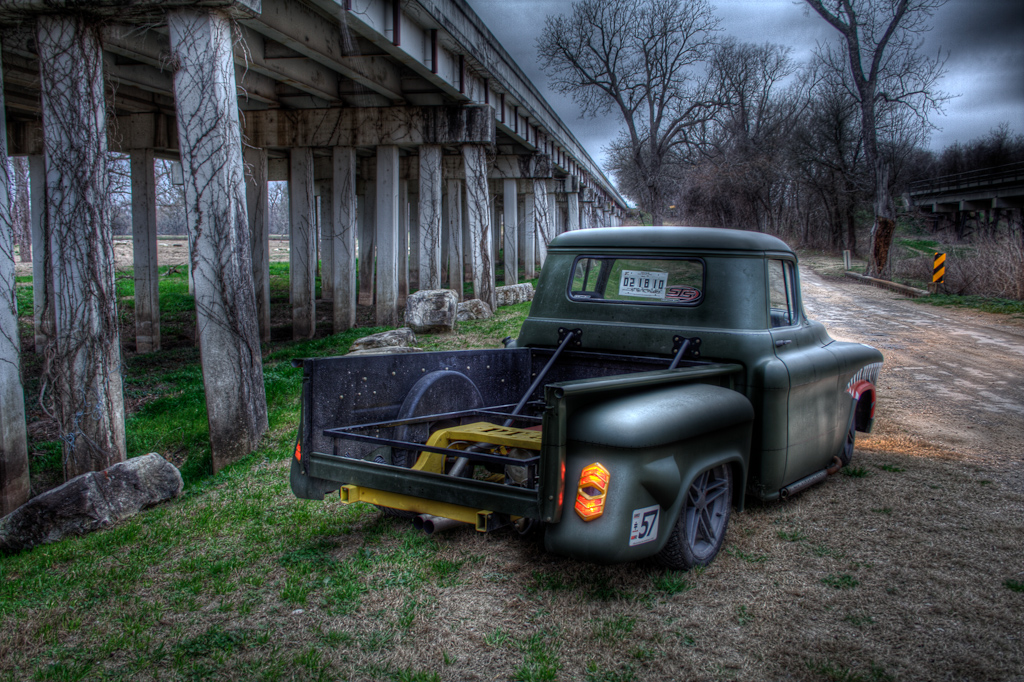
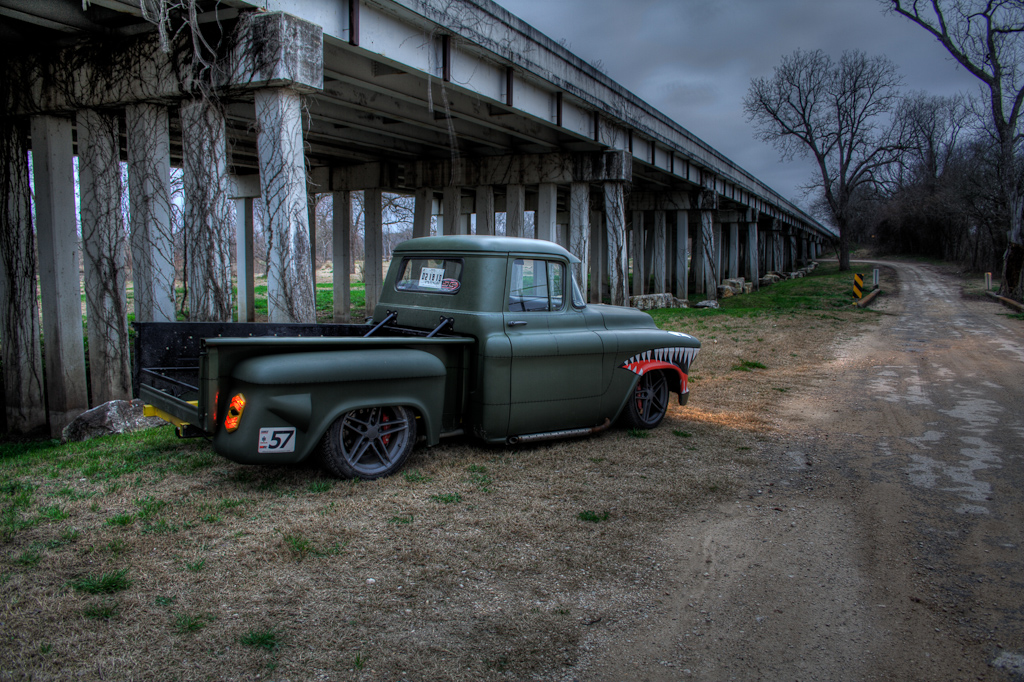
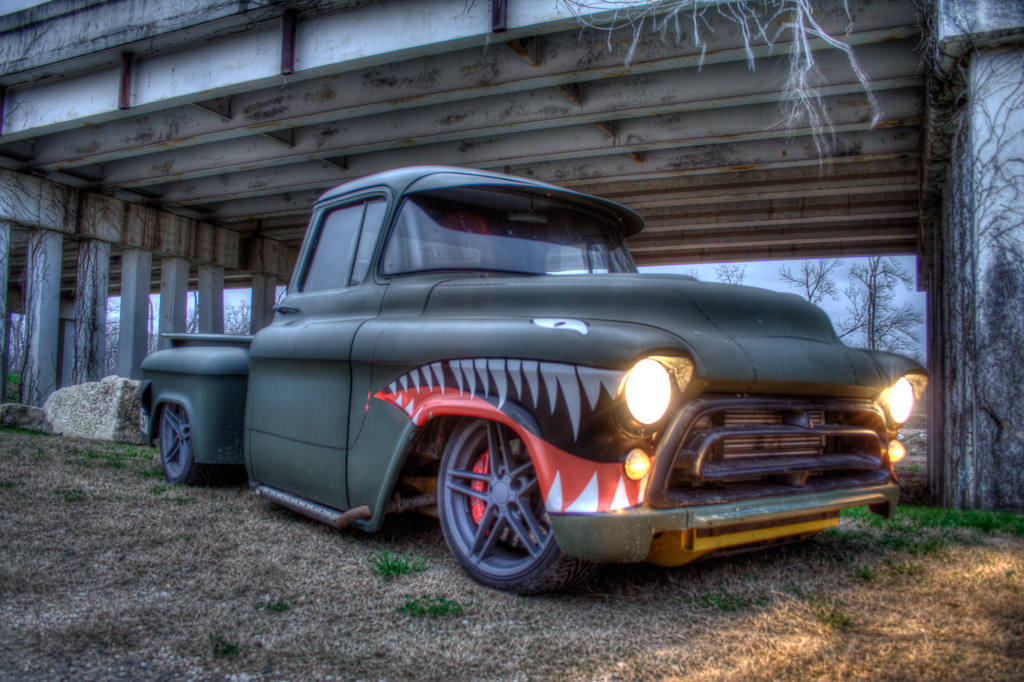
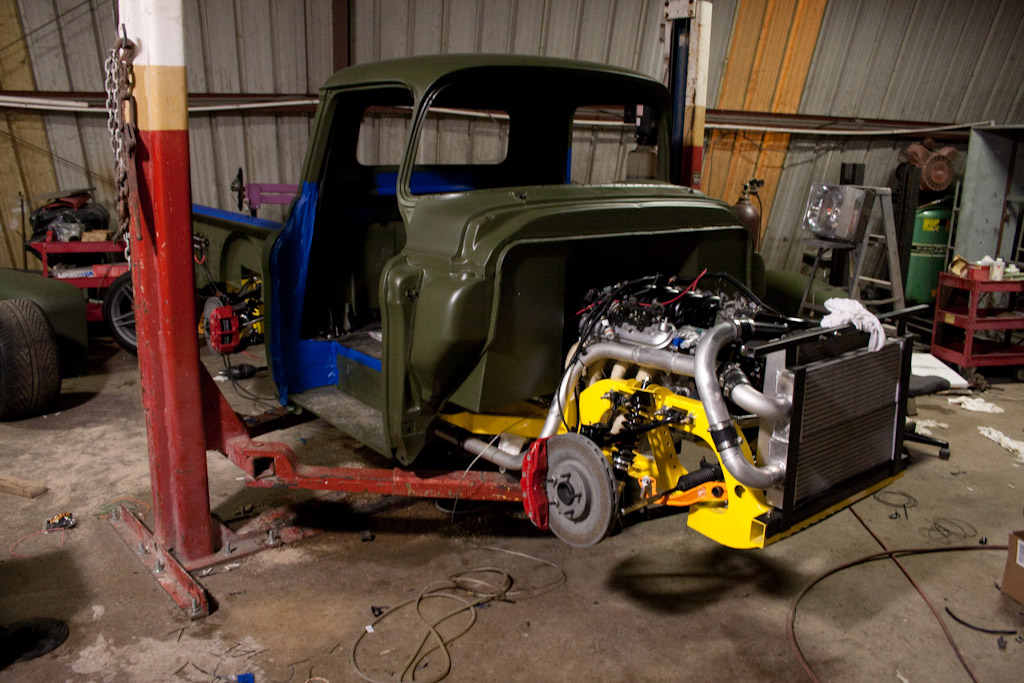
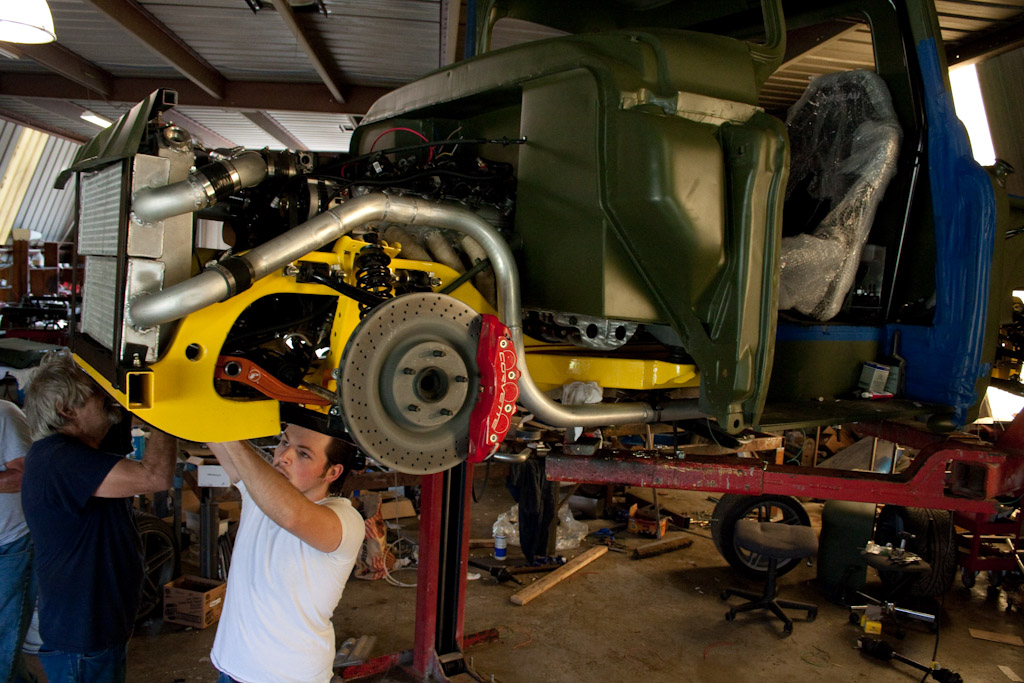
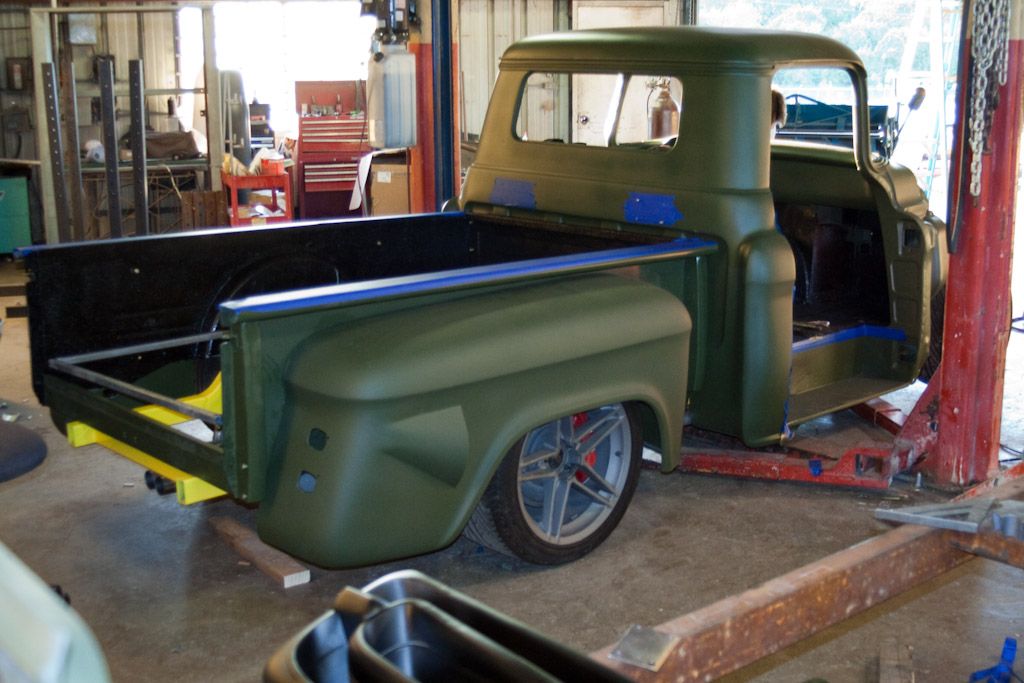
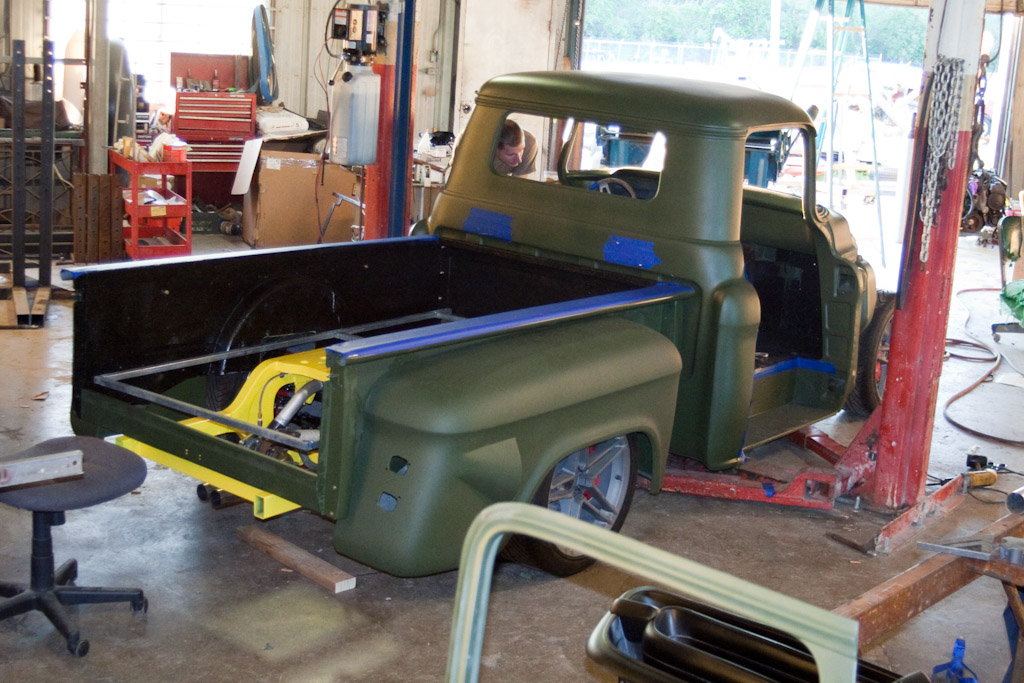
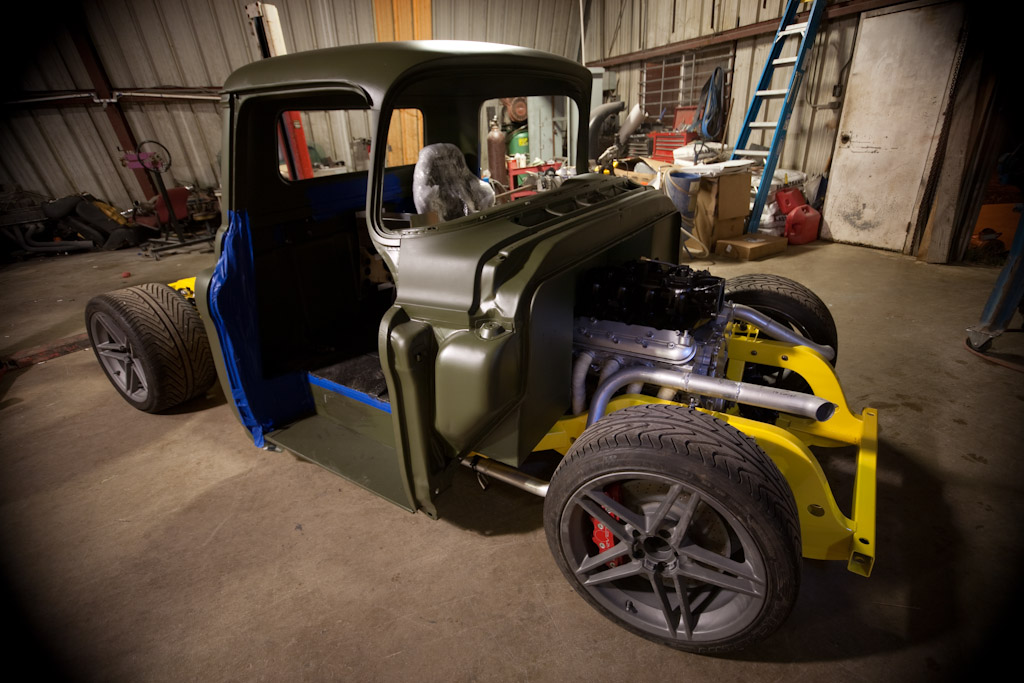
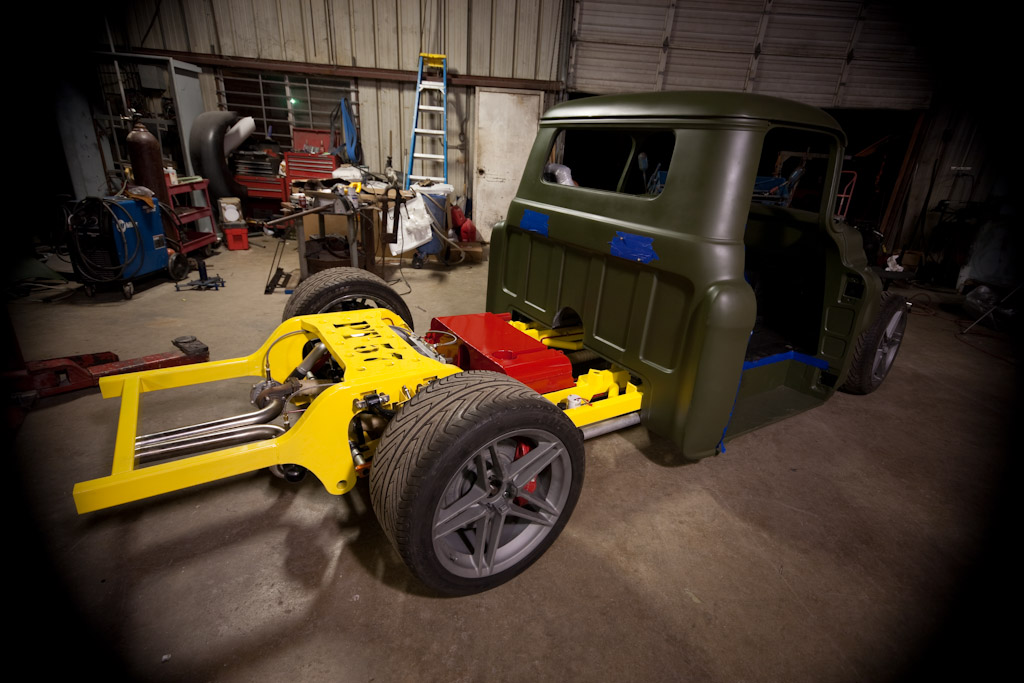
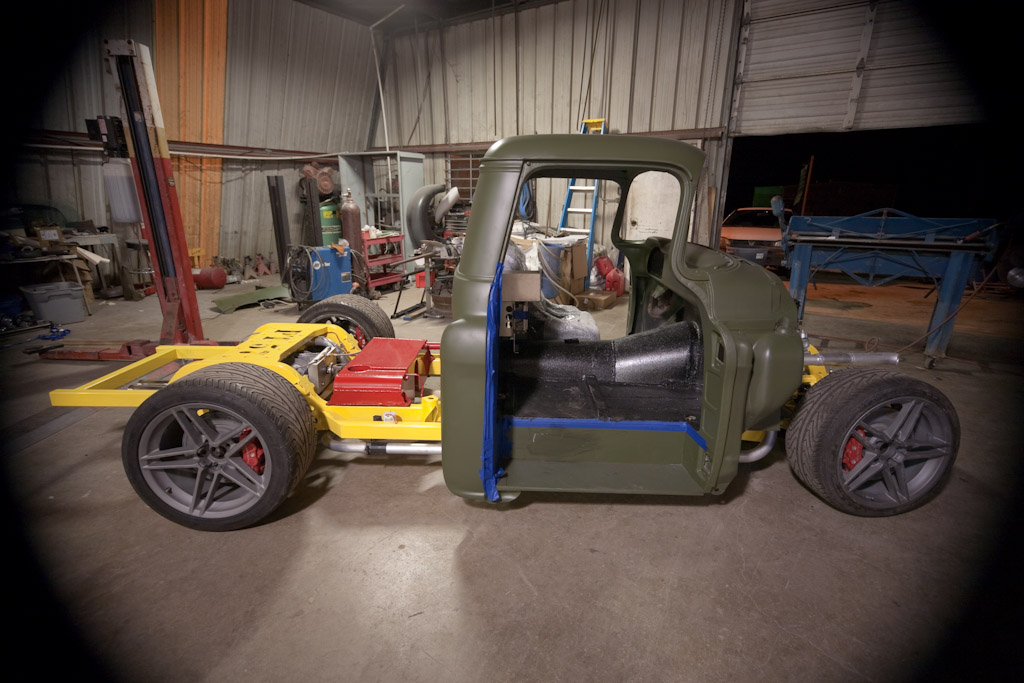
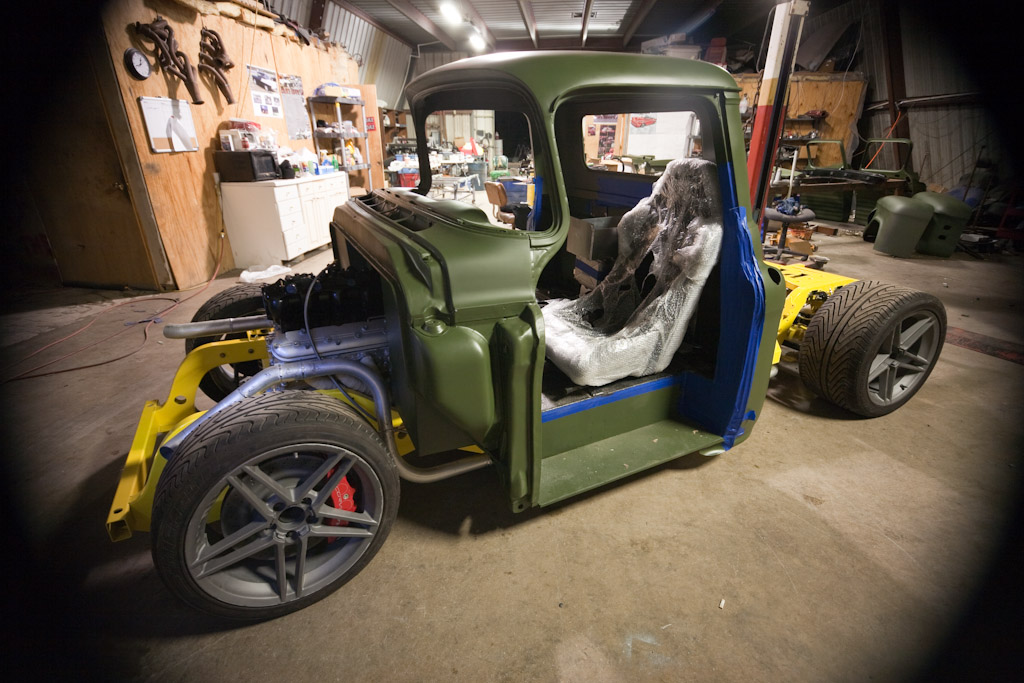
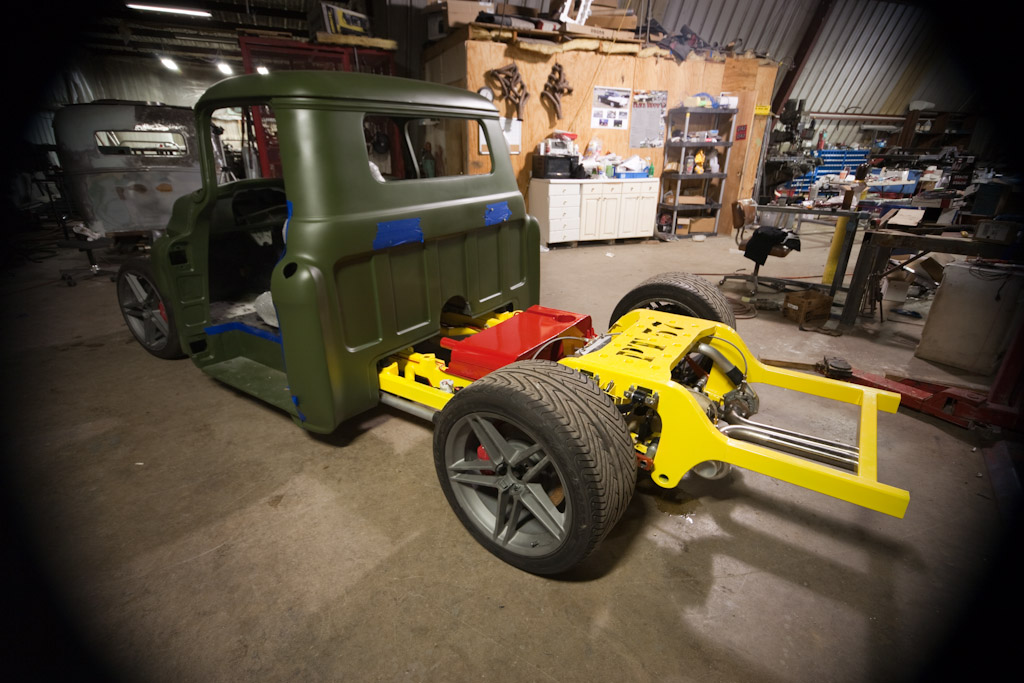
For the fans, I just got around to taking these today so you all can see how she's come out so far.
We're still experimenting with differential mounts and brackets so we haven't gotten a chance to put it on the track yet. We're also going to do a major renovation of the firewall, steering column, steering linkage, and pedal system.
The steering column ended up a little lower than we would have liked so we'll be moving it up to better clear Russell's huge size 13 feet and we're going to give a little extra because of our 2 friends / customers who wear 16's. A little more leverage on the brakes on the brakes is also in the list. The driver can just barely lock up the street tires the way she sits now. That mean's we'll loose out on available grip with the Slicks so a little more leverage on that end and a little different pedal design too.
The fire wall is going to get a different look to make it more of a factory design instead of the overly common slick everything. We want to make the motor compartment look and feel more like the inside of a bomber / fighter than a tricked out show car. We're also going to ditch the inter coolers since they only show very little cooling compared to the intake air temp. On the dyno the ITA was only 5+ ambient and that was with no air moving across the rest of the mandrill tubing under the car. The pyrometer on the end caps only showed 8-10 degrees of cooling drop across the ICs and they had a fan blowing on them directly so their gone and with it some weight too.
So here’s the story covering the why and what happened starting after our last post of photos on the 22nd.
Monday when you last heard from us it was Thursday October, 22. We started installing the motor bits, intake, pulleys, and fuel system then we noticed a little problem. Sunday night, most of the wiring was down. We were finishing up the fuel system, but the fuel rail wasn't going down all the way to the intake. It soon became obvious that the 42 pound injectors are LS1 injectors not the short body truck ones we needed for the LQ4 intake. Our goal was to be on the dyno Monday afternoon. We spent most of Monday morning looking for a quick fix on the injectors, because we wanted to be on the dyno that night but nothing turned up. We then spent Monday night modifying the system to accept the LS1 intake.
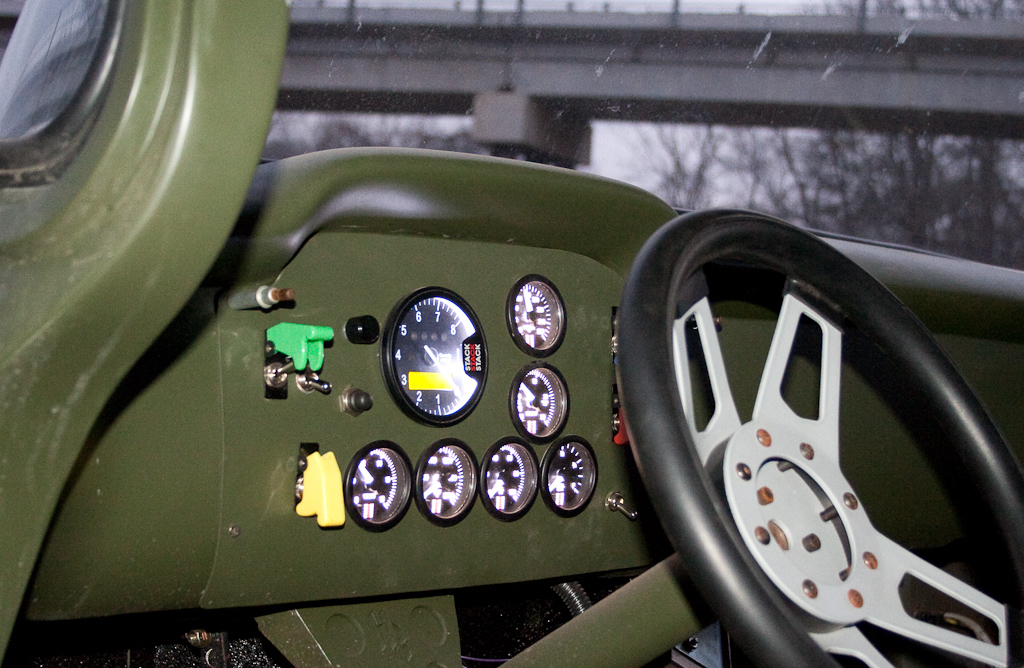
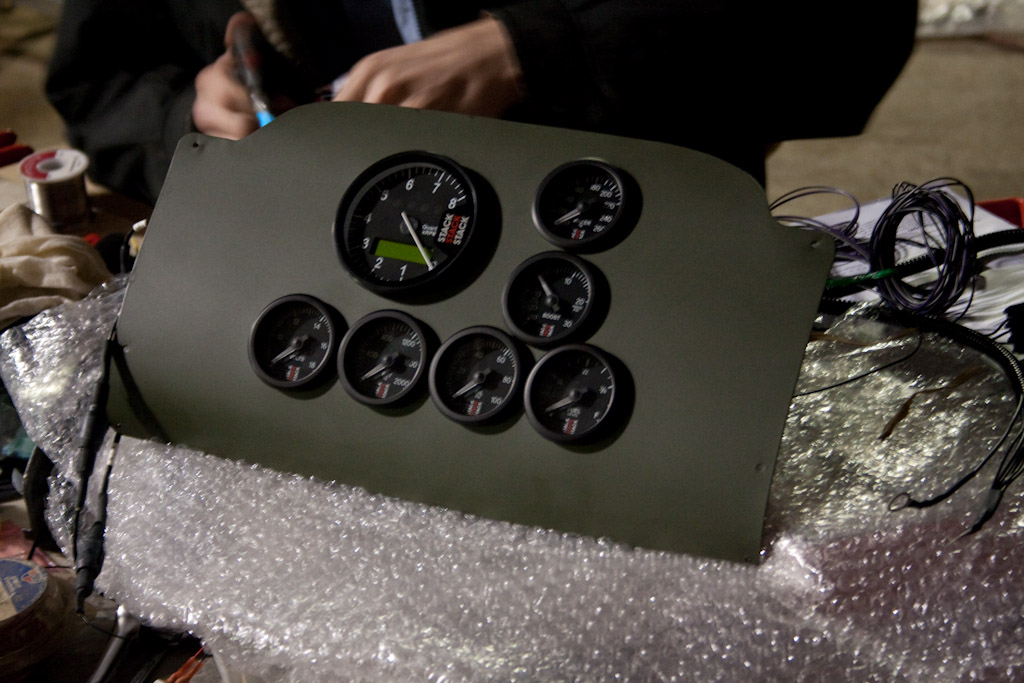
To get the LS1 intake to fit the turbo system we had to modify the intercooler piping. So all those parts had to come back off. The piping then started to hit the inner fenders so we then pulled the front end back off and get them re-shimmed. Wednesday night and we’re finally getting close to having all those mods knocked out. I hadn’t finished drawing up the shop banners for the booth yet so I was spending time working on that while Jim and Billy worked on the truck during the day. Then I would come in at night to run wiring. If you cam by the booth most likely you met Darren. A buddy of ours graduated top of his class from WyoTech and was the M Class tech at the BMW of Austin. He loves wiring so he came down 3 nights from Austin (1.5 hour drive) to help me work on the wiring and learn how to program the Stack ST700 Tack. I was still sorting the exact tuning setup since I’ve never programmed a Turbo car before and the EFI Live custom OS we were going to run was a little confusing to me still. Kendal was tearing up the TIG on the display parts and a few little odd ball parts for the truck we hadn’t built yet.
Wednesday more of the last minute parts showed up. We had a bad check from a customer so we ended up selling off one of our cars, the little black 32 roadster, that weekend to make up for it. Our missing pair of 12” Z06 Corvette wheels from FedEx, 2 Sets of Hoosiers followed the wheels in the UPS truck with a few other boxes of other little parts in tow. Getting those mounted took a little time. Turns out almost no one can mount a 12” wide wheel in this town but the guys at Expert Tire got it knocked out with 2 guys standing on top of the mounting machine jumping up and down on those 345/30/R19’s to get them on to the wheel. That was fun to watch.
Thursday saw more help and a few more headaches popped up. Kelly was back in the game full time busting on the truck helping to nut and bolt the chassis and he, the web coder, was actually getting some photos taken for me since I wasn’t even paying attention to it at that point. That day our truck and enclosed trailer both fell through due to unforeseen circumstances. So even if we got done we didn’t have a ride to the show. That’s when our buddy Jonathan pulled threw and hooked us up with his 1 ton Dodge for the trip. A long time friend of Kendall’s, Don with another shop in San Antonio, lent us his trailer since it had brakes where our normal shop trailer didn’t making the trip one step easier.
Friday the troops began to rally. Our plan we to roll out Saturday night and most everyone riding out was at the shop that day planning for a long night with some rest in the truck. Looking at what needed to be done, we recalculated when the absolute latest we could leave. Our new deadline now Sunday at 6 A.M. with the advantage of 2 hours in time zones and an additional hour because of the time change we had a few things going for us but the details of our to do list grew just as quickly. Darren was back in the shop now with all his stuff loaded up into the haul truck Kelly’s stuff on top of his, I hadn’t even looked at my bag yet, and I live at the shop in an apartment/ office. Kelly was plugging leaks in our turbo's oil lines, Darren was still wiring getting all the grounds in place, Billy was locking down the turbo air lines and I was getting ready to start the truck for the first time.
Saturday we took the truck to have its front graphic mounted. Jim and Kendall both worked on the shop display, Billy was securing the advertising banners and cards while Kelly finished up some revision to the website. When I got back Jonathan and his son Charlie had both shown up to give us a hand getting the truck road worthy. Brianne our driver and her Boyfriend Jason both showed up even thought it was Brianne’s Birthday. We worked on driver ergonomics and pedal adjustment while I was trying to figure out something on the ECM. I played with it and played with it but I couldn’t get the pedal to show any signal, and the MAP wasn’t showing any voltage either. Watch our SEMA video to see what happened then. Saturday around midnight or Sunday morning later the truck still wouldn’t start. It would fire off then die. We decided that’s it and had to load it up. We couldn’t do anymore then, but we could plan to work on it at the show. So we did just that and started loading up the tools we would need to get it knocked out with. Then had to make plans for a second truck for the extra support tools we would need for chassis tuning. Kendall and Jim would stay behind and come out with those tools later and the 4 of us would all leave that night to make the setup for SEMA.
A whole lot of driving later its 7:00 A.M. and we’re in Vegas. We got checked into our hotel, it was supposed to be 2 rooms but they didn’t have it registered in there system so we only got one room and two beds for all 4 of us, yay. We got to the show, waded through all the crazy and finally got to our booth to set it up. Afterwards we all walked back to the hotel around 5ish and crashed.
The week was us all working off and on in the booth during the show then hanging around at night for 1-2 hours so we could spread out and pin out our harness looking for the reason the TPS and the MAP sensors weren’t showing any signal to the laptop. A short somewhere in the system but we reran both sensors back to the ECM and Wednesday night we got it to fire off and idle. I was still a little unsure of the tune so I went over to the EFI Live booth and talked to the engineers and programmers who make the software. Awesome guys all of them then Jesse Bubb asks me if I want him to write a base tune to make it easier. With my enthusiastic “hell yes” and he snapped open one of their laptops and started writing a base tune from a blank custom OS file. He asking me 2-3 questions and filled out almost 50 blank maps off the top of his head in 10 minutes then knocked it down to 3 tables for me to tune all based off the simple WO2 data. Rick Squires of Squires Turbos Systems offered me plenty of info and showed me a few things on his laptop for me to watch out for when tuning the remote turbos on the truck.
Friday, show was over and the mad dash out of the building started. We made it out around 7:00 P.M. then we were off to the tuners. Thursday night the guys with the Optima Battery Race hadn’t given up on us and helped us find a local Dyno plus a friendly shop owner who was going to be there all night anyway. Cody Chapman of Wicked HP was working on a Pro Mod Head and gave us a section of his shop to thrash in that night. We plugged holes, bled brakes, and worked out the tune for some safe power at the track.
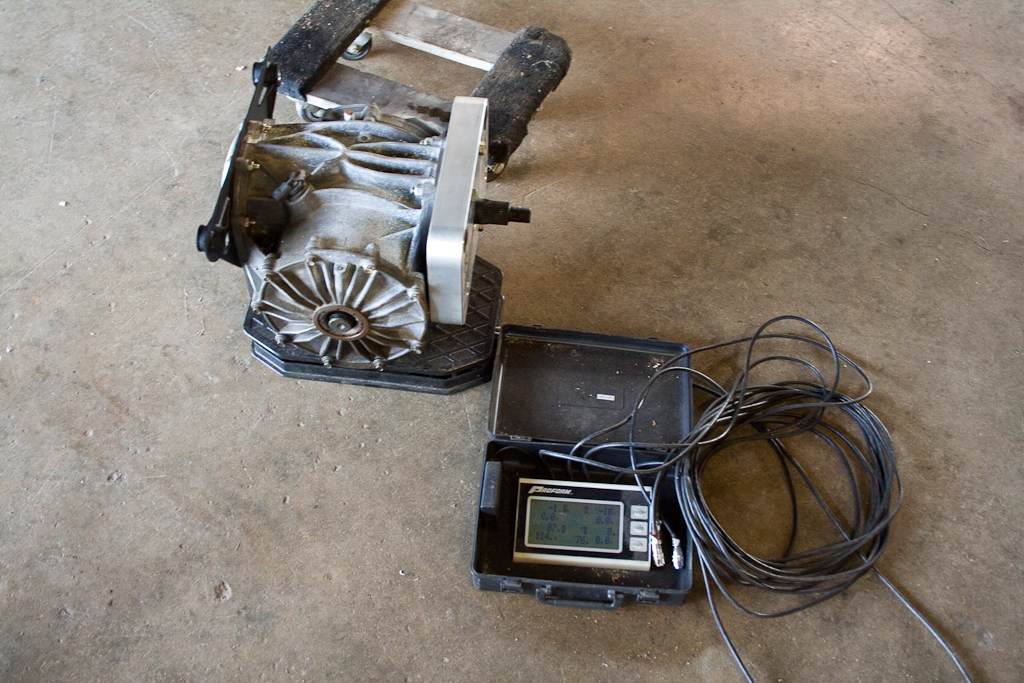
We started on the dyno with 75 RWHP. The right bank coil pack had fried the fuse, swapped that and ran out all the fuel from the system then we started putting down 350-390 RWHP but we still weren’t seeing any boost. I had my buddies put their hands over the waste gate dump and could they feel hot air leaking out. Turns out in our rush we forgot to put in the sealing rings that seated against the plunger. We were all discussing about settling for dead turbos and run on all motor. Then the Cody pipes up “You want me to turn one?” Sure enough he chucks up a chuck of aluminum and went to town. An hour later we’re dropping the waste gates back in with their sealing rings. Crank it up and boom 5 PSI and we know the passenger’s side was still leaking a little. 3 pulls later and we have 567.13 RWHP and 506 RWTQ. By that time it was 4:00 A.M. and we still had to get out of the hotel and off to the race track.
I was sure everyone saw us rolling in during the drivers meeting and madly unloading the car. At that point our team had all been awake for the last 36 Hours and counting. Paul and his father were bleeding the last of the brakes (multi pistons hold air like a mother) and we were trying to plug the hole on the diff where the corvette VSS sensor goes but we forgot it back at home. One tech extension, two tech extension we we’re having some trouble with the rear swaybar and the brake light switch never got wired for some reason. Finally Tyler walks up for the last time, Brianne is strapped in and getting ready to take off and then the final straw. The front Z06 wheels high centered on the Z06 brakes and locked up the front wheels, that’s when Tyler with the tech team helped make it plane to me, not this year.
A big thank to the Optima Tech Team, thank you sirs for putting my foolish, sleep deprived, rampaging butt in check, I would have surely broken something vital or hurt someone the way we were going. At that point I really wasn’t in the right mind to make that call. With so much money, time, and some blood in a few places into getting there I didn’t want to give up. You were right a few parking lot drives weren’t nearly enough to be comfortable with it. I know personally Jason would have killed me if something happened to Brianne while driving my truck too then I really wouldn’t have made it out next year. We didn’t have the chassis dialed out the way it needed to be and with the interior in its serious disarray. Even if we won every event the show points would have smacked us back to the bottom. With the experience behind me I have to look at the bright side, I have all year and 2 fresh sets of Hoosiers to start. I’m already working on a revised frame for next year to be swapped sometime this spring to shave a little weight.
fuel system problem, wrong injectors and we're having to rebuild some of our wiring harness. Plan is to get a safe tune on monday so we can break in the transmission, differential, and turbos then tuesday spin it up and get the serious tune so we can get some track time in on Thursday before we leave.